
Project Nashville Pt. 3 - MOST Excelent!
How to upgrade your P3 V70/XC70/S80 to the Premium (DynAudio) Sound System
Introduction:
As the P3 cars continue to age, it is no suprise that they have become more common in junkyards across the country. This is excellent news for us who have been fans of the chassis for a while as it means that well optioned cars can now be picked over to upgrade those still on the road. From personal experience it seems that people really love taking the grille and headlights, an odd choice considering how common they are and how they went unchanged for close to 8 years, but I digress. This weekend I had the benefit of going to 3 P3 cars in South Carolina. Both yards were mere minutes from my parents house in Charleston so a weekend trip was well worth it. The marked vehicles were two S80s and 2009 V70, the V70 being a rarity to show up in LKQ yards due to their low sales in the US. While all 3 cars were tan interior vehicles, they all had great items to pick.

This V8 was fully loaded. DynAudio, heated and cooled seats, ABL headlights, and more.
Parts:
From each vehicle I was able to get some plug and play items useful for anyone with a P3 that share parts between the 70/80 chassis. My first stop was Blue and Gold Auto Salvage in Goose Creek, SC.
From the white V8 S80 I got:
DynAudio Tweeters
Sirius XM Module
The tweeters are easily removed from the A pillar by prying them back gently. They have a small connector that is easily removed the XM module is bolted in with a few hard to access bolts, but comes out easily once unbolted.
From the blue 3.2 S80 I got:
DynAudio Tweeters (with BLIS)
Full BLIS power mirrors
DynAudio Amplifier
The tweeters in this vehicle are identical to the V8, however the housing has an extra connector that goes to the mirrors for the BLIS notifier light. They are also easy to remove, and the mirrors come off the chassis with 2 easily accesible T25 bolts. The amp is located under the drivers seat, and was not too hard to access even with no power to the seats. I removed the front seat bolts and bent the seat rails back to access the 3 10mm bolts holding the amp in place.
My second stop was at LKQ Charleston to see the V70. This car was much more rough than the pictures showed, but there were a few small items I took as backups.
From the tan 3.2 V70 I got:
Standard BLIS Tweeters
Sirius XM module
While I should have probably taken the load cover and maybe the tail lights, I was quickly running out of time before the yard closed. These parts I grabbed as backups and spare parts for my BLIS swap. This car also had BLIS mirrors however the passenger side was destroyed.
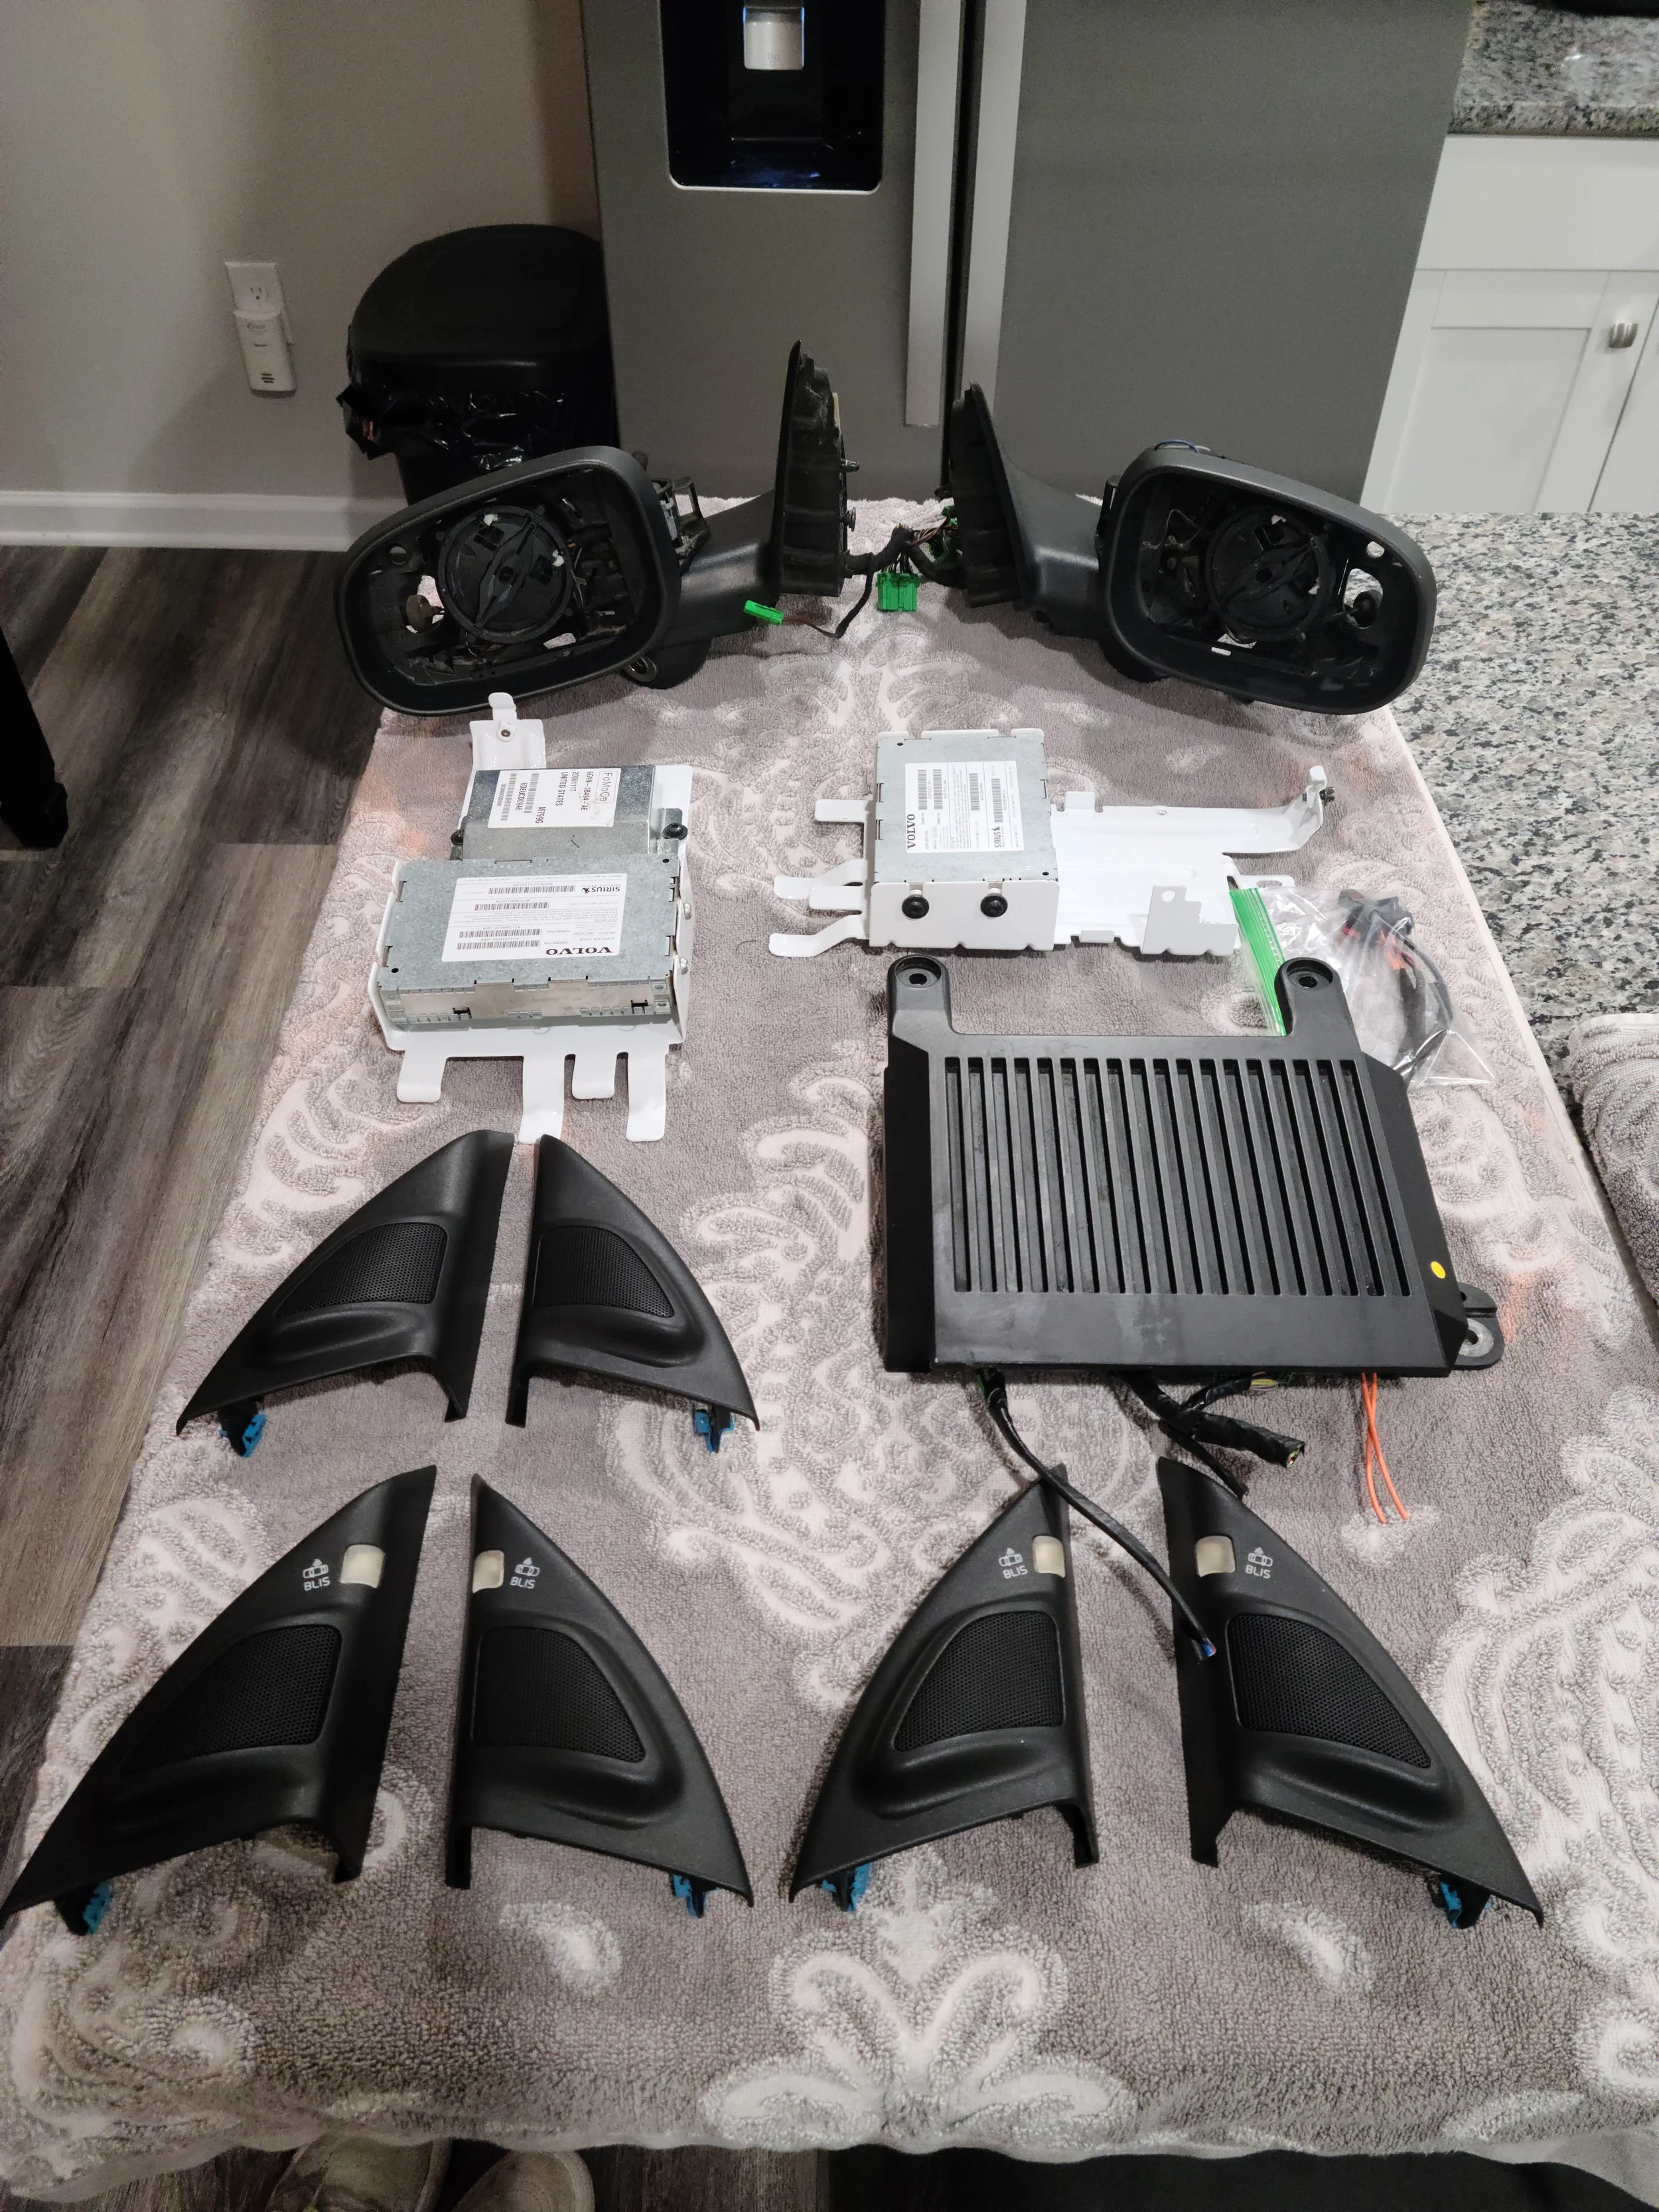
The full haul once back home and cleaned up. Every part was gone over with a small brush, and cleaning agent.

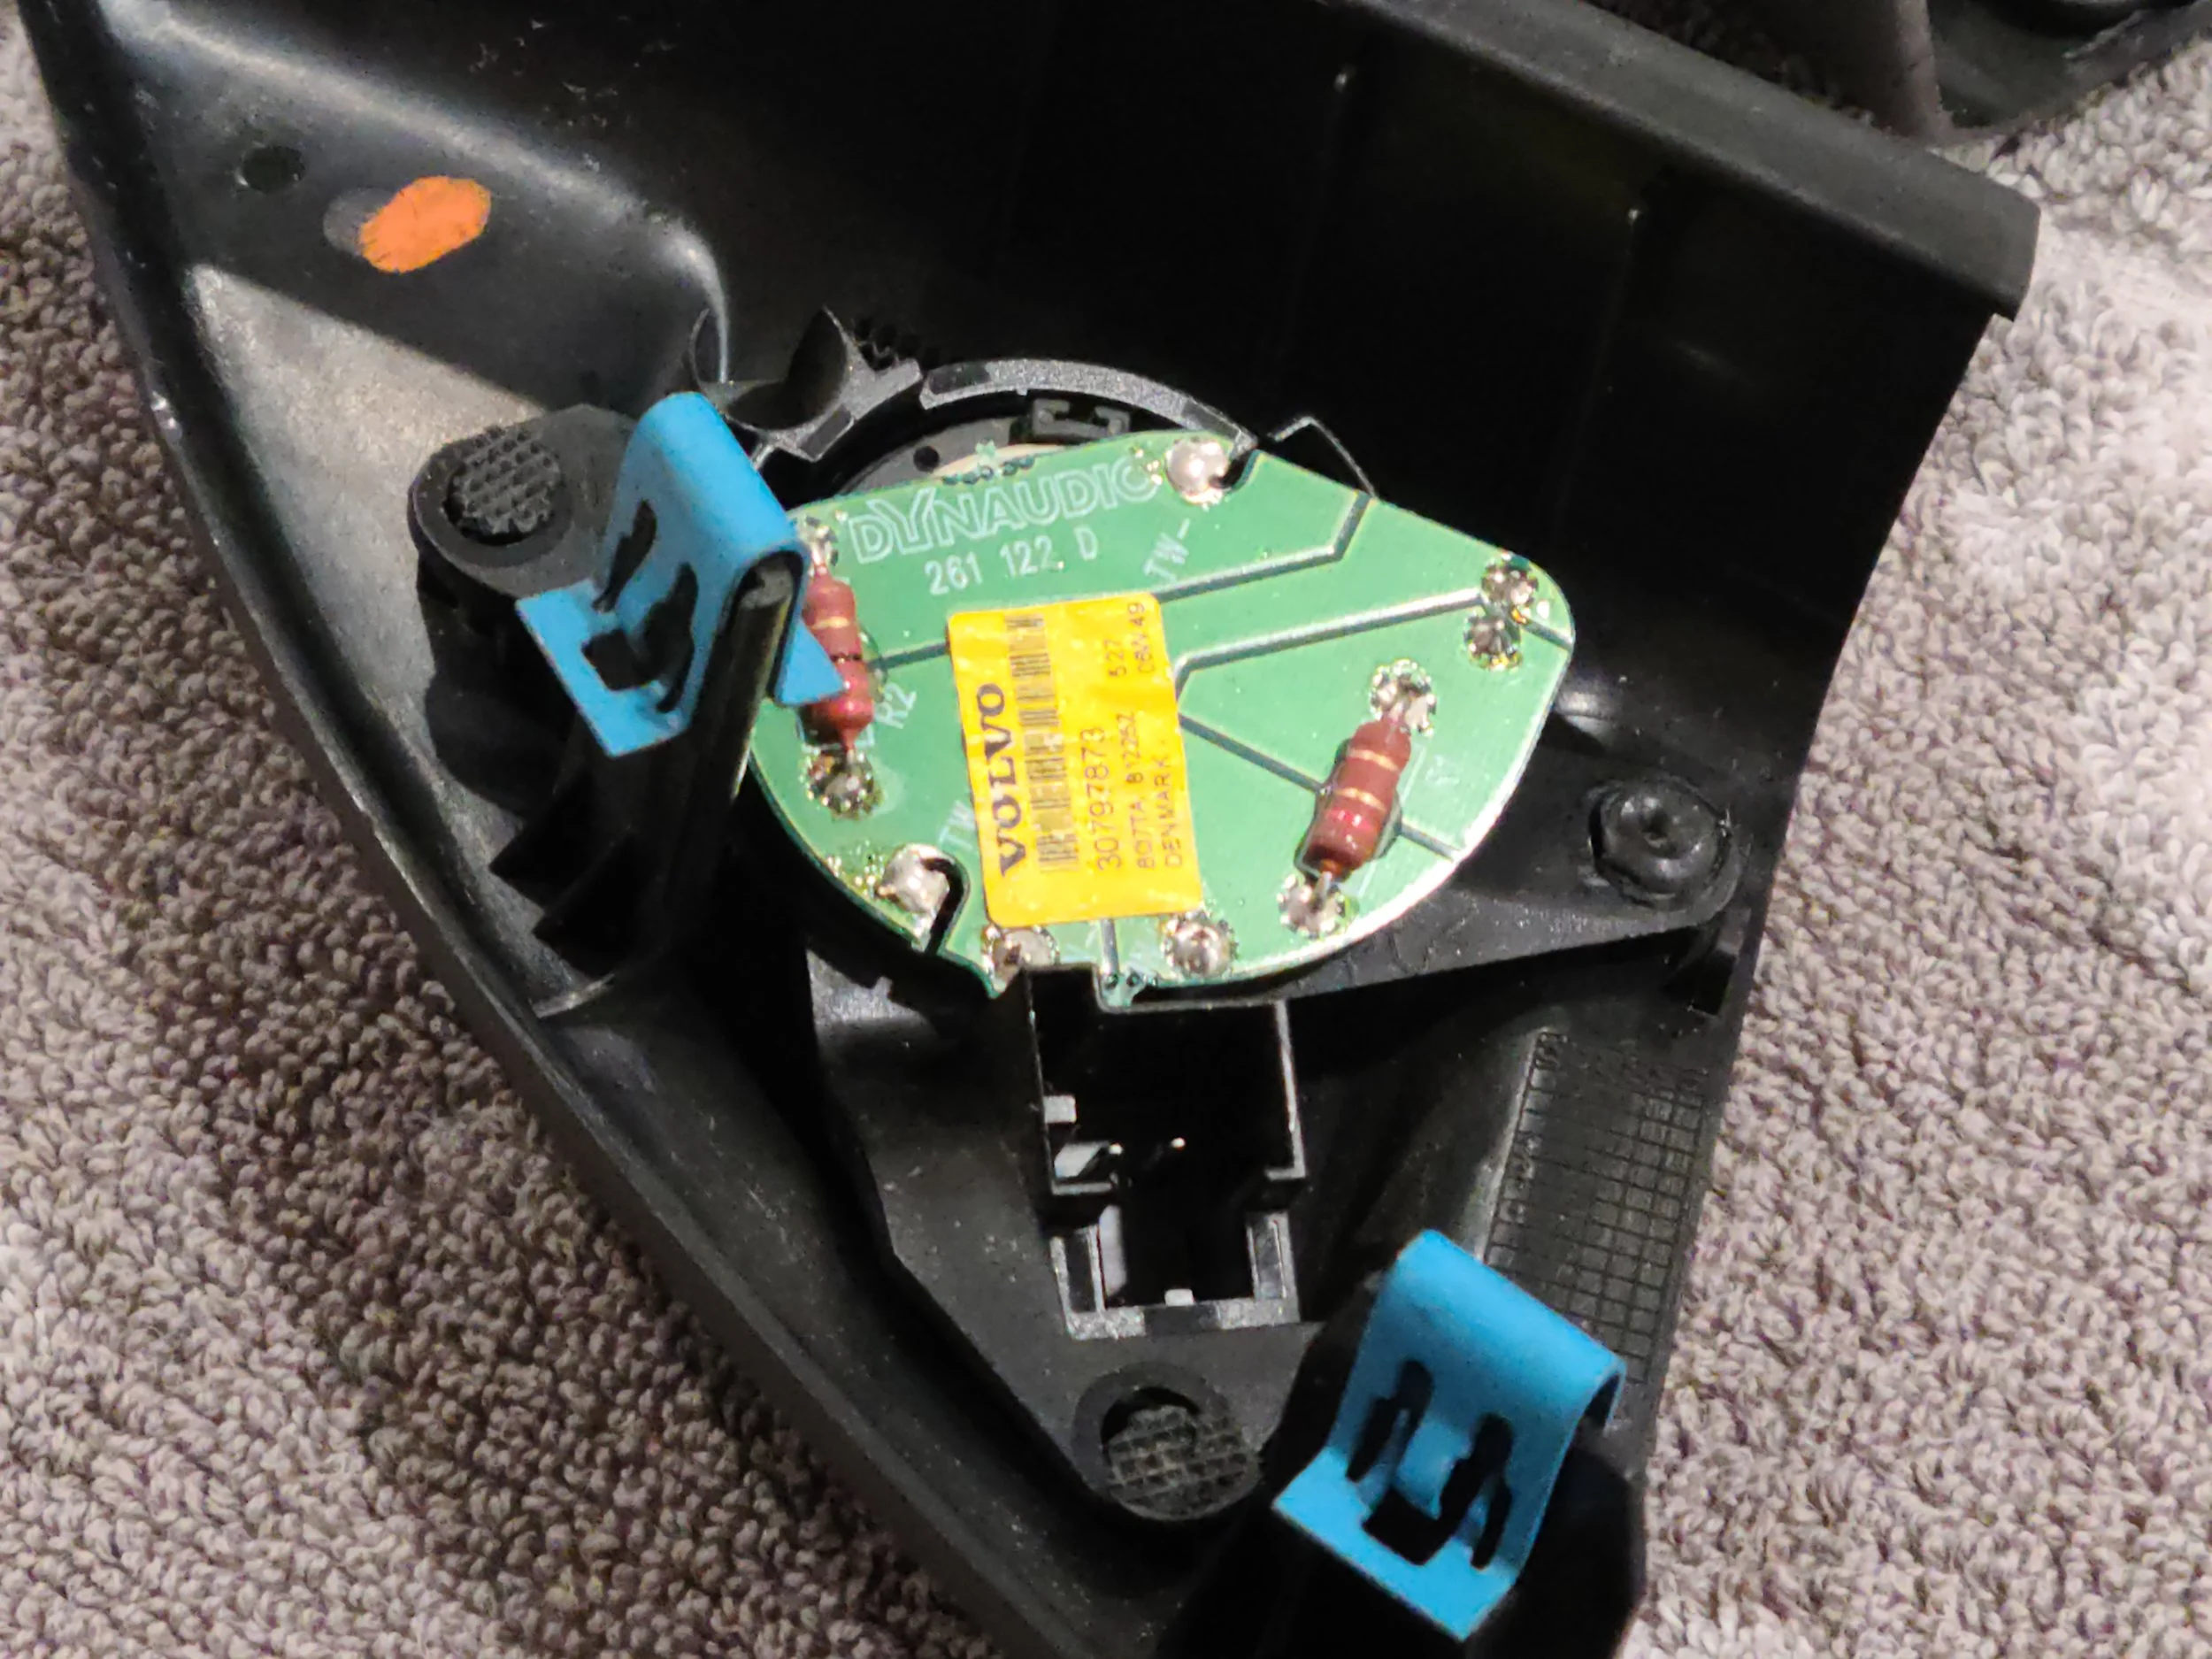
Green DynAudio tweeters, standard in blue. Note the white plastic housing in the BLIS equipped sets.
Installation:
Sound System
This is where I begin to enter some unknown territory. I have a pretty good idea of what needs to happen for the mirrors, however the audio system uses MOST security which will need to be disabled to add the amplifier. Additionally I plan on possibly adding the premium sound speakers and drivers to the doors to add even more audio fidelity.
The first step was replacing the amplifier, which sounds easy and should have been if it was not for one little bolt holding it in. The amp has 3 10mm bolts that secure it to the floor, and while the first two are super easy to access, the third is located directly under the seat, very close to the seat rail. Getting a socket on the bolt was no easy task, and I ended up breaking the small magnet that is attached to the seat rail to gain access.
What that magnet does, I have no idea.
The rest of the install is very straight forward, just unclip the stock amp, and plug the upgraded one in. Once in we need to take 3 steps in P3tool. (This can also be done in VDASH with a Pro account).
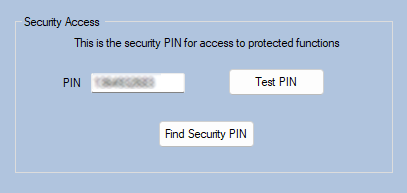
Step 1 is to find the cars security PIN. (P3 Security tab) This is different than the CEM PIN which is needed first to access anything. Running the Find PIN takes about 10 minutes, with the car is the same “deep sleep” state as when you try to find the CEM PIN. Once it is found, it will populate the field (where I have blurred).
Step 2 is to set the ITP Security to Off. This will allow a “foreign” device to be on the MOST network. Without getting too deep into the details, the original amp is coded to the car so when the system sees a new component with a different ID, it throws a flag and will not allow the audio system to turn on. By disabling the ITP security we are telling the system to allow any device. (That being said, if the car is brought to a dealer or updated with VIDA there is a risk of the ITP locking again, in which case you may need to re-install the original amp or disable the ITP security through P3Tool again. This is unchartered territory so do these mods at your own risk!)
Step 1.

Step 2.
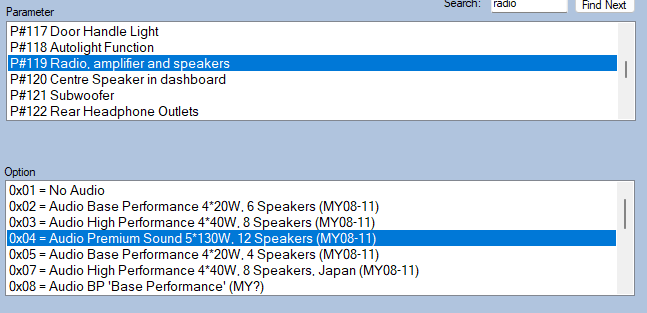
Step 3 is to change the audio settings of the car. This means going back to the P3 CarConfig tab and going to parameter #119. Here I will be changing the car from hex 0x03 High Performance Sound to hex 0x04 Premium Sound. Making this change gives you many more options in the audio settings of the car, and allows the premium sound amp to play nicely with the rest of the system.
Step 3.
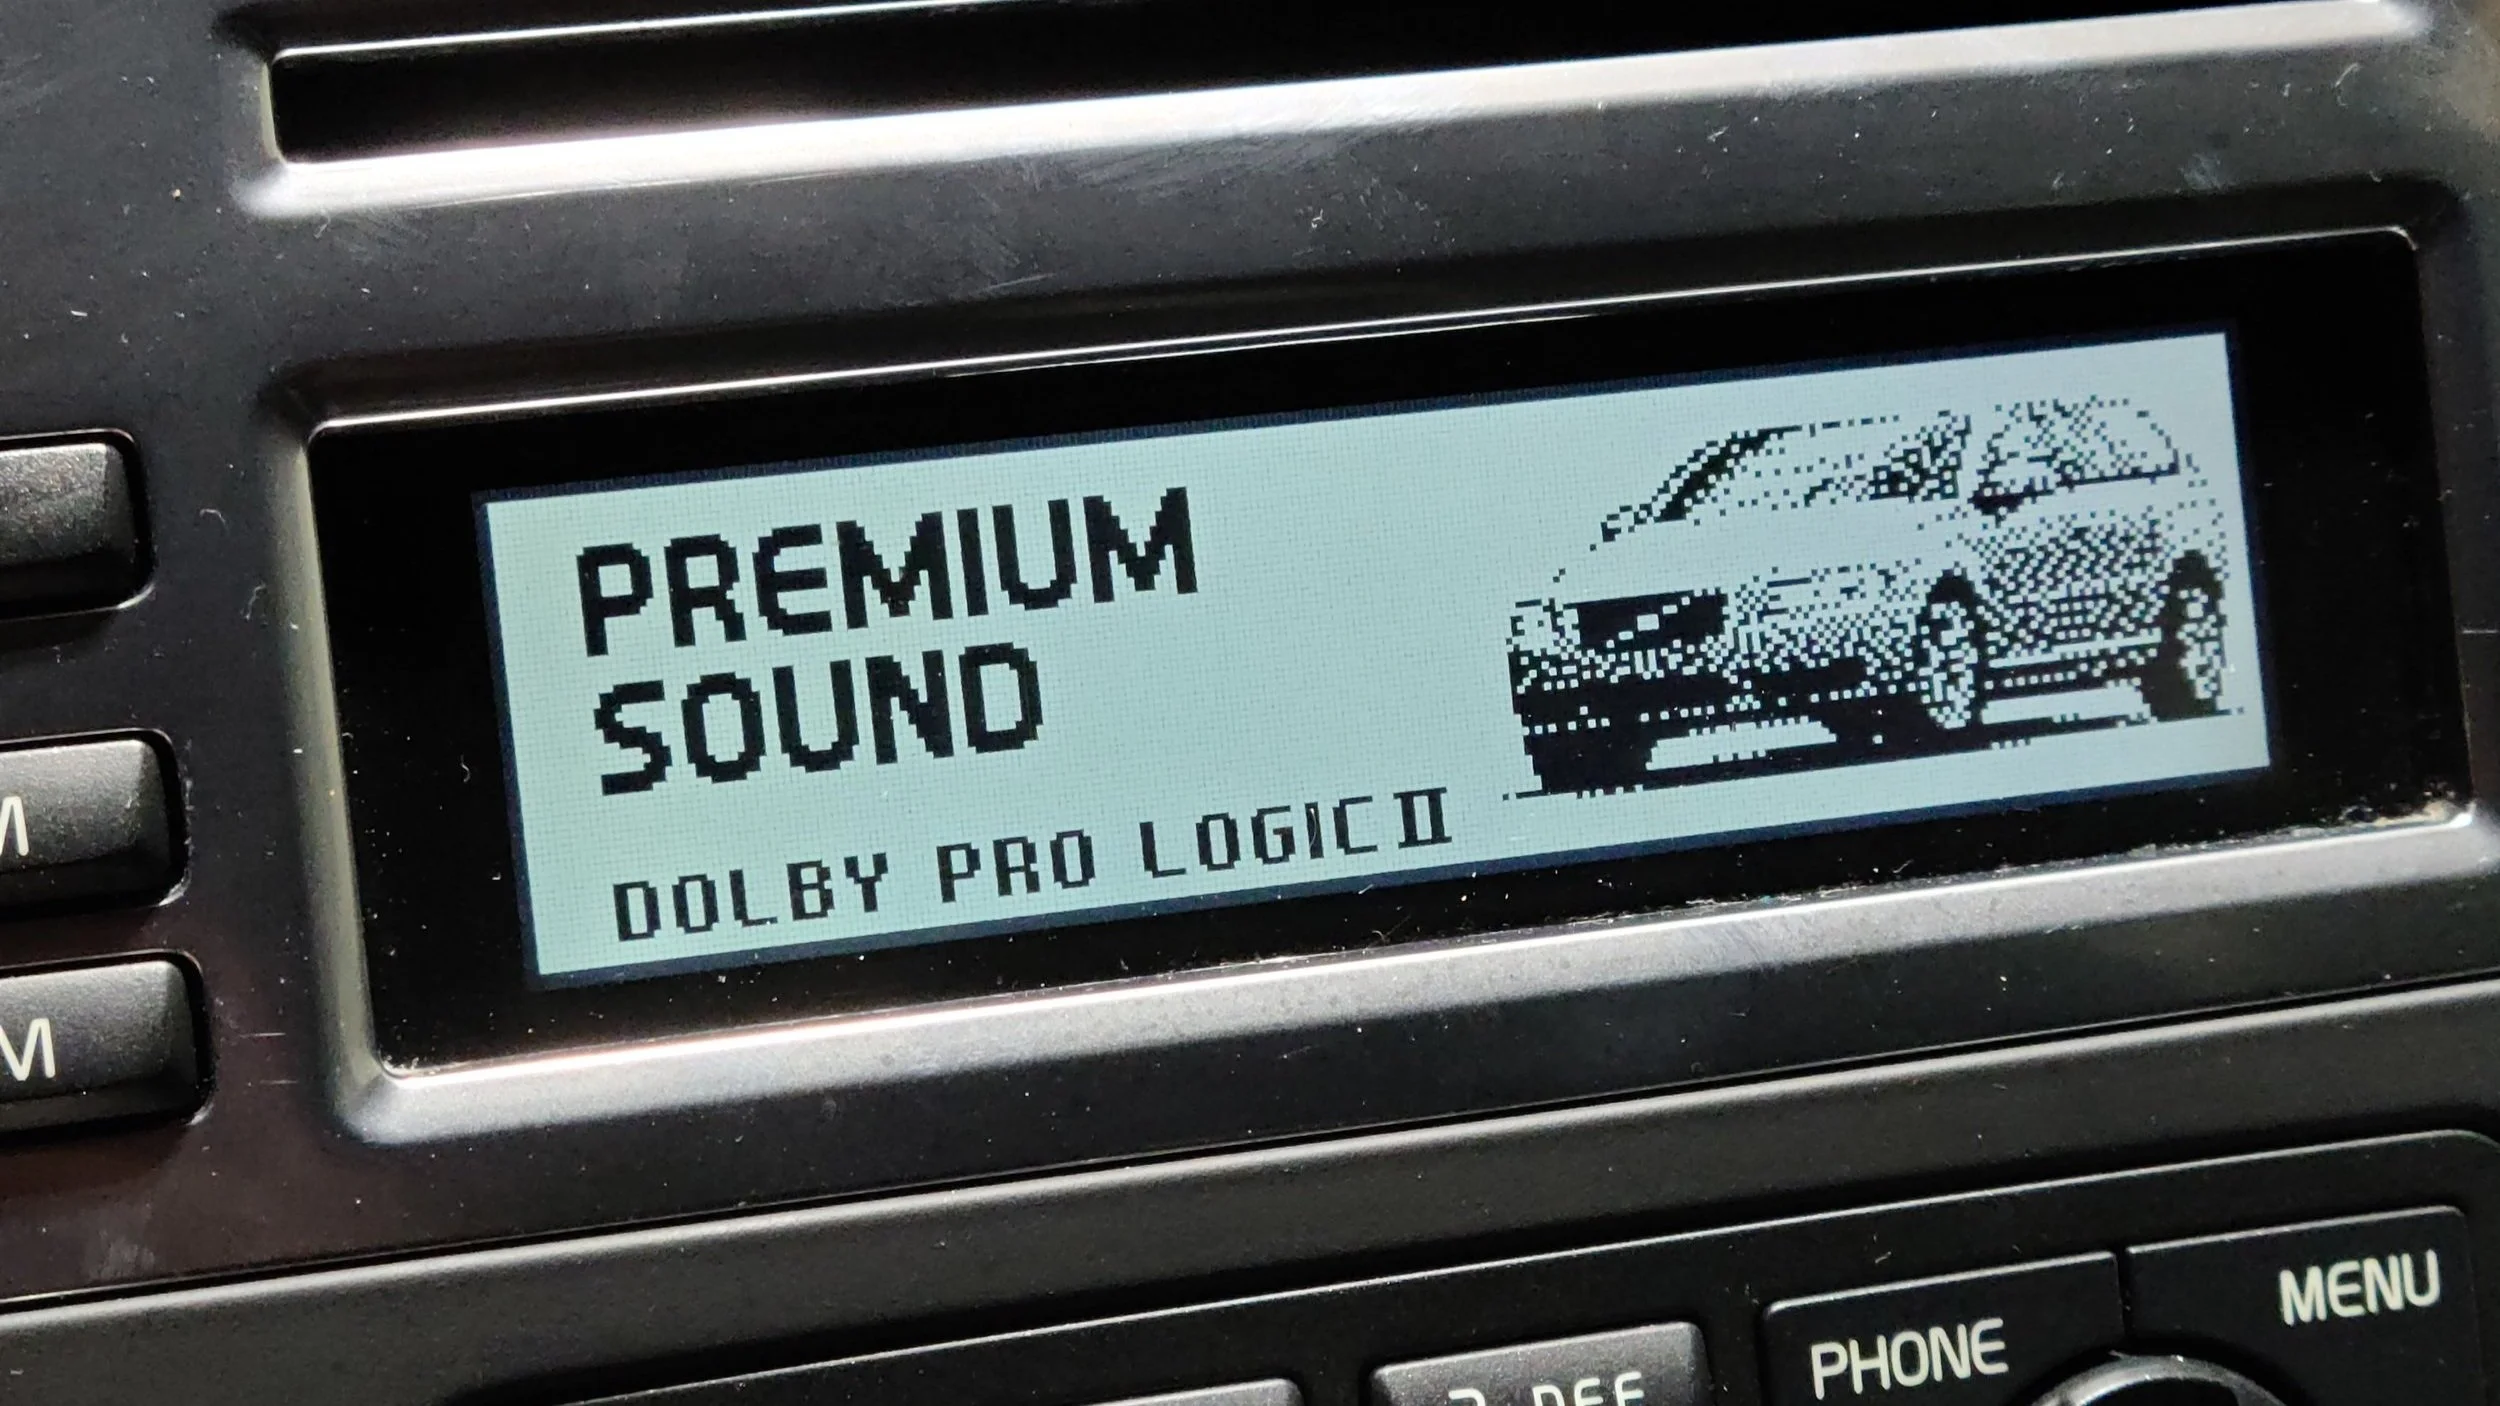
Save the changes and the car will reboot. You will now see the car show the Premium Sound image instead of the High Performance sound image. The sound difference is night and day. What used to be 80-85 percent up the volume bar is now closer to 40%. I will not be driving the system past about 60-75 percent as the volume factor has increased significantly.
Please Note: With the much powerful amplifier you do run the risk of driving the stock sound components too hard. Playing the sound system at higher than usual volumes can result in damage!
Overall through, this was a pretty easy and very noticable mod to make to the car. With the later addition of premium sound door speakers, the soundscape in the car will have changed drastically.
Sirius XM Radio
This is the biggest question mark for me as information online for adding this is sparse. Obviously there are not a whole lot of people adding satelite radio to a 12 year old car. Off to Swedespeed I went, and in my searching found that all P3 cars from 2010 onwards were pre-wired for Sirius XM satellite radios. This meant that the power (MOST) cables, antenna, and fiber optic cables should be all run to the back under the load tray.
I dug into my car, the MOST cables were easy to find, a bright orange two wire connector with a loop on the end. I didnt see any other cables initally, so I went back to Swedespeed and posed a question to anyone that could help. Afterall, who is really taking the time out of their day to install satellite radio in a 12 year old car these days. One user responded, linking the VIDA instruction manual on how to install the module and this made me question my inital search in the car.
Lo-and-behold after lifitng up some more sound deadening in the trunk there they were. The antenna and fiber optic cables. Next step, installing the board into the car.

Do not throw away / lose the loop installed on the MOST cable as it is required if the module is taken back out!
From here the install was just connecting the 3 cables into their ports and pushing the bracket the RDAR module sits in into the car. It is a press fit with a single bolt to hold it in. The final step will be done in the car with the aid of P3Tool.

In the tool, option #125 was selected which is the config of the radio options. The car was originally set to hex 0x03 for HD radio, however with the new XM module installed it was changed to hex 0x04. I saved the change and the program changed the value in the CEM.
After its reboot I immediately had access to the satellite radio!

What then happened sort of suprised me. I found that all the user data was stored inside the satellite module! This included their subscription data, as well as all of the presets. I figured this data would be stored in the IAM, but lo-and-behold I had a totally free, working XM subscription!
Now this did not last long, as the subscription had clearly expired during the donor cars time in the junkyard, however this does mean that it is possible to find a module with a working, active subscription. From here I went into the audio settings tab to find the radios ID code, and activated the subscription with my own Sirius XM account.
There will be a follow up to this post, covering both the basic uses of P3tool and the installation of BLIS into the car. I am very excited at the new levels that P3 modding are getting to. The P3tool is very easy to use and I genuinely believe will one day overtake VDASH as the modding tool of choice. If there is anything I missed or any questions on some process I did not cover, please feel free to drop a comment below.