
P3Tool - Volvo Hacking Takes Its Next Big Step
Introduction
Before we begin I want to talk briefly about the P3 chassis modding scene and its brief history. Hopefully this forward will provide some insight and context as to the importance of P3Tool.
Anyone that has been in the Volvo scene long enough with a “modern” era chassis has probably at least heard of VDASH. It was developed in eastern Europe and allows users to “crack” their cars CEM and access parameters usually only accessible by Volvo. When the tool first hit the scene around 2017, it was a revelation to all those with newer cars, allowing them to add remote start, headlight configurations, key controls and more. The prices were pay-per-mod and they were…reasonable. Some categories being more expensive than others based on what I can only describe as desirability. However in 2022, my opinion on this tool has been swayed.
Having been out of the P3 scene for some years (having sold my S60, buying an Alfa Romeo, and then selling the Alfa Romeo for the V70) I did not notice the changes that had been made to VDASH. When I went and unlocked my V70, I found that many of the options and features I had been able to access on my S60 were gone. What I learned was that many of VDASHs actually useful features had been locked behind a paywall, allowing only those with a “Pro” account to enable and disable certain parameters.
Now its important that you understand that I am aware that my pre-sensus V70 is lacking the hardware for many of the mods that my S60 was capable of, however the biggest issue I had was with the ITP security system parameters. This is needed for when a user installs any OEM audio part on the MOST network. To make a long story short, the car needs to see identical keys across all the audio system components or it will refuse to work. This can be bypassed if the part is installed by a dealer and “properly” coded to the car, but is not possible for many upgrade cases like installing a premium sound amp in a high performance sound car. This feature is locked behind a yearly payment with VDASH which can cost over $400.
Now, lets get into the real substance of the article; P3tool.
Prerequisites
P3Tool is a windows program created by Johnny Persson, who you can find on Swedespeed under the username jp_swe. It was originally developed by Johnny to bypass the payment system in place with the old VDASH tools so he could add a power tailgate to his V70. He is a much smarter man than I so you can read more about its development here on Swedespeed.
The first step to setting it up was acquiring the software. You can sign up on Johnny’s site here:
Updated 7/2/2025Once the file is downloaded, we will extract the files to our PC and use the login information provided by Johnny.
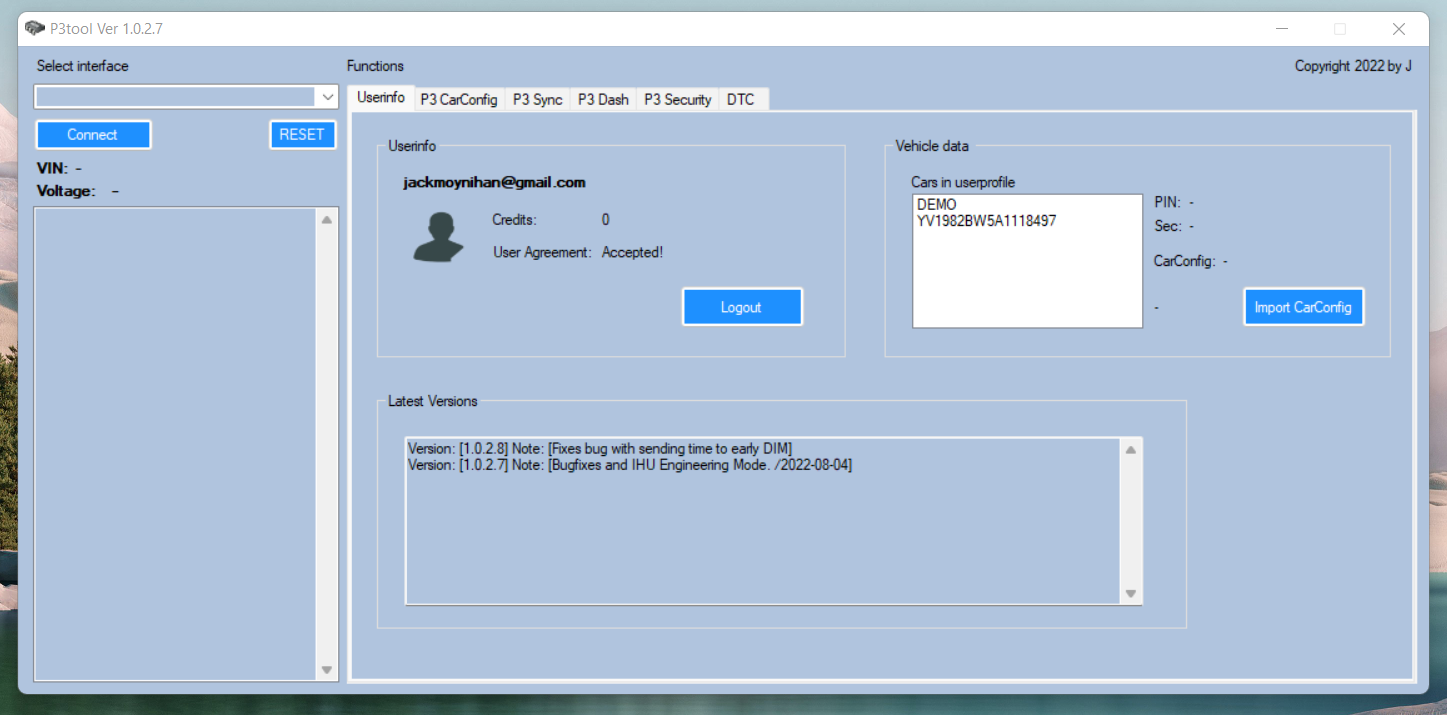
This is the homescreen (USERINFO tab) once you are logged into the tool. There are a few areas to note to start off:
Select interface: this is where your DICE unit will show up. I used my original chinese DICE unit from the VDASH article.
VIN / Voltage: this is pretty self explanatory. The voltage is helpful in seeing if your battery tender is working properly. A battery tender / charger is needed when decoding your CEM PIN! More on that later in the article.
Vehicle Data / Cars in userprofile: This is where you will be able to select a car loaded into the program. The DEMO profile allows you to use a demo vehicle and see all the options available before even connecting a car. I love this feature, not only does the demo shows everything, but I am able to load my own cars profile while not connected at at least see what changes I have made.
Credits: Credits are added when a car is added to the program, this allows you to access the parameters to make modifications to the car. Unlike VDASH, the cost in P3Tool is $50 flat fee paid only once. This gives you lifetime access to that car.
Hardware you will need:
Battery Tender / Charger
Windows Laptop
Volvo DiCE Connector
These can be found from China via AliExpress, genuine unit is not needed.
Getting Started
Start by connecting your battery tender to your battery, and connecting your DiCE unit to your PC. If everything is recognized, you should see the DiCE show up in the interface tab on the tool.
At this point the car should be in key position 1 or 2. Now, click the blue CONNECT button. Once you have verified connection, go over to the P3 CarConfig tab.
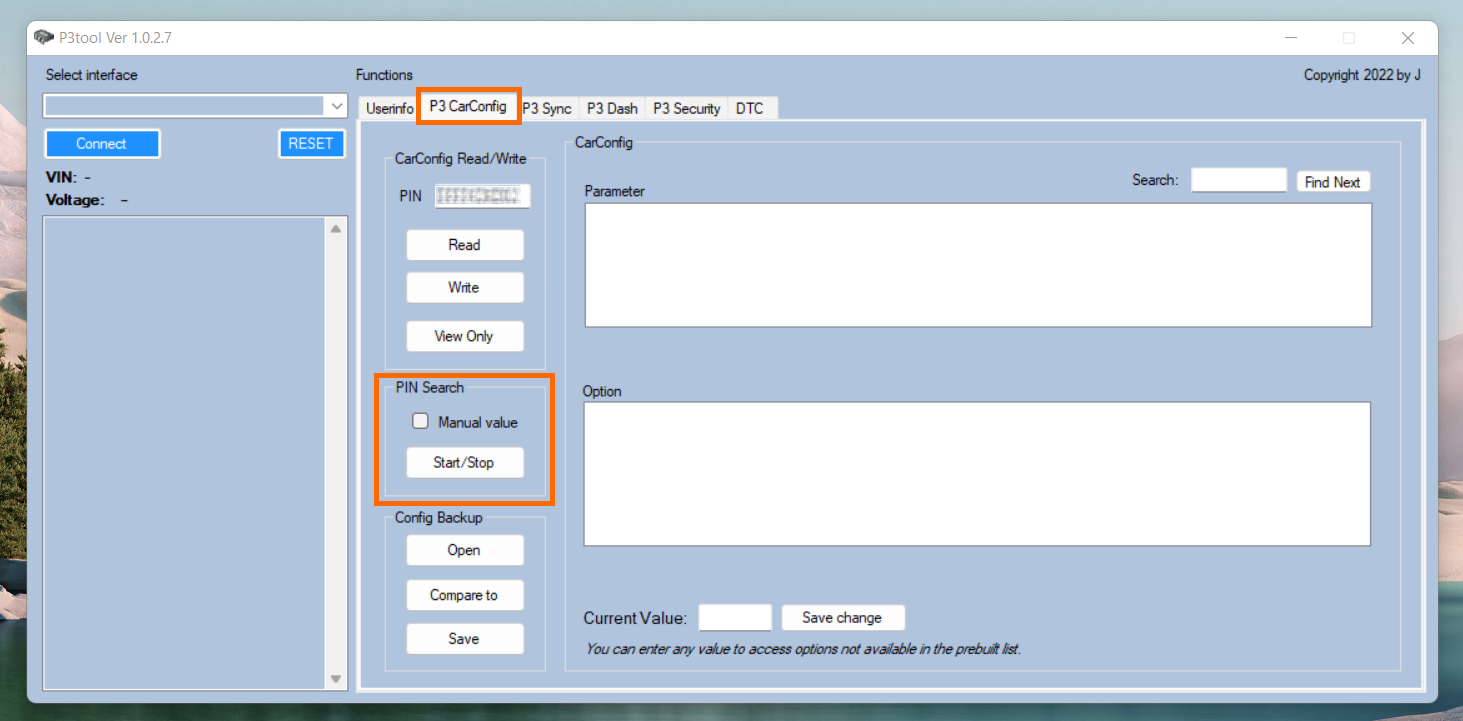
Go to PIN Search and select the start/stop, Once this happens, the car will be completely off. This is normal. Do not attempt to start the car during this process. Essentially, the car is in a hibernation state with the computer talking exclusively with the CEM.
You can now watch the tool “crack” the CEM PIN code. I use the quotations since this is not really a crack, in encryption terms a a brute-force attack. The tool is rapidly firing off PIN codes, going one by one trying to find one that the CEM accepts. The maximum throughput of this process is limited by the speed of the cars network to about 250 keys per second. Johnny has a great description of this process in his thread on Swedespeed. It is also worth mentioning that since this is not a crack, the CEM is not open to any program that does not know the PIN! This means that even if you have previously done work to the car with VDASH and found the CEM PIN with that tool, P3Tool has no idea what the PIN is.
This process can take a few hours and entirely depends on where your PINs hex code is based on the list the tool is trying. Running overnight is the recommended procedure. During this process you can stop the search and the tool will pick up where it left off. Progress can be seen on the side bar under the voltage readout.
Once it is completed its search, the PIN field will populate with the cars CEM PIN.
CarConfig
The first step after cracking the PIN is to backup your cars stock CarConfig. This can be done by going down to the Config Backup section and selecting save. This will save your cars factory state and serve as a backup in case anything is changed that affects the cars functions.
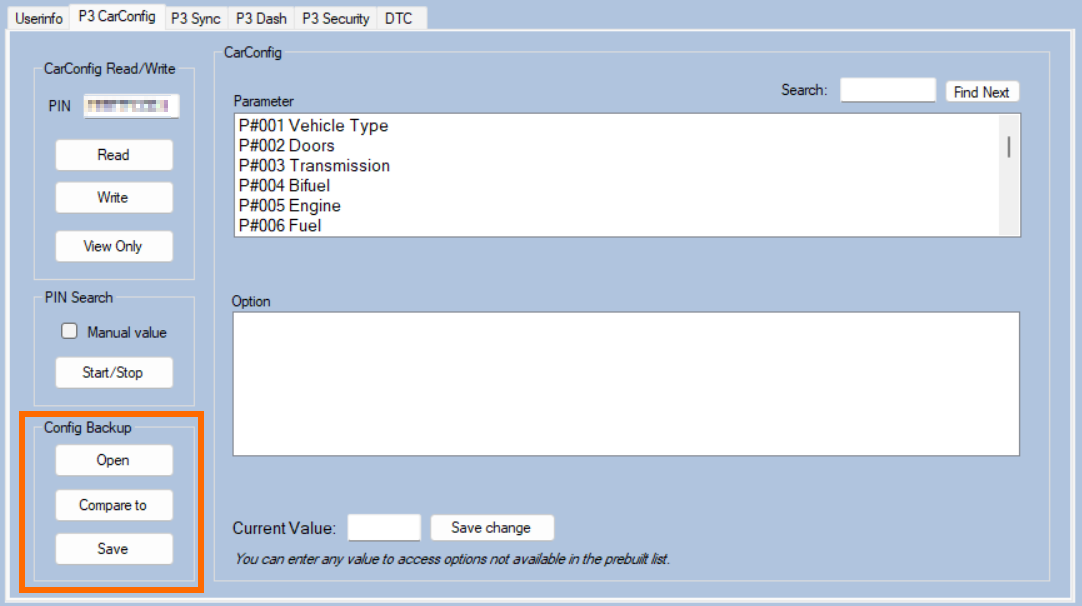
Make sure this file is backed up properly. I make sure to make a backup before doing any changes. Now for the config changes.
I recommend that everyone take the time to scroll through each parameter to see what is available as it is an extensive range of vehicle options, many of which you wont need to change or have any use changing (such as the amount of doors on the vehicle).
For this example lets say we want added a Sirius XM radio module to the car.
In parameter 125 the cars factory state is set as 0x03 “HD Radio”, so we will select 0x04 for the Sirius XM Radio.

Now we will hit Save Change. This saves our selection, but it has not yet been applied to the car! We need to hit Write, up in the Read/Write area. This will then flash the changed parameter to the car.
This process is the same for any change to any parameter. Multiple changes can be made at once and saved before writing to the CEM.
Advanced Options + ITP/MOST Security
While most modifications to a P3 do not require any extra steps, the audio system is a bit of a difference beast. Do not be discouraged though, there are a few more steps which we need to take to be able to add things like premium sound amps, dedicated subwoofers, etc.
The first thing we will do is go over to the P3 Security tab. Here we will be finding the security PIN via the Find Security PIN button. This is similar to the CEM PIN however this process only takes a few minutes.

Once this PIN found you are able to set the status of the ITP security. If you are adding a subwoofer or amplifier from a junkyard vehicle, you will want to set the security OFF. It can stay permanently off, if it re-engages it will stop your sound system from working.
Conclusion
There is still much to discover with P3Tool. It has tools for many onboard modules of the car as well as for the TFT display (which my car is not equipped with). I will be following this project closely and I think i speak for everyone in the community when I say thank you Johnny for your work. Stay tuned for any updates!