
NordCarolina Blog
Formerly BoostMoose.com
850R - Stage 0 Dreams Pt. 2
While the weather has been on and off here in NC, Steve and I have been plugging away the best we can with the 850R. The most recent work we did was a restoration of the exterior trim, as well as maintenance in the engine day. For the trim restoration we used Chemical Bros. VRP and some old microfibers, and well the results speak for themselves.

This is the passenger side, rear door trim after 1 pass with the VRP. The difference in person is astounding, and after a few more passes (once the sun is back) the trim will really look as good as new.

The upper engine cover / air filter cover also significantly benefited from the VRP. This piece needed a bit of soap and water before we used any chemicals on it. After a few heavy passes it started to regain its color, however the raised grille sections in the middle seem to need a second pass and maybe a wet sand to fully restore their color. It was also from this removal of the cover that we discovered how gross the cabin air filter was!

The engine day with the cover removed, and before detailing.

The nasty cabin air filter, replaced with a new Napa Auto Parts piece.
After replacing the cabin air filter, we detailed the engine bay for good mesaure. We used a shop vac to remove all of the leaves and grime that had built up in all the tiny areas of the engine bay.

The drain hose from the upper engine cover, completely filled with junk!
We are still hoping to get the throttle body mod done soon, so stay tuned!
850R - 960 Throttle Body Upgrade pt. 1
For the 850 Turbo and 850R, one of the many common, cheap mods that enthusiasts will do is redistricting the airflow to the engine. The modification is a 2 part process of using the intake manifold from a naturally aspirated Volvo 850, and the throttle body from a Volvo 960. For this, you need an assortment of parts, most of which can be found at any local pick-n-pull, for ours we sourced all of the parts from LKQ Greensboro. The first step in modifiying the 850s throttle body with parts from the 960 throttle body.

Dirty, but cheap!

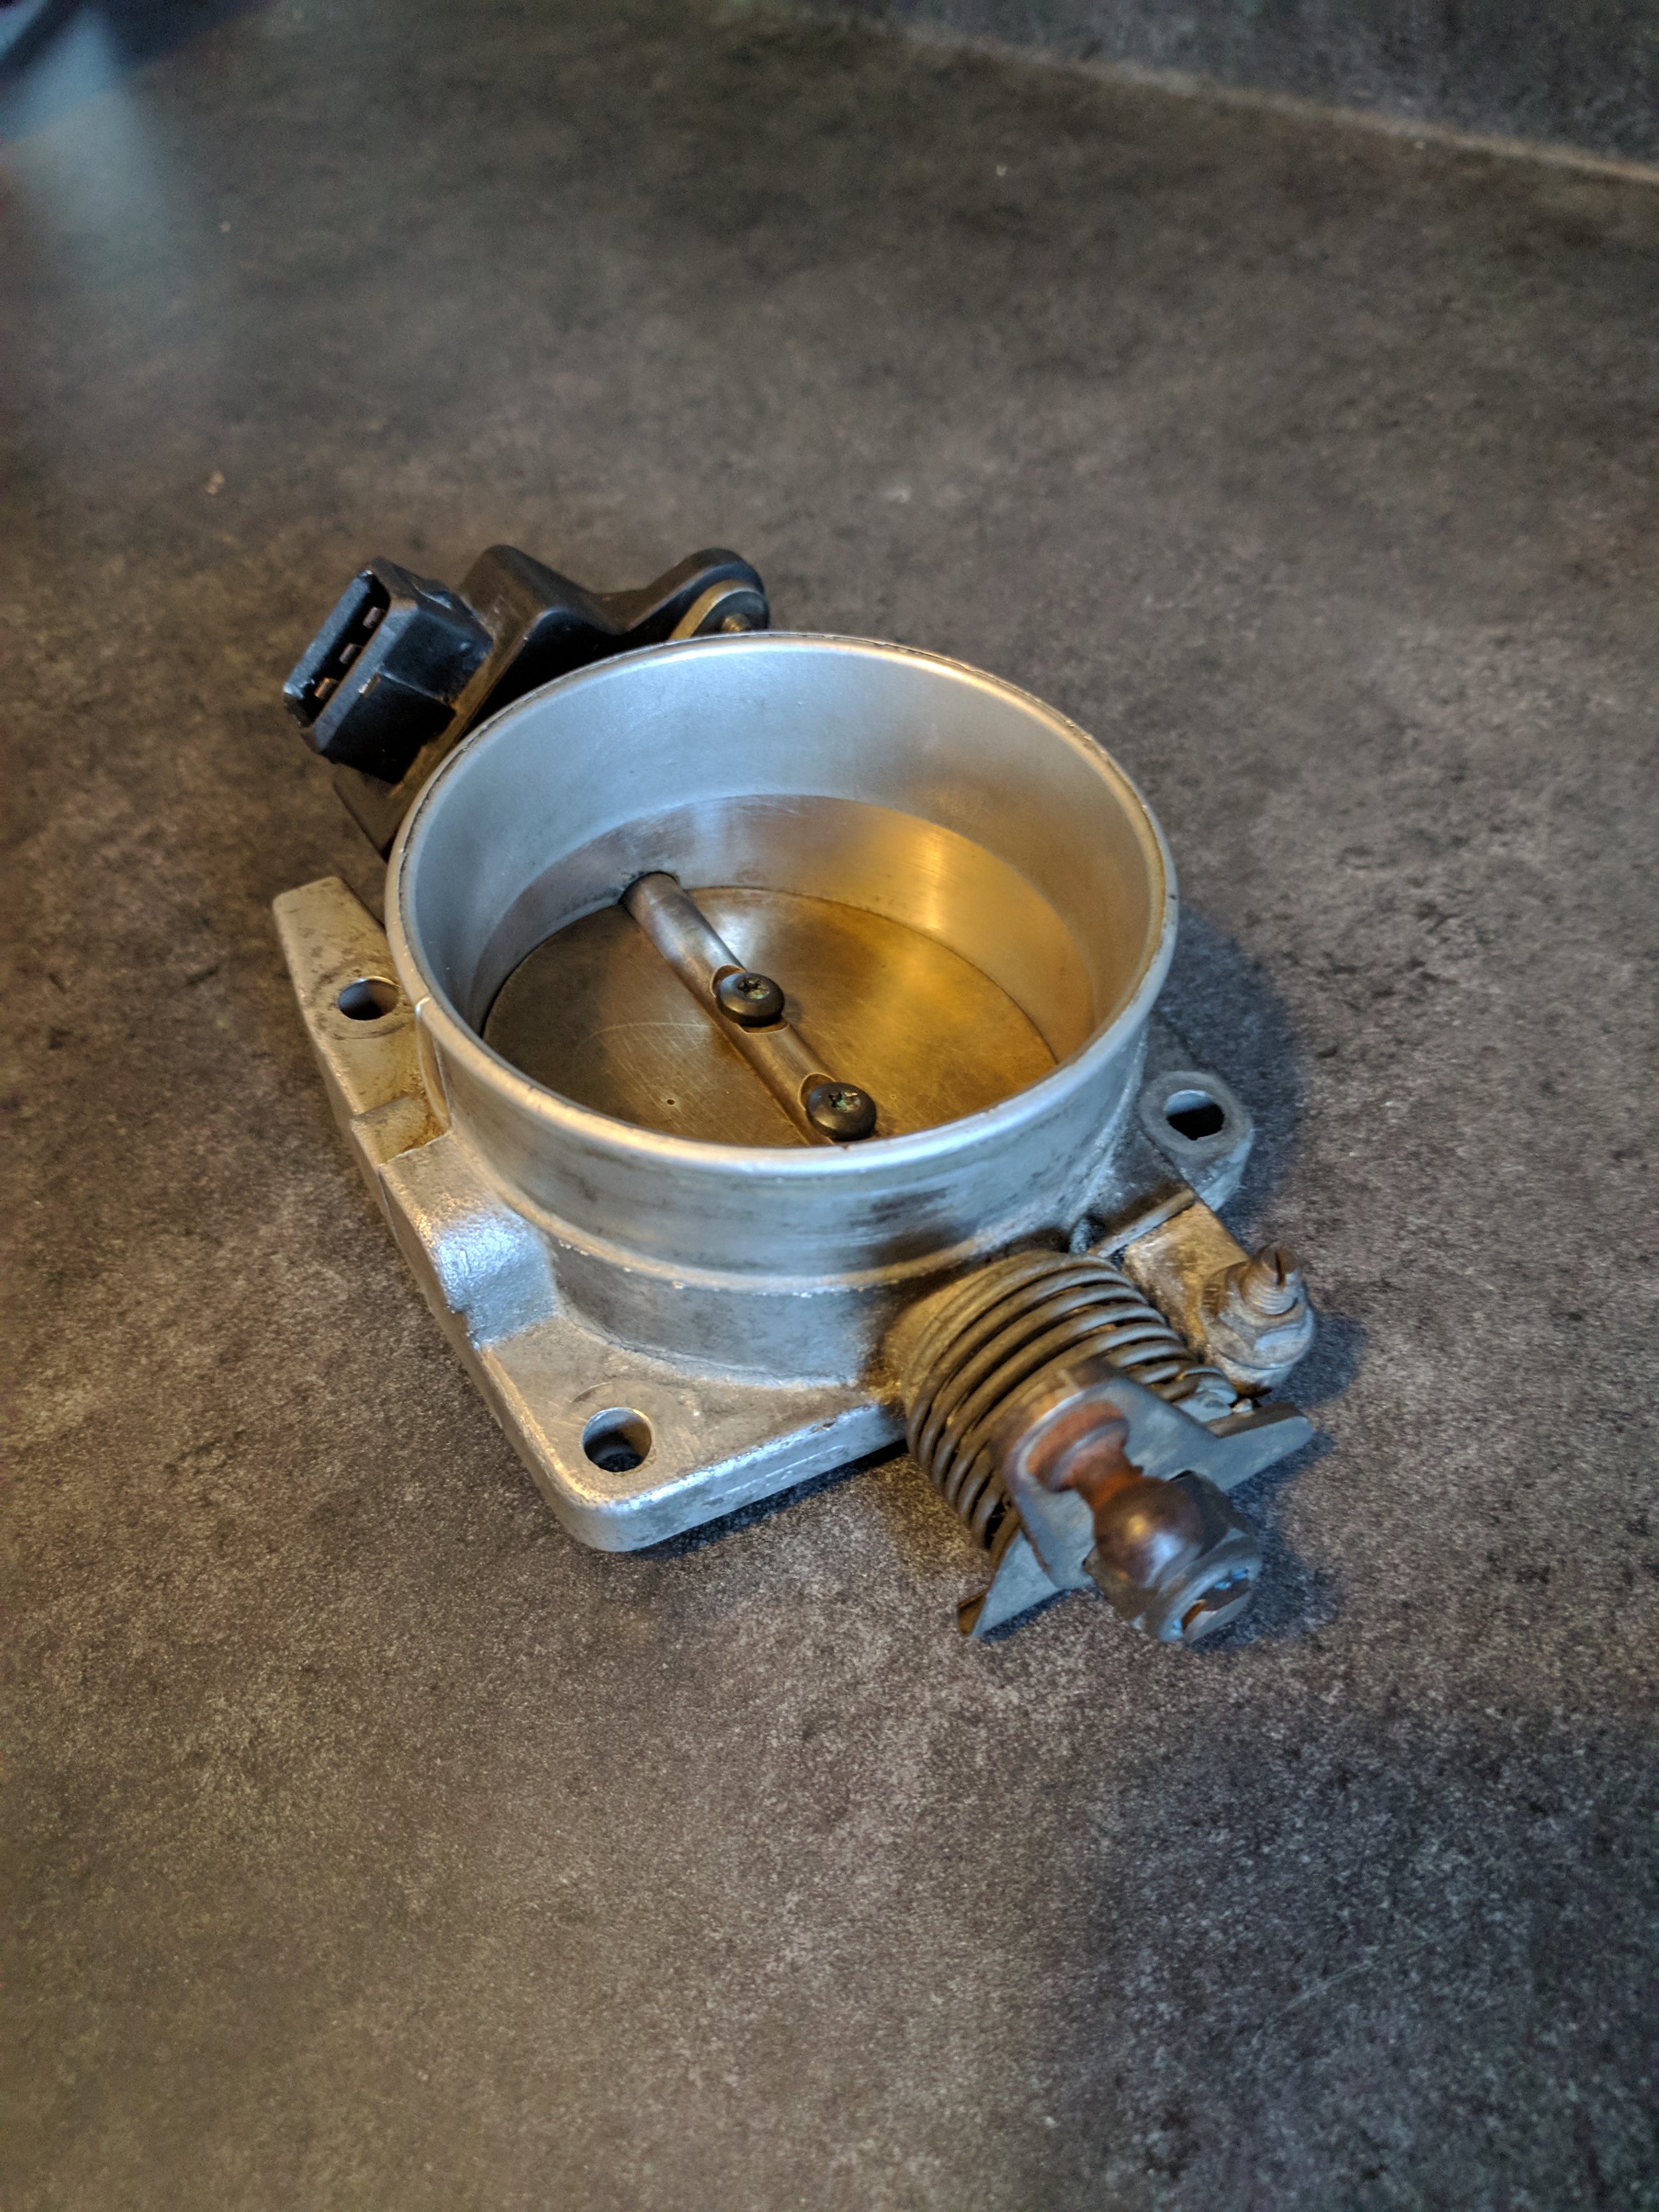
So crusty!
As you can see in the images above of the stock 850 throttle body, the plate in the center has a wedge attached. At wide-open-throttle this plate restricts the amount of air entering the engine. The 960 throttle body is the same size as the 850, but does not have these restriction plates installed!
To do this you will probably need a small assortment of torx / hex bits, a screwdriver, and some small wrenches (probably only a 7mm, I used a small set of pliers). I started by removing the sensor on the side of the throttle body on both the 850 and 960, just make sure to keep them separate! The bolts on the 960 sensor were much nicer than the crusty ones from the 850, and these also featured a torx head instead of a 7mm head.

The gross crusty bolts used to hold on the positioning sensor.

There was grime everywhere, but that's junkyard cars for you.
Removing the plates from the center was very easy, I found it works best to unscrew the bolts while the plate is being held at WOT. Once the 2 screws are removed from the center the plate will slide right out. Again the 850 had very cheap screws that bent and warped easily, so I used the screws that held in the 960s plate which were much higher quality.

The 960 throttle body plate un-installed from its housing
Installation is just as simple, just hold the throttle body open and slide the new plate in. Mine required a bit on brake cleaner and steel wool to remove the excess grime from the plate and bars inside the body. Once the plate is in I could re-attach the sensor to the side.
Total time for this project was only around 45 and the process was very simple, I would definitely recommend it to anyone looking to gain a small amount of performance for cheap. In part 2 we will be installing the intake manifold from the naturally aspirated 850 into the 850R.
850R - Seat Restoration
Well, more like an attempt at seat salvaging.
To be honest, there is no way to restore alcantara seats that are 20+ years old. That many years have taken a decent toll on the seats on the 850, as you may have seen they have significant matting of the seat material, as well as a significant rip in the lower drivers seat bolster. The only real fix is to have the seats re-upholstered but on our limited budget that is simply not possible. For this restoration project I tried to see what I can do as cheaply as possible with tools I already had. One of my ideas was to use my Conair Fabric Defuzzer, which can be purchased on Amazon for $12. Its mostly used for clothing, but in practice it seems to remove matted pieces of alcantara from the seats.

The section on the left is after being run over by the defuzzer, and the section on the right (the center piece of the seat) is what the rest of the seat looks like.

Left side after, right side before.
While the material will never look new, I am still happy with the results. From a distance the seats look much better, and this process only took me around 20 minutes to cover both front seats with multiple passes. After this I used Griots interior cleaner on the fresh sections, but the affect was minimal.
All of this begs the question "Who the fuck bought a Volvo wagon and decided that suede / alcantara was the best choice of seat material!?" If the car had been garaged all of its life maybe it would have been ok, but this car was being used constantly as a family hauler and daily driver for almost all of its life. By some miracle the rear seats are almost perfect, and god bless the fact that the steering wheel, armrest, and headliner arent made of the stuff.
Archive
-
2025
- Dec 15, 2025 11-16 Ford Super Duty Remote Start Ultimate DIY Guide Dec 15, 2025
- May 5, 2025 Volvo 700 Series In-Tank Fuel Sender Assemblies - Whats the deal? May 5, 2025
- Apr 28, 2025 Store Update: Shipping Rates and Carriers Apr 28, 2025
- Jan 1, 2025 Cash for Clunkers and Todays Car Marketplace - A Mathematical Analysis on Why Cash For Clunkers Doesn't Matter Anymore. Jan 1, 2025
-
2024
- Nov 25, 2024 11-16 Ford F250 / F350 Super Duty - Definitive Flow-Through Center Console Install Guide Nov 25, 2024
- Jul 30, 2024 13-16 F250 Steering Wheel and Audio Control Upgrade / Retrofit Guide for Dummies Jul 30, 2024
- Mar 13, 2024 Misc. Project - Volvo P3 Desk Chair Mar 13, 2024
- Jan 16, 2024 The Definitive P2 XC90 External Transmission Cooler Writeup Jan 16, 2024
-
2023
- Aug 8, 2023 TFT Display with P3Tool Guide Aug 8, 2023
- Aug 4, 2023 Facility Upgrades and Updates Pt. 2 - Tow Dolly Aug 4, 2023
- Mar 27, 2023 Facility Upgrades and Updates Pt. 1 - John Deere 165 Hydro Restoration Mar 27, 2023
-
2022
- Sep 27, 2022 P3Tool - Volvo Hacking Takes Its Next Big Step Sep 27, 2022
- Aug 25, 2022 Project Nashville Pt. 3 - MOST Excelent! Aug 25, 2022
- Jun 28, 2022 NordCarolina Shop Update! Jun 28, 2022
- Jun 20, 2022 Project Nashville Pt. 2 - Tech Talk Jun 20, 2022
- May 12, 2022 And I Would Drive 500 Miles - Project Nashville Pt. 1 May 12, 2022
- Mar 14, 2022 On life, cars, and business. Mar 14, 2022
-
2021
- Jul 19, 2021 Volvo 960 Project Pt. 6 - Still Alive Jul 19, 2021
- Mar 12, 2021 Volvo 780 Bertone Project Pt. 2 - Why buying another persons project is the WORST. Mar 12, 2021
-
2020
- Dec 7, 2020 Volvo 780 Bertone Project Pt. 1 - In Over My Head Dec 7, 2020
- Dec 7, 2020 Volvo 960 Project Pt. 5 - Taking my time. Dec 7, 2020
- Sep 11, 2020 A Very Volvo September Sep 11, 2020
- May 15, 2020 960 Project Pt. 4 - End of Spring Almost Summer Updates May 15, 2020
- Feb 3, 2020 960 Project Pt. 3 - Always Remember Your Oil Feb 3, 2020
-
2019
- Dec 17, 2019 Nord Carolina - Starting my own E-Commerce Platform for Volvo Enthusiasts Dec 17, 2019
- Nov 20, 2019 960 Project Pt. 2 - I built it one piece at a time... Nov 20, 2019
- Oct 2, 2019 960 Project Pt. 1 - Diving In Oct 2, 2019
- Sep 20, 2019 1997 Volvo 960 Project Pt. 0 - $800 Worth of Headaches Sep 20, 2019
- Aug 3, 2019 VDASH Pt. 2 - Cloud Based Car Tuning Aug 3, 2019
- Jul 2, 2019 VDASH Pt 2. is coming.... Jul 2, 2019
- Apr 1, 2019 VDASH Pt. 1 - A new tool for a modern Volvo hacker Apr 1, 2019
- Mar 18, 2019 2013+ Shifter Retrofit Project Pt. 2 - Reconstruction and Installation Mar 18, 2019
- Feb 17, 2019 2013+ Shifter Retrofit Project Pt. 1 - Preparation and Disassembly Feb 17, 2019
- Feb 2, 2019 The P3 Common & Uncommon Repairs Documentation Project Feb 2, 2019
-
2018
- Dec 28, 2018 Mini-Post: New side skirt. Dec 28, 2018
- Dec 8, 2018 Driveability and Performance Report: December 2018 Dec 8, 2018
- Oct 8, 2018 Audio Modules & The Return to Boostmoose Oct 8, 2018
- Jul 28, 2018 The Final Report: 850R Beauty Shots Jul 28, 2018
- Jul 17, 2018 Mid-July Summer Update Jul 17, 2018
- May 15, 2018 Summer Progress Update May 15, 2018
- Apr 1, 2018 850R - Stage 0 Dreams Pt. 2 Apr 1, 2018
- Mar 18, 2018 850R - 960 Throttle Body Upgrade pt. 1 Mar 18, 2018
- Mar 14, 2018 850R - Seat Restoration Mar 14, 2018
- Jan 18, 2018 S60R - Wrap Repair + Driving the Eastern Shore Jan 18, 2018
- Jan 1, 2018 S60R - Vinyl Wrap Jan 1, 2018
-
2017
- Dec 4, 2017 850R - Better and Brighter Tail Light Installation Dec 4, 2017
- Dec 4, 2017 S60R - Holiday Charity Laps at Virginia International Raceway Dec 4, 2017
- Nov 16, 2017 850R - Junkyard Pulls for Performance & New Rear Lights Nov 16, 2017
- Nov 15, 2017 S60R - Scheduled maintenance.....yawn. Nov 15, 2017
- Nov 3, 2017 850R - Stage 0 Dreams Pt. 1 Nov 3, 2017
- Nov 1, 2017 850R - Firestone Fixes CV Axle while Suspension Nears Completion Nov 1, 2017
- Oct 28, 2017 850R - Axle Removal and CV Boots Halt Progress Oct 28, 2017
- Oct 27, 2017 850R - Air Tool Woes and Broken Brakes Oct 27, 2017