
NordCarolina Blog
Formerly BoostMoose.com
Nord Carolina - Starting my own E-Commerce Platform for Volvo Enthusiasts
If you follow my social media you may have seen that I made the first steps in making my own e-commerce platform known as Nord Carolina. A play on Nordic Carolina, the idea behind the shop is to supply online rare and obscure Volvo parts that are sourced from the Carolinas and surrounding areas. This region has a large amount of untapped Volvo potential as they are not as collectible here as they are in the PNW or New England. This has left lots of older RWD cars and parts in good condition and ready for the right buyer!
As I write this, I have already made my first sale, which was a classic Volvo 240 Wagon roofrack. I was able to grab it off Facebook marketplace and quickly get it off to a satisfied customer in the UK. Parts like roofracks, grilles, trim pieces, gauges, and wheels are just some of the OEM parts I hope to source to everyone outside of the carolinas.
I plan on eventually adding the store to this website, probably using its own web address but leveraging Squarespaces commerce platform. In the mean time, you can follow the associated Instagram account @nord.carolina. I am open to all suggestions on products and parts you would like me to find as well. The local pick and pulls here have lots of high quality Volvos with rarely any parts removed before they are crushed. I hope that this ‘business’ can grow significantly, and I want to eventually expand into some original products and maybe bits of merchandise.
More updates to the 960 project will be coming soon, work will continue after the holiday season. Stay tuned, and happy holidays!
960 Project Pt. 2 - I built it one piece at a time...
Section 1 - Repairs
Its almost the end of November and we are swiftly approaching the holidays. As such, my work on the 960 has slowed down a bit in relation to the cold weather. I still wanted to give an update and also talk about some of the things I have learned along the way working on this car.
I have done a lot of maintenance work on the 960, and acquired quite a few junkyard parts and spares to keep it going. One of the biggest fixes was solving the misfiring issue. I ended up taking the car to my local shop here in Greensboro for some more expert diagnostics. They found that the intake manifold gasket had gone bad, and that the wiring to many of the coils was severely damaged from the heat and wear of 22 years of driving. That little repair cost me close to $400 when all said and done, but I am glad I didnt have to pull the entire intake system myself.
The first shipment from IPD was a pretty small, basic order with a few easy to replace parts like a new intake filter, as well as a new gasket for the oil cap. Both of these were very easy to install and cost less than $20 in total. The gasket on the oil cap, as I may have previously mentioned in another write up, slowly hardens due to the engine heat and allows oil to escape out onto the top of the engine. After replacing the gasket I did not see any more oil in or around the oil cap or on the top of the block.

Previous filter, vs a brand new one.
The serpentine belt was a major replacement that needed to be done. I ordered a new belt, shifter bushings, and new front rotors from FCP Euro, all which made a considerable difference on the car. My first attempt at replacing the serpentine did not go as planned. The socket size used on the tensioner for the belt is a non, standard size and requires some creative tool usage to turn. The first step was removing the fan, this step is easy on the 960 since it uses an electronic fan which can be easily unscrewed and moved out of the way. The harder part is finding the right drive socket to physically move the tensioner to release pressure on the belt. For this I ended up using a 1/2 in. to 3/4 in from this harbor freight socket adapter set this allowed me to easily use a standard wrench to turn the tensioner and slide a small screwdriver into the locking hole.
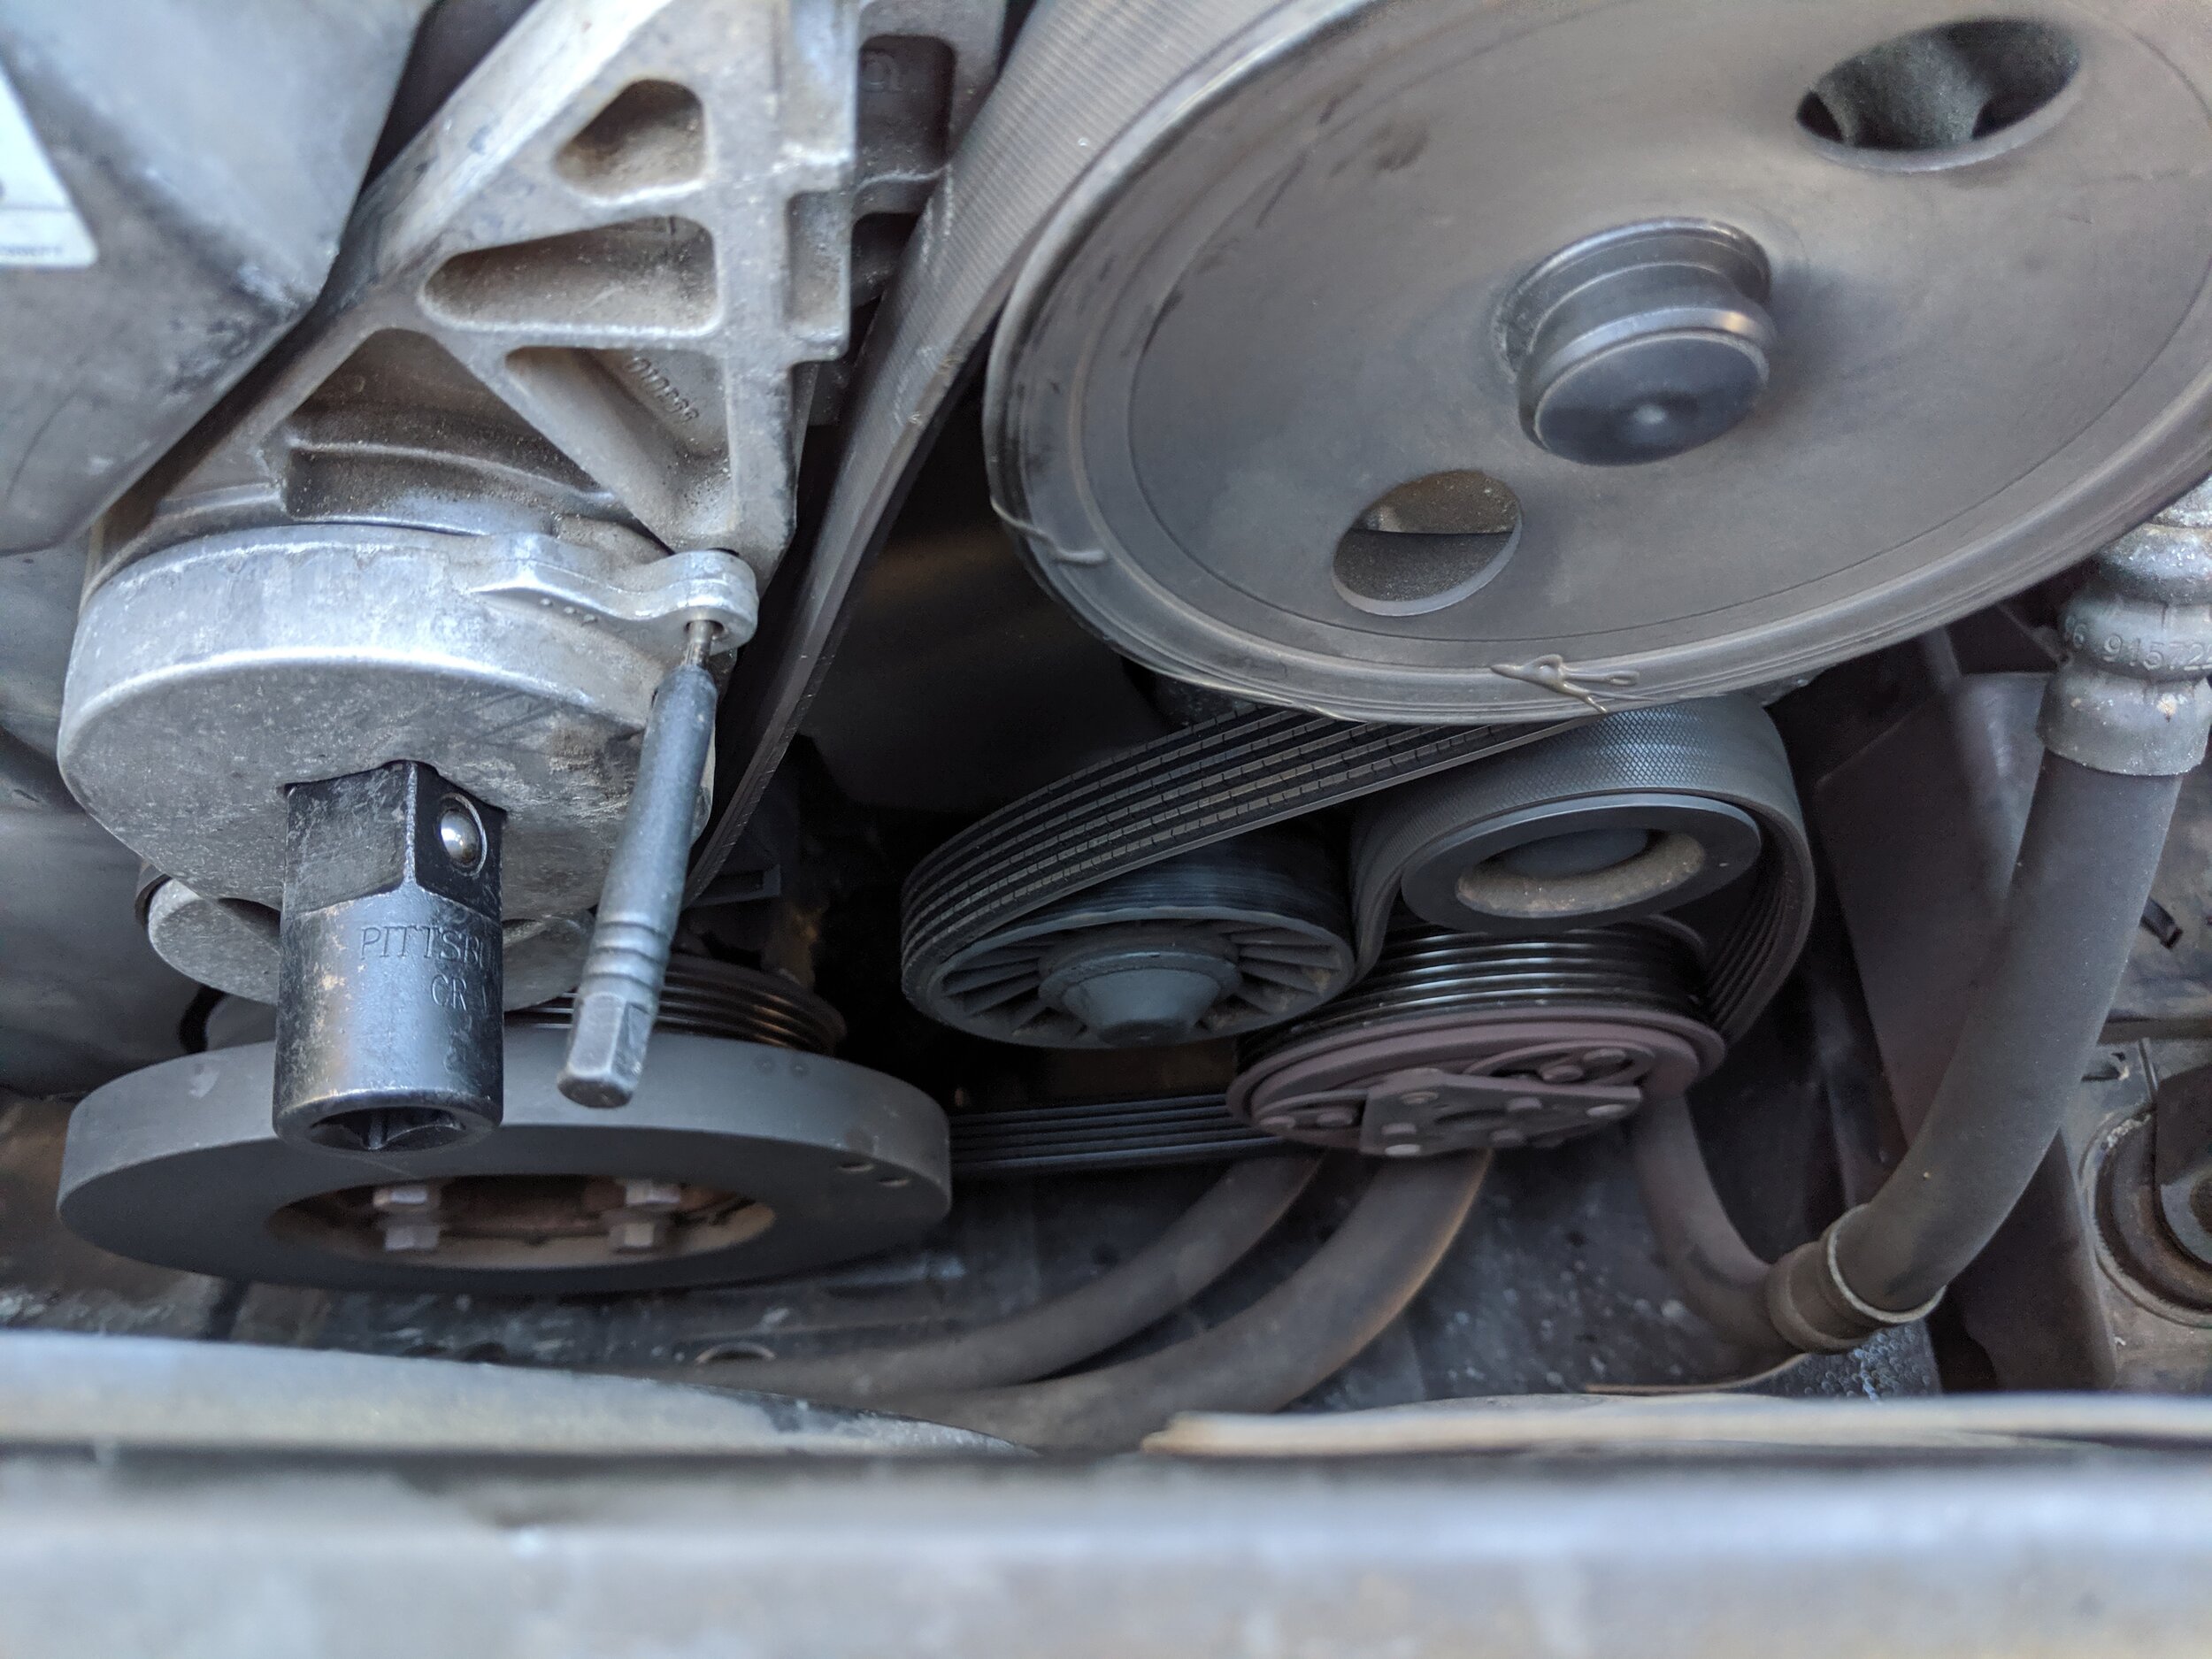
The tensioner doesn’t take to much force to move, just remember to take a picture of your belt before it comes off to help you properly feed the new belt on. This was definitely an intimidating job for someone who has never done belts before, but it was surprisingly very easy!
As previously mentioned, I also bought new shifter bushings from FCP Euro. For two, I think I paid a whole 90c. These small rubber O shaped bushings go into each end of the short linkage connecting the shifter inside the car to the transmission. The original bushings had fallen out long ago, meaning there was a large amount of forward and backward play in the shifter even when in gear. It also had the side effect of making a nasty clanking sound when shifting out of park. The bushings are very simple to install, and you will only need a 13mm wrench, a 15mm wrench and a pair of needle nose pliers. I didnt take many pictures, but the process of locating and installing these new bushings is extremely straight forward and took maybe 15 minutes total to do. The pay off however, well worth the time and money. The car now shifts into gear like its brand new, and drastically changed the feeling on the shifter in operation. It also completely eliminated any play that it previously had.
Section 2 - Cosmetics
In addition to the many small mechanical repairs I have made on the car, I was able to recruit my long time friend, and former 850R co-owner Steve to help me with really giving the car a good cosmetic make over. If I am being honest, the car will never be perfect, because at the end of the day its still a 22 year old Volvo that I bought for $800. We were able to rent a wet vacuum from Home Depot, as well as pick up a few heavy duty cleaners and de-greasers to really give the interior of the car a good makeover. Most of the work was done at night, but I can attest to the fact that Steves elbow grease on the door cars and carpet made a huge difference in removing the smokey, stale smell from the car.
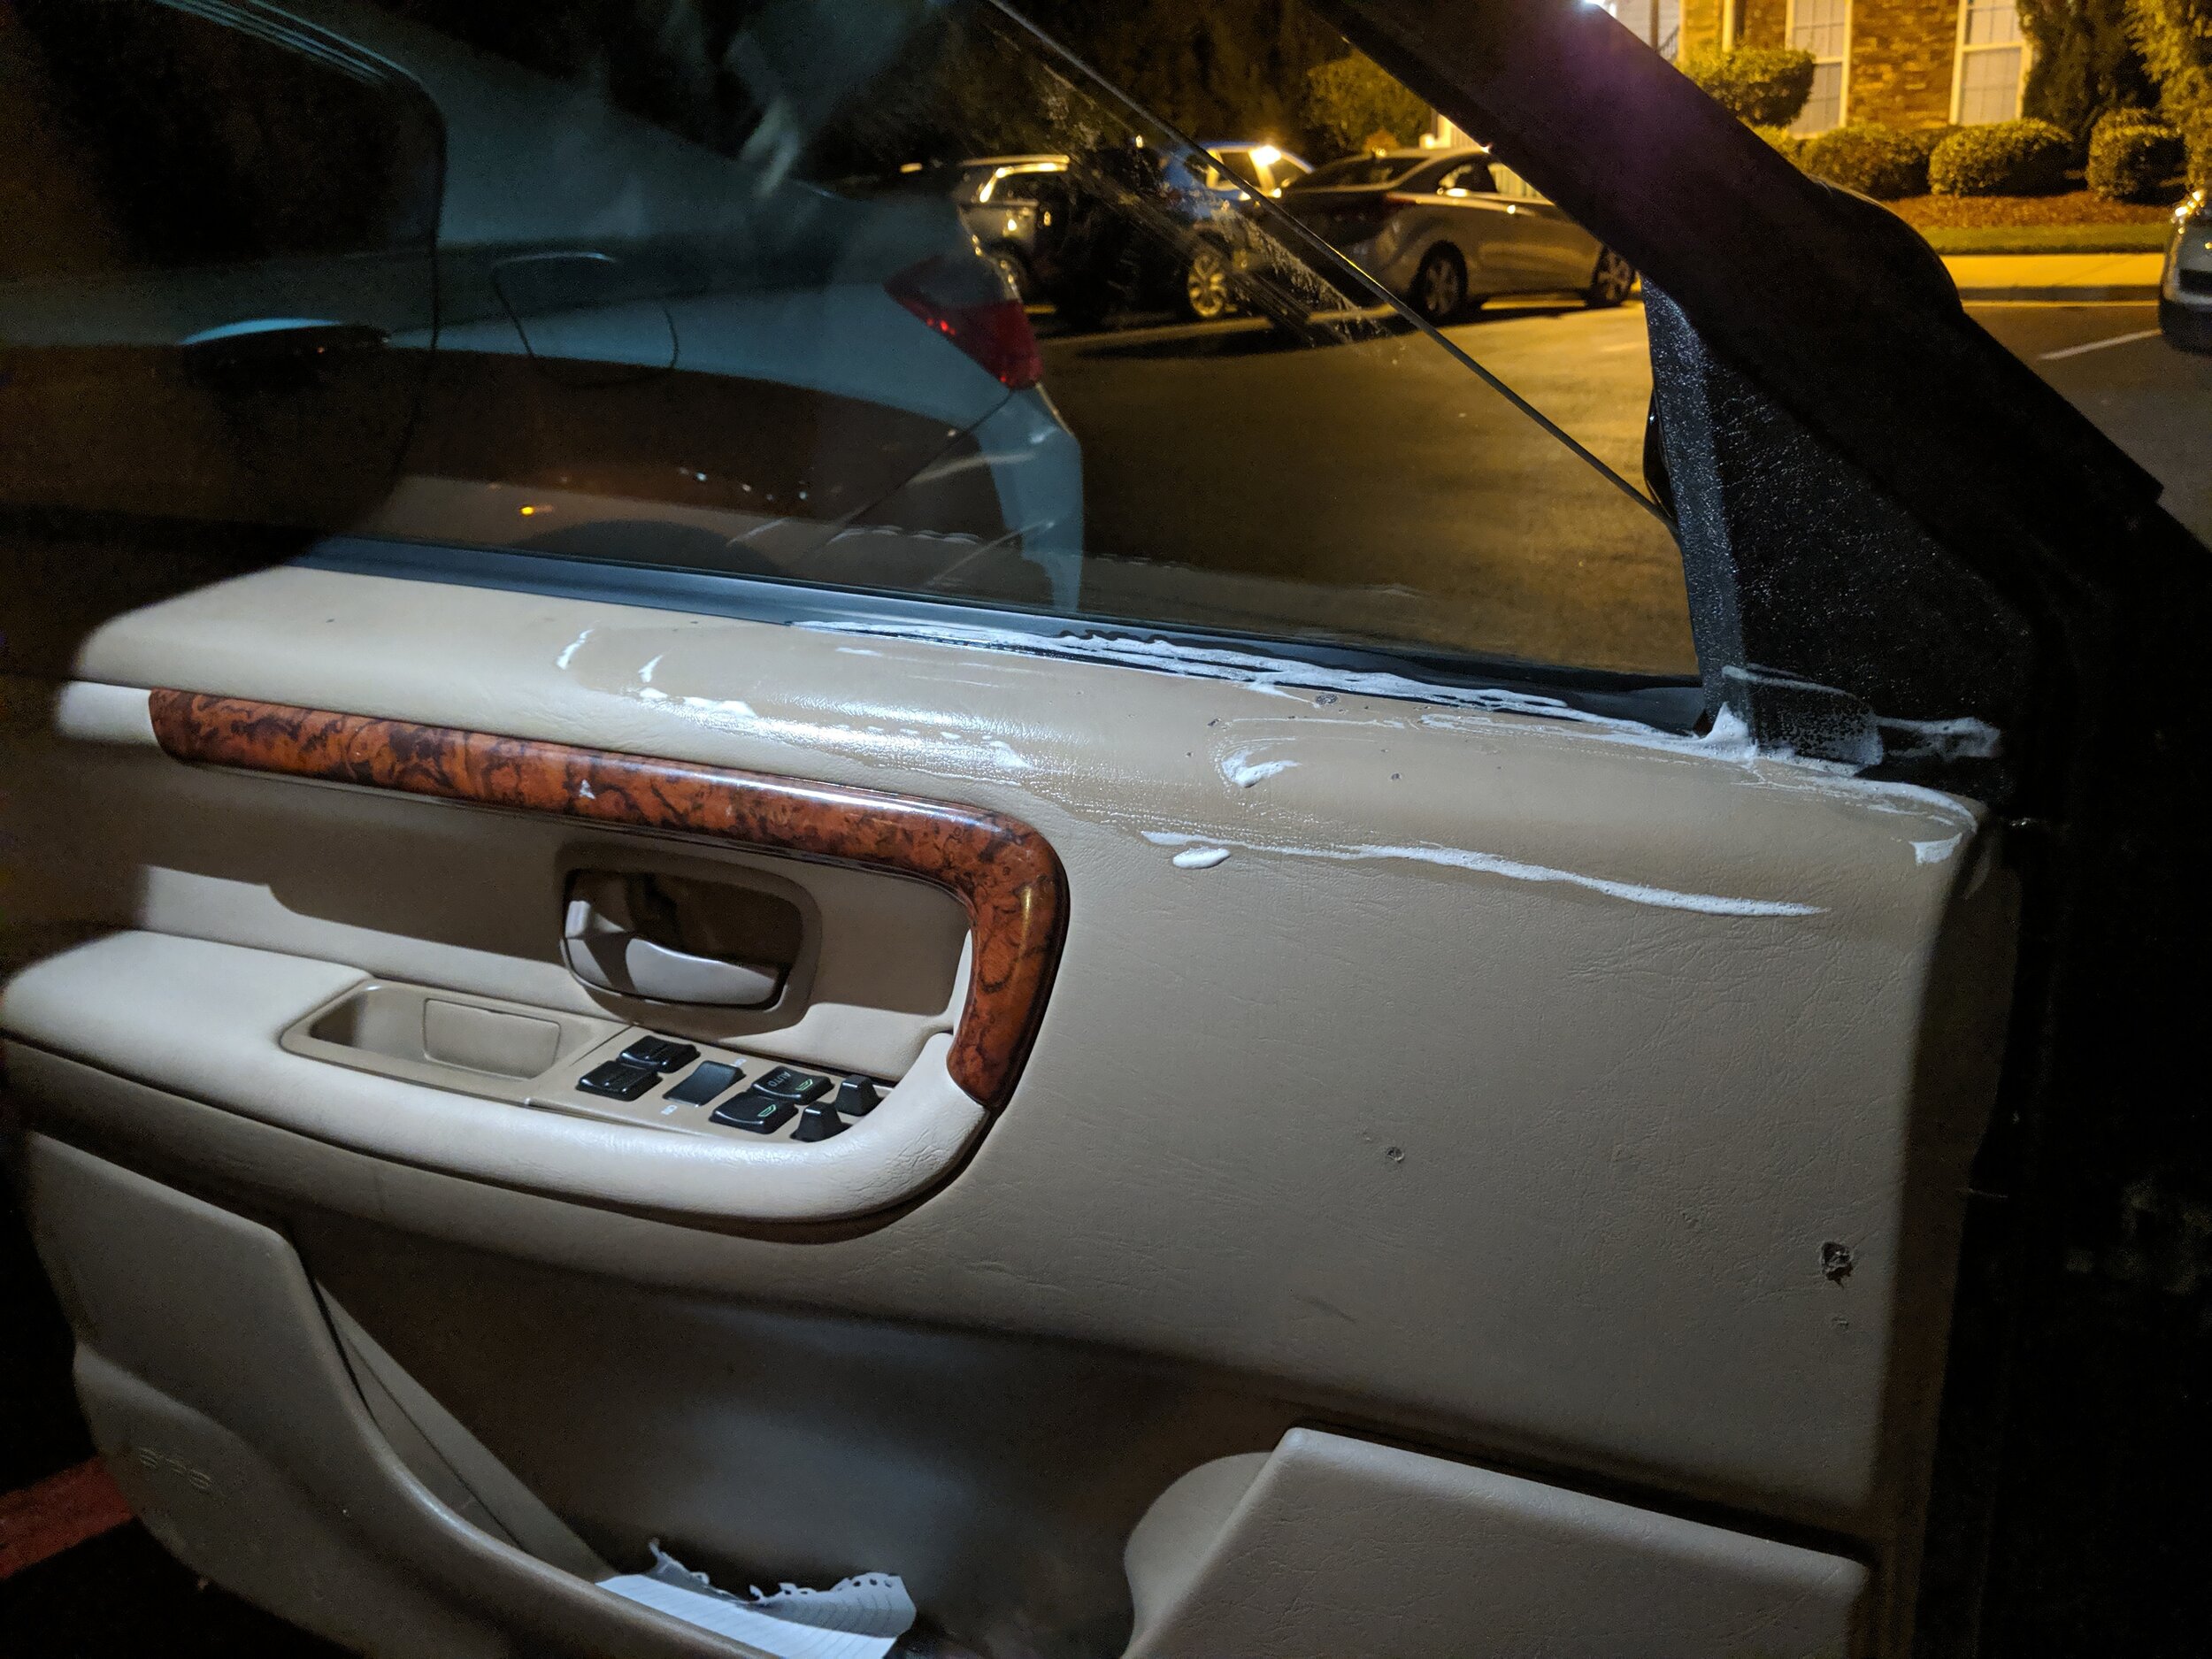
A mixture of Simple Green and a Magic Eraser being used to remove the built up tar and grime from each door card. Note all the cigarette burn holes…
Now this may controversial, but here it goes:
I.
HATE.
PINSTRIPING.
The 960 was no exception. It had to go. Using a rubber wheel on a drill, I slowly worked down one side of the car removing the painted on pinstripe. It must have been originally installed by the first owner since it was severely faded and chipping away in some places. I feel like that stripe gone it gives the side profile of the car a much cleaner appearance. Unfortunately the paint still need a lot of attention at the moment so its not perfect, but from afar (or when wet) it really brings out the clean lines of the wagon.

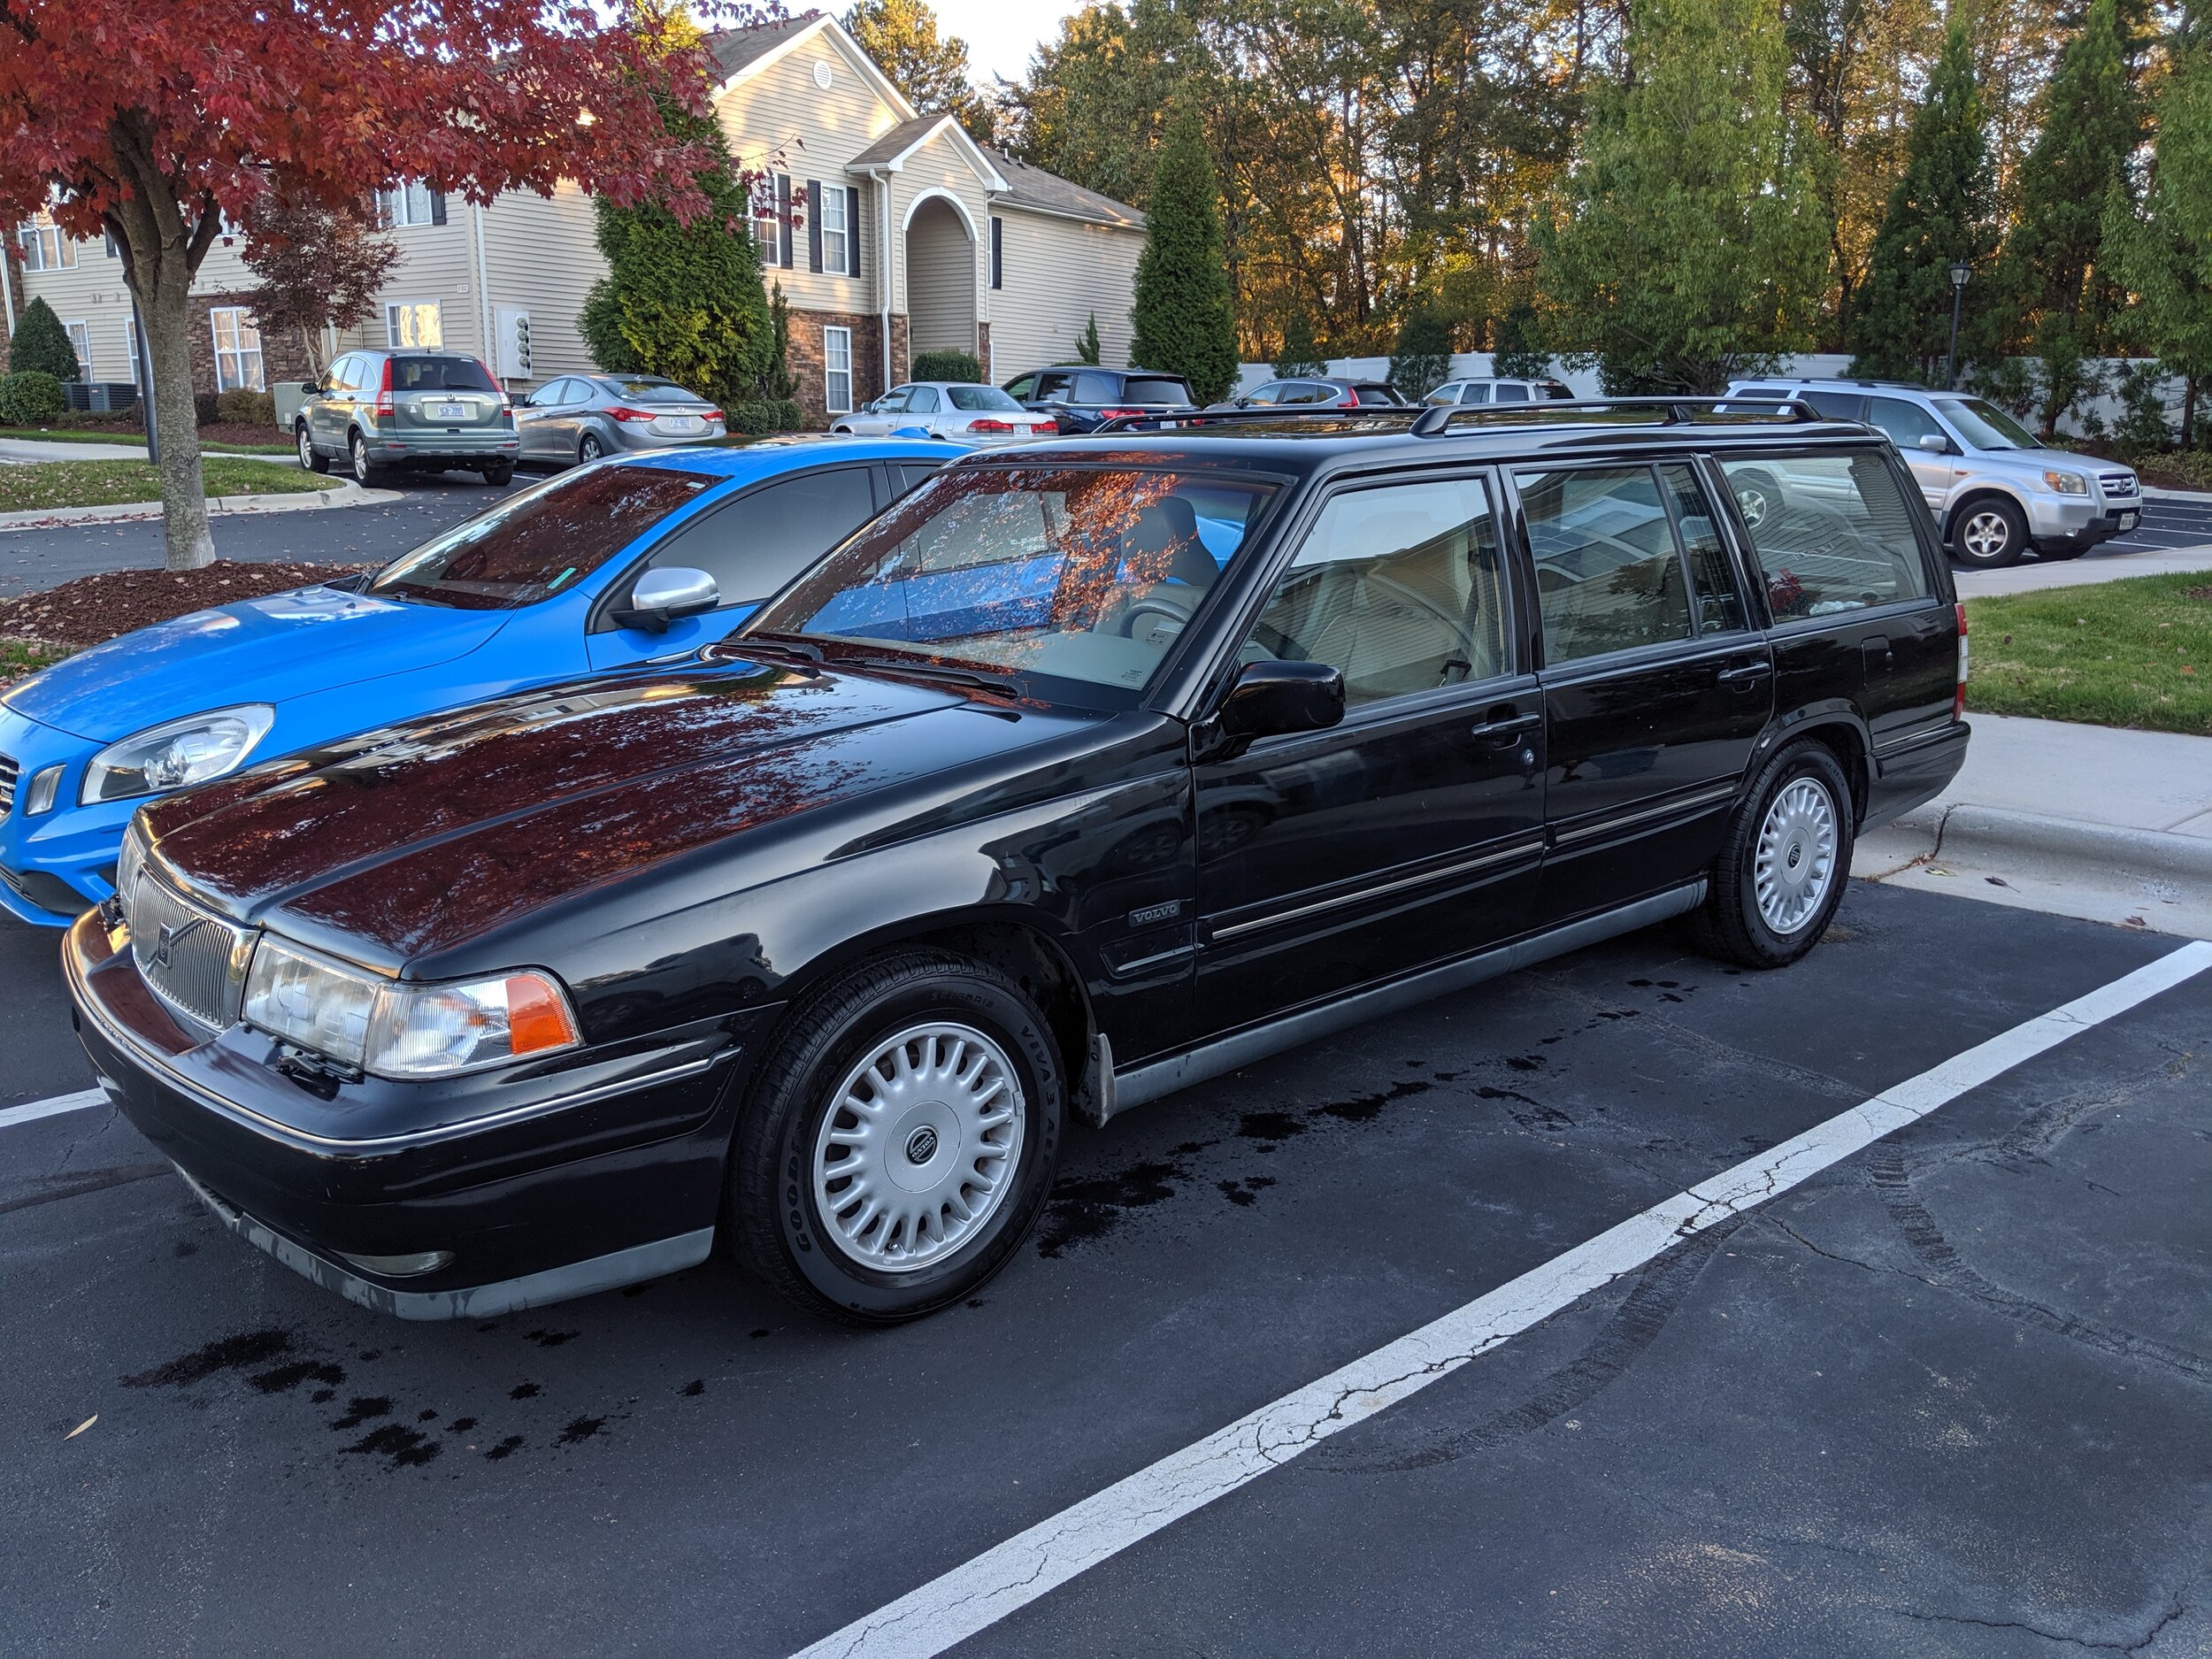
Drivers side after pinstripe removal and a quick 2 bucket wash.
That’s it for this installment. There is still a lot that needs to be done to the 960 before its really ready to be a daily driver in any sort of way. I have yet to tackle the brakes, or suspension. It also has a mysterious fluid leak near the front wheels I have yet to diagnose, as well as a new fuel rail that needs to be installed. I hope to start working on it a bit in my local shop where I can get it up on a lift, but as it sits currently, I am happy with the progress. As usual, feel free to drop a comment or suggestion for the project, there is not much information out there on the 960 series cars so I am always looking for any information I can get my hands on!
As a bonus, I have a picture of the final missing trim piece installed. The owner I bought it from finally found it after 2 months of searching!

This photo really shows the true damage to the paint, hoping a wet sand, buff, and polish may be able to bring back that original shine!
960 Project Pt. 1 - Diving In
So as a I previously mentioned in my first post, the 960 needs a lot of work. Currently it is driving on 5 out of its 6 cylinders and has oil and grime all over the engine bay. One of the first things I did was check the Idle Air Module. This piece regulates the air when the car is idling (as the name suggests) to give the engine a smooth idle at the low RPMs. Unfortunately, their design means that over time they can become filled with oil and grime which causes them to stop working. Checking the full intake system made sense as the parts are easy to access and can usually benefit from a cleanup on any car.

Most of the intake system comes off with a simple screw driver. Most of the system is actually tool-less removal and uses latches to attach everything together. The intake filter seemed to be in decent shape, however the main concern was around the throttle body. Due to the old gasket on the oil cap, oil leaks from the top of the engine down onto a lot of components. I suspect this oil is also the reason for the misfire on cylinder 3. I made sure to clean the throttle body, as well as check the Idle Air Module, as well as inspected the MAF for any buildup.

The gasket of the oil cap can go bad on the 6cyl motor, leading to oil build up around the cap and pooling along areas of the head. The oil from the cap has been leaking significantly, there is buildup around the intake and even the throttle body.

Additionally, while I was in the engine bay I made sure to check the belts. The motor on the 960 series cars use an interference design, meaning that the timing belt is crucial to the operation of the engine. Without the belt, the pistons will rise on the combustion stroke and collide with the stuck open valves since the belt controls when the valves open and close. Unfortunately, the sticker for the last timing belt replacement on this car dates back to 2006 when the car had significantly less miles. I assume that it has been replaced since then since the service interval for the belt is around 40-50k miles.

Not the information you want to see on a car in 2019 with 190k miles on the ODO.
While the timing belt may not look terrible upon my brief inspection, I would HIGHLY recommend that any new 960 owner do the maintenance on it. I plan on using IPDs kit with a new belt, pulleys, and tensioner as any of these components going bad can cause a catastrophic failure of the motor.
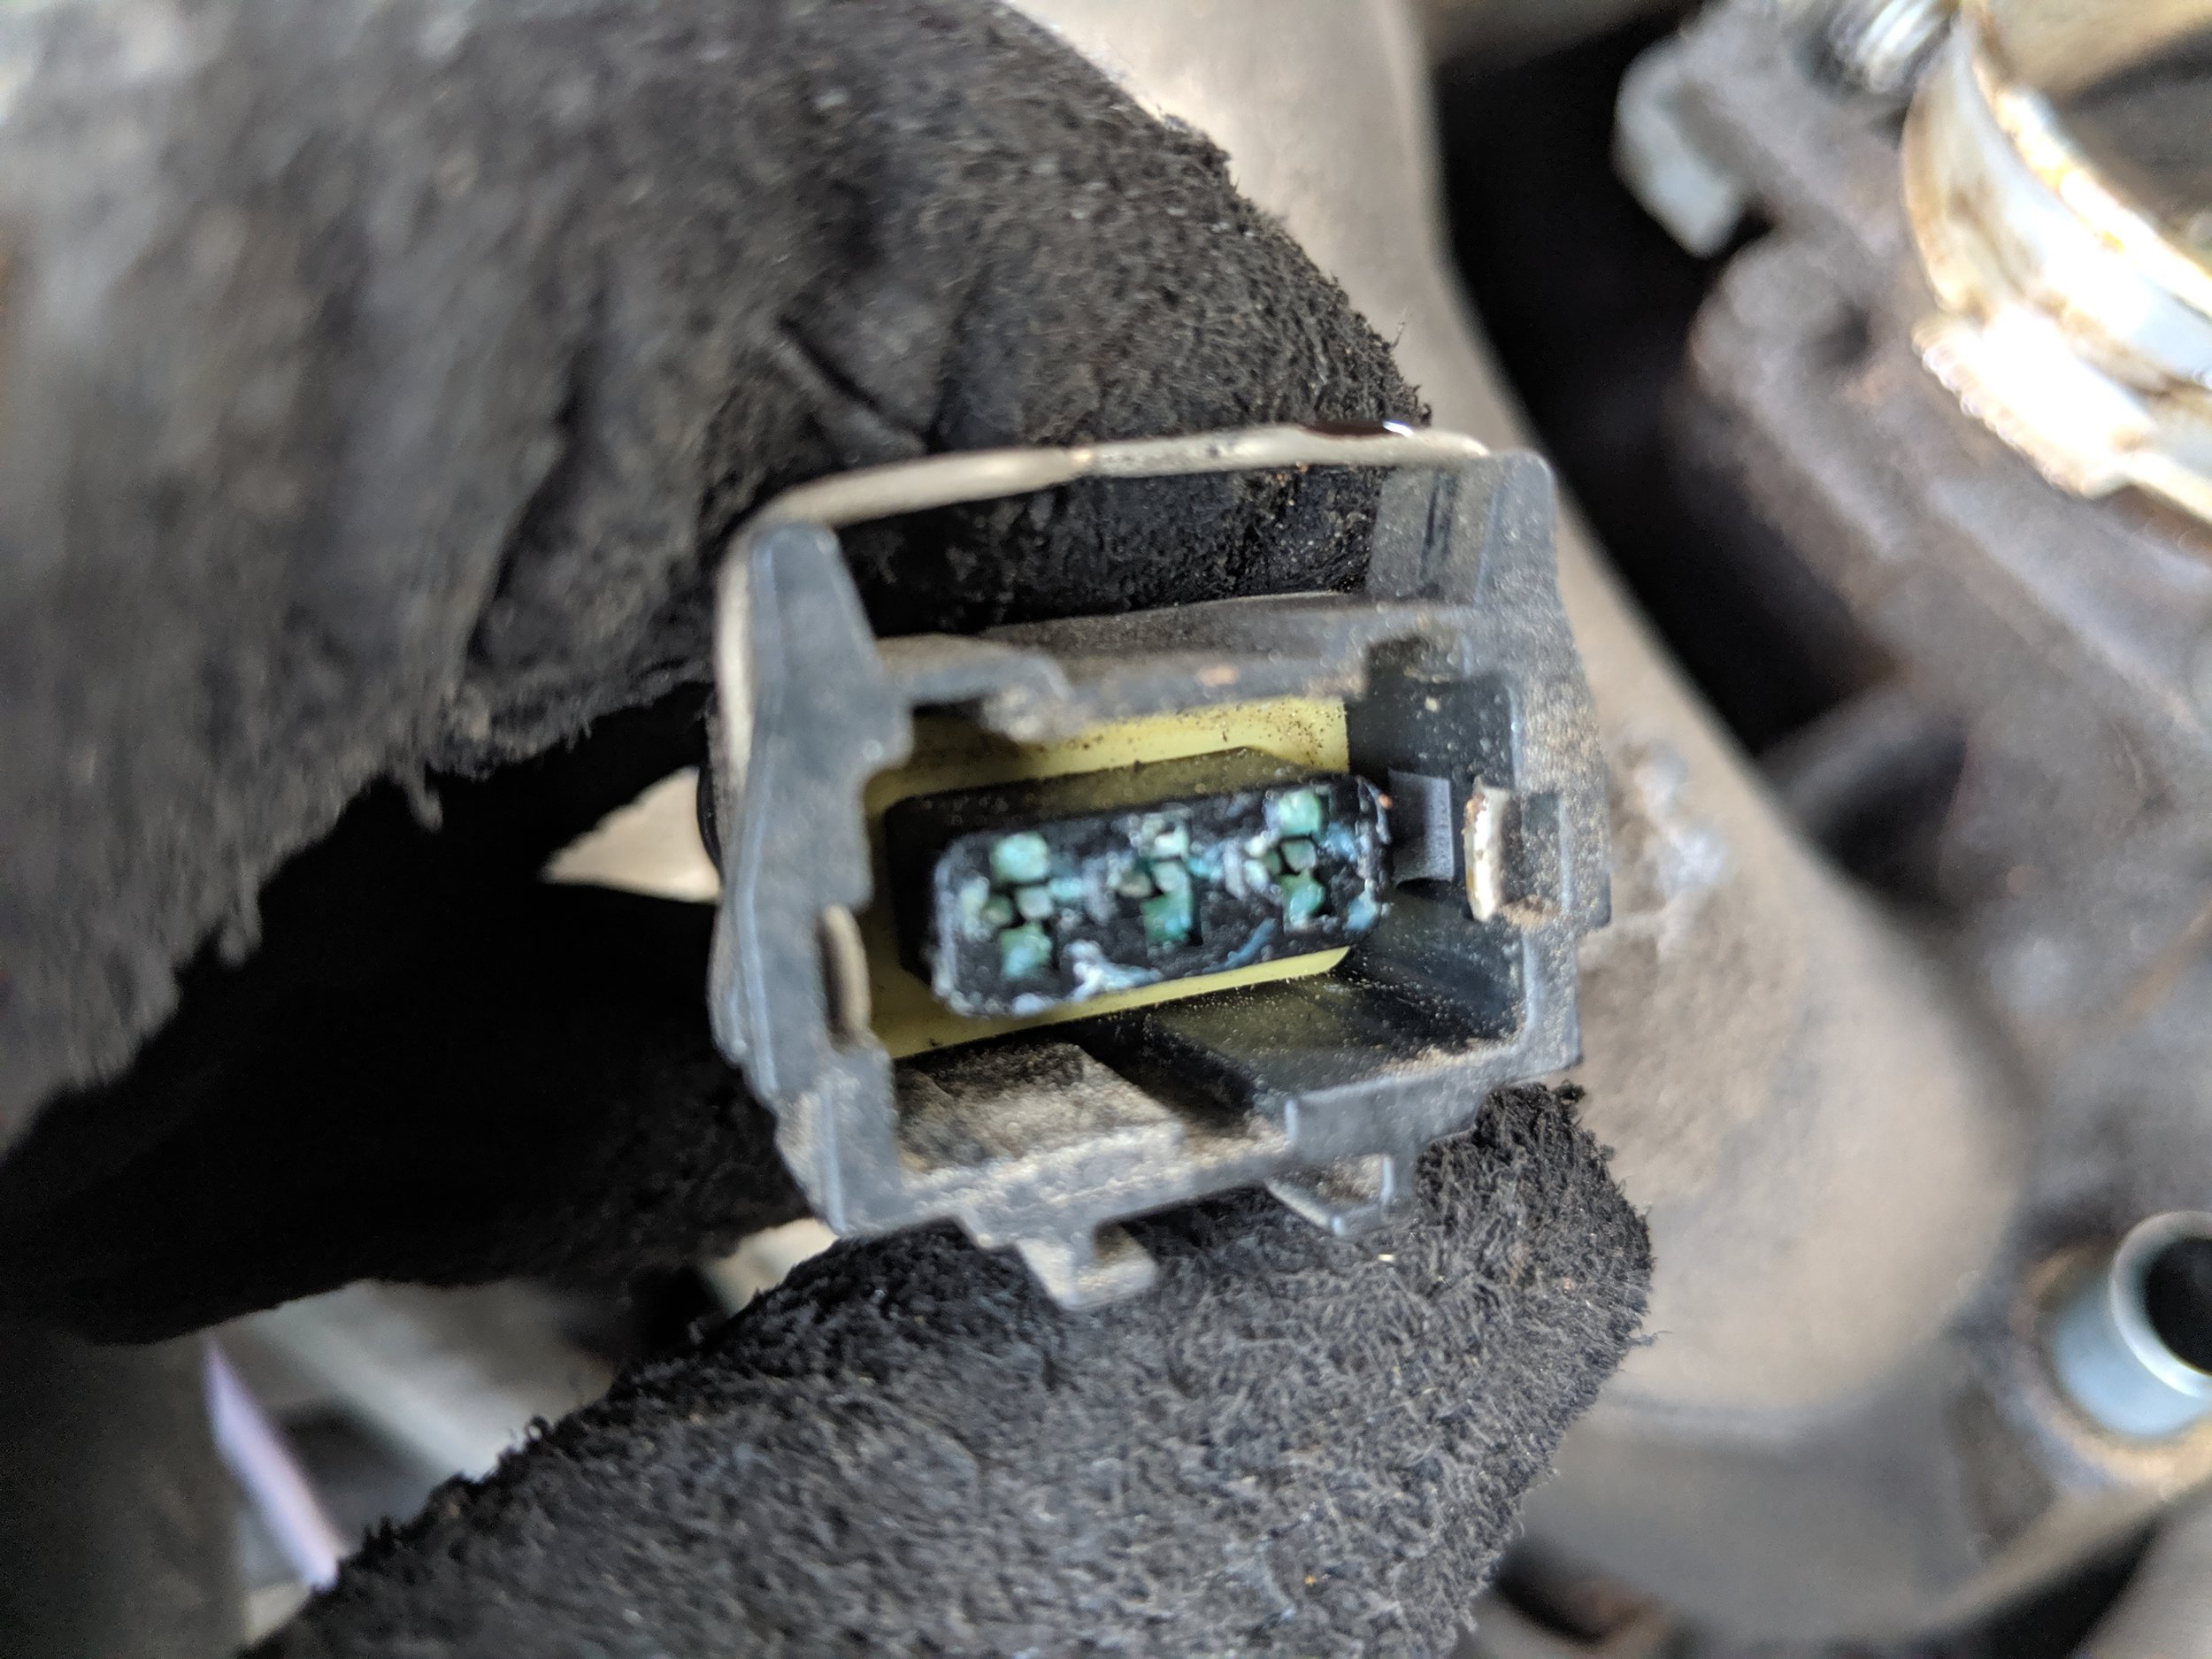
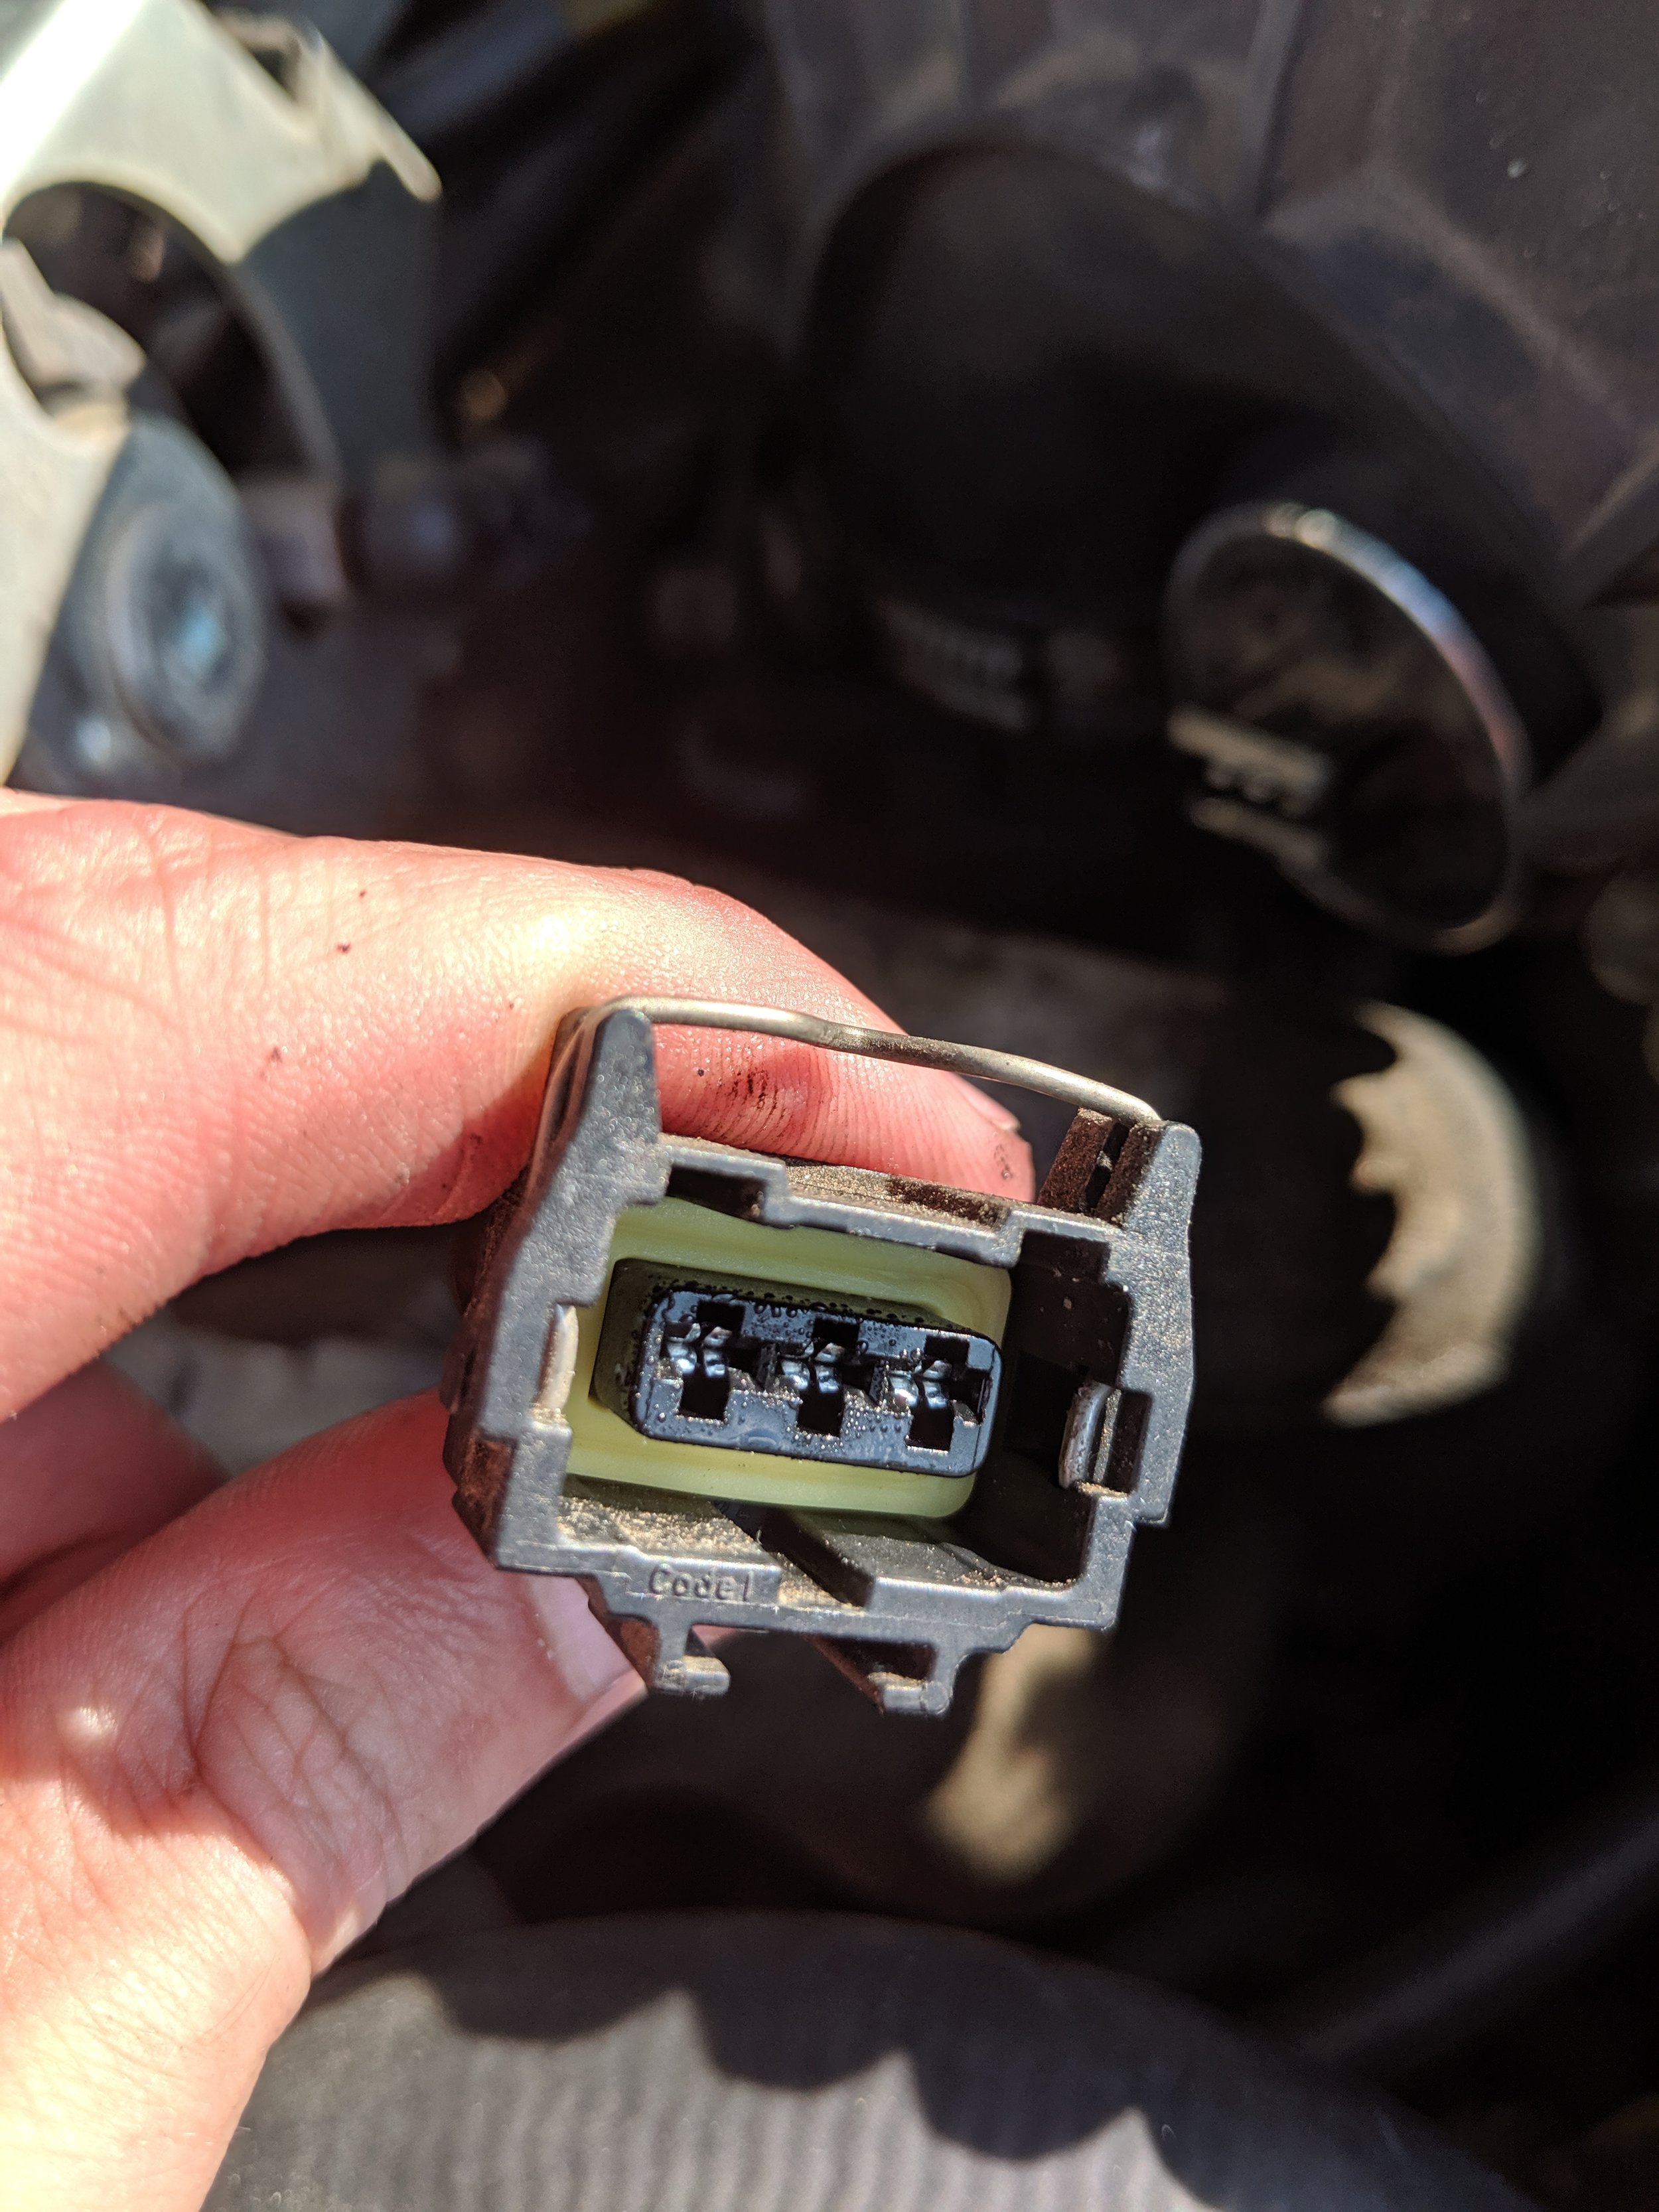
The last fix I did in my initial dive into the car was physically checking the connections around the intake system. Upon my inspection the MAF was very clean and the connectors seemed to be in solid shape. However, on the Idle Airflow Module, I found nasty corrosion that could have been causing issues. I used a can of electrical contact cleaning to remove the corrosion as well as a small pick to clean out any stubborn bits. The female end of the plug on the IACM was also cleaned for good measure.
I apologize that this write up was a bit short, I am writing it many days after I have done the work. For much of my writing, I find it easier to explain my work and processes when it is fresh in my mind and I can dive deeper into the repairs. In part 2 I will be covering the diagnosis of the misfire, and my continued work to resolve it.
Archive
-
2025
- Dec 15, 2025 11-16 Ford Super Duty Remote Start Ultimate DIY Guide Dec 15, 2025
- May 5, 2025 Volvo 700 Series In-Tank Fuel Sender Assemblies - Whats the deal? May 5, 2025
- Apr 28, 2025 Store Update: Shipping Rates and Carriers Apr 28, 2025
- Jan 1, 2025 Cash for Clunkers and Todays Car Marketplace - A Mathematical Analysis on Why Cash For Clunkers Doesn't Matter Anymore. Jan 1, 2025
-
2024
- Nov 25, 2024 11-16 Ford F250 / F350 Super Duty - Definitive Flow-Through Center Console Install Guide Nov 25, 2024
- Jul 30, 2024 13-16 F250 Steering Wheel and Audio Control Upgrade / Retrofit Guide for Dummies Jul 30, 2024
- Mar 13, 2024 Misc. Project - Volvo P3 Desk Chair Mar 13, 2024
- Jan 16, 2024 The Definitive P2 XC90 External Transmission Cooler Writeup Jan 16, 2024
-
2023
- Aug 8, 2023 TFT Display with P3Tool Guide Aug 8, 2023
- Aug 4, 2023 Facility Upgrades and Updates Pt. 2 - Tow Dolly Aug 4, 2023
- Mar 27, 2023 Facility Upgrades and Updates Pt. 1 - John Deere 165 Hydro Restoration Mar 27, 2023
-
2022
- Sep 27, 2022 P3Tool - Volvo Hacking Takes Its Next Big Step Sep 27, 2022
- Aug 25, 2022 Project Nashville Pt. 3 - MOST Excelent! Aug 25, 2022
- Jun 28, 2022 NordCarolina Shop Update! Jun 28, 2022
- Jun 20, 2022 Project Nashville Pt. 2 - Tech Talk Jun 20, 2022
- May 12, 2022 And I Would Drive 500 Miles - Project Nashville Pt. 1 May 12, 2022
- Mar 14, 2022 On life, cars, and business. Mar 14, 2022
-
2021
- Jul 19, 2021 Volvo 960 Project Pt. 6 - Still Alive Jul 19, 2021
- Mar 12, 2021 Volvo 780 Bertone Project Pt. 2 - Why buying another persons project is the WORST. Mar 12, 2021
-
2020
- Dec 7, 2020 Volvo 780 Bertone Project Pt. 1 - In Over My Head Dec 7, 2020
- Dec 7, 2020 Volvo 960 Project Pt. 5 - Taking my time. Dec 7, 2020
- Sep 11, 2020 A Very Volvo September Sep 11, 2020
- May 15, 2020 960 Project Pt. 4 - End of Spring Almost Summer Updates May 15, 2020
- Feb 3, 2020 960 Project Pt. 3 - Always Remember Your Oil Feb 3, 2020
-
2019
- Dec 17, 2019 Nord Carolina - Starting my own E-Commerce Platform for Volvo Enthusiasts Dec 17, 2019
- Nov 20, 2019 960 Project Pt. 2 - I built it one piece at a time... Nov 20, 2019
- Oct 2, 2019 960 Project Pt. 1 - Diving In Oct 2, 2019
- Sep 20, 2019 1997 Volvo 960 Project Pt. 0 - $800 Worth of Headaches Sep 20, 2019
- Aug 3, 2019 VDASH Pt. 2 - Cloud Based Car Tuning Aug 3, 2019
- Jul 2, 2019 VDASH Pt 2. is coming.... Jul 2, 2019
- Apr 1, 2019 VDASH Pt. 1 - A new tool for a modern Volvo hacker Apr 1, 2019
- Mar 18, 2019 2013+ Shifter Retrofit Project Pt. 2 - Reconstruction and Installation Mar 18, 2019
- Feb 17, 2019 2013+ Shifter Retrofit Project Pt. 1 - Preparation and Disassembly Feb 17, 2019
- Feb 2, 2019 The P3 Common & Uncommon Repairs Documentation Project Feb 2, 2019
-
2018
- Dec 28, 2018 Mini-Post: New side skirt. Dec 28, 2018
- Dec 8, 2018 Driveability and Performance Report: December 2018 Dec 8, 2018
- Oct 8, 2018 Audio Modules & The Return to Boostmoose Oct 8, 2018
- Jul 28, 2018 The Final Report: 850R Beauty Shots Jul 28, 2018
- Jul 17, 2018 Mid-July Summer Update Jul 17, 2018
- May 15, 2018 Summer Progress Update May 15, 2018
- Apr 1, 2018 850R - Stage 0 Dreams Pt. 2 Apr 1, 2018
- Mar 18, 2018 850R - 960 Throttle Body Upgrade pt. 1 Mar 18, 2018
- Mar 14, 2018 850R - Seat Restoration Mar 14, 2018
- Jan 18, 2018 S60R - Wrap Repair + Driving the Eastern Shore Jan 18, 2018
- Jan 1, 2018 S60R - Vinyl Wrap Jan 1, 2018
-
2017
- Dec 4, 2017 850R - Better and Brighter Tail Light Installation Dec 4, 2017
- Dec 4, 2017 S60R - Holiday Charity Laps at Virginia International Raceway Dec 4, 2017
- Nov 16, 2017 850R - Junkyard Pulls for Performance & New Rear Lights Nov 16, 2017
- Nov 15, 2017 S60R - Scheduled maintenance.....yawn. Nov 15, 2017
- Nov 3, 2017 850R - Stage 0 Dreams Pt. 1 Nov 3, 2017
- Nov 1, 2017 850R - Firestone Fixes CV Axle while Suspension Nears Completion Nov 1, 2017
- Oct 28, 2017 850R - Axle Removal and CV Boots Halt Progress Oct 28, 2017
- Oct 27, 2017 850R - Air Tool Woes and Broken Brakes Oct 27, 2017