
NordCarolina Blog
Formerly BoostMoose.com
Volvo 780 Bertone Project Pt. 2 - Why buying another persons project is the WORST.
Well already 2 months have passed of 2021, and here I am writing an update on my 1987 780 whilst sitting at my cold garage desk. To say this project has gone way deeper than I expected would be an understatement, but it has been a great learning experience along the way. As usual with these “catch up” posts, I will start from the oldest photos I have and work my way up to the present. This allows me to try and cover in-depth what I am doing and why, as well as structure the narrative a bit better. Without any further rambling, lets begin.
Lots of the work on the car so far has been in the engine bay. As expected with a PRV, nothing is quite perfect, and getting replacement parts is no easy task. Many of the parts are standard Volvo and Bosch units, however things like the Fuel Pressure Regulator is a Bosch part shared with a few air-cooled Porsches of the era, making them impossible to find at a reasonable price.

An engine bay detail was in order to really give the car some new life, as well as increase my quality of life while I spent long hours wrenching away.
Finally solving my rough running issues (which still somewhat persist now unfortunately), was a massive research undertaking. One piece I never checked originally was the cars air filter and MAF, a good place to start with any car suffering from performance issues. What I found was something I had never seen before.

Inside the filter housing.

The inside of the Bosch MAF
Let me explain these two photos. At some point Ether was used to try to start the car. Well the resulting backfire from this process caused the air filter to light on fire, which then melted the plastic. This molten plastic, then was sucked through the MAF from the engines vacuum, which coated the inside of the MAF in plastic, completely destroying it. Not once have I ever seen something like this. Thankfully, I was able to source a good used MAF, and trim the melted plastic out of the air filter housing. One problem for the books.
Next I replaced the “thermotimer”, which is Volvos name for the coolant temp. sensor. The unit on the car was original, and most likely as to blame for some of the rough running issues.
Last piece was the fuel pressure regulator, which was leaking significant amounts of fuel into the engine bay as well as past its rubber diaphragm. The old gas in the tank was sucked out as it had expired many years ago, and fresh premium gasoline was added to the tank. The filter was not replaced, however I may do that as well.

Moving on from the engine bay it was in order to clean up some pieces around the chassis that had been overlooked or improperly repaired by the previous owners. When the car was up on the lift it was easy to see that one of the sway bar end links had been damaged at some point, somehow resembling a “J” shape.
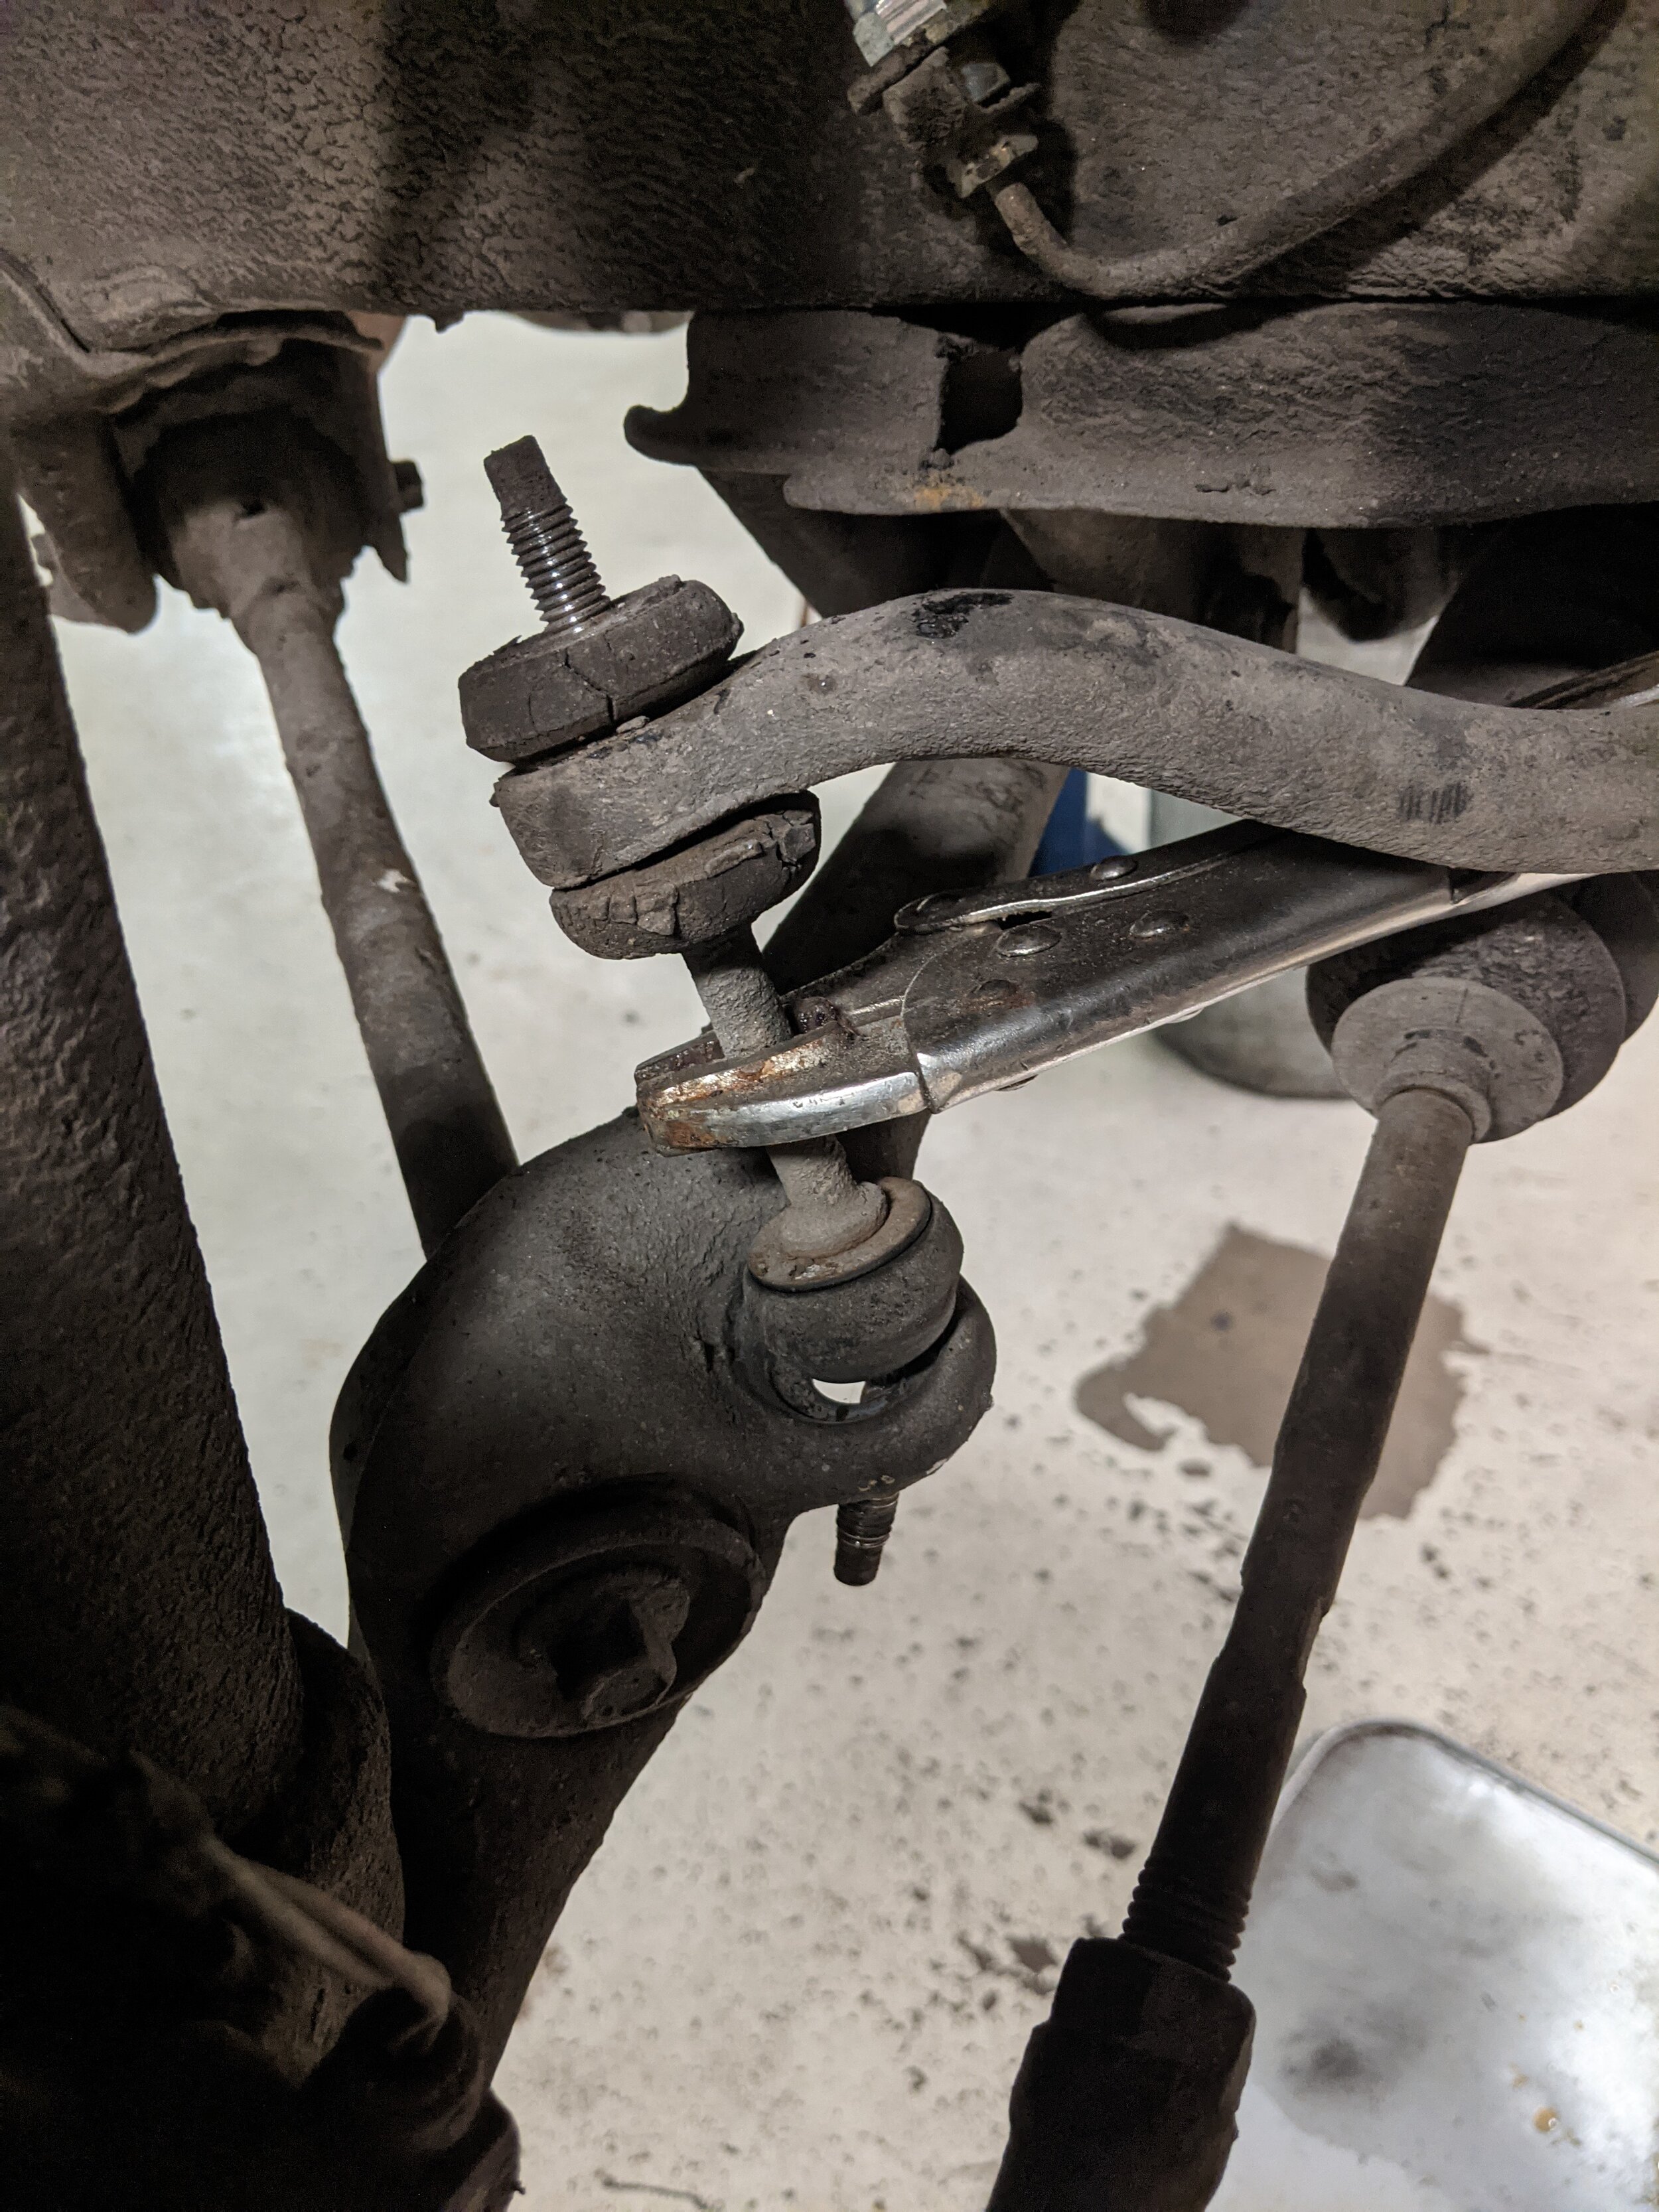
Vice grips were needed to prevent the rusted up end links from free spinning when removing the bolts.

The drivers side vs. passenger side end links.
As you can see from the photos, these were most likely original as well. The bent side was obviously trash and missing the lower bushings as well. Installation of these is actually very straight forward, and doesn’t even use a ball joint like many modern cars. These simply are a threaded rod with 2 bushings on each end to sandwich the chassis and sway bar.
Small details like the gas door cap were also fixed. This one really upset me because of the way it was repaired. These fuel doors were used on many different model Volvos, and a rebuild kit from online suppliers like IPD cost about $10 for a new clip and spring. The previous owner of this car was very liberal with their use of butyl “dumdum” tape.

Rivets and butyl tape…completely unneeded.
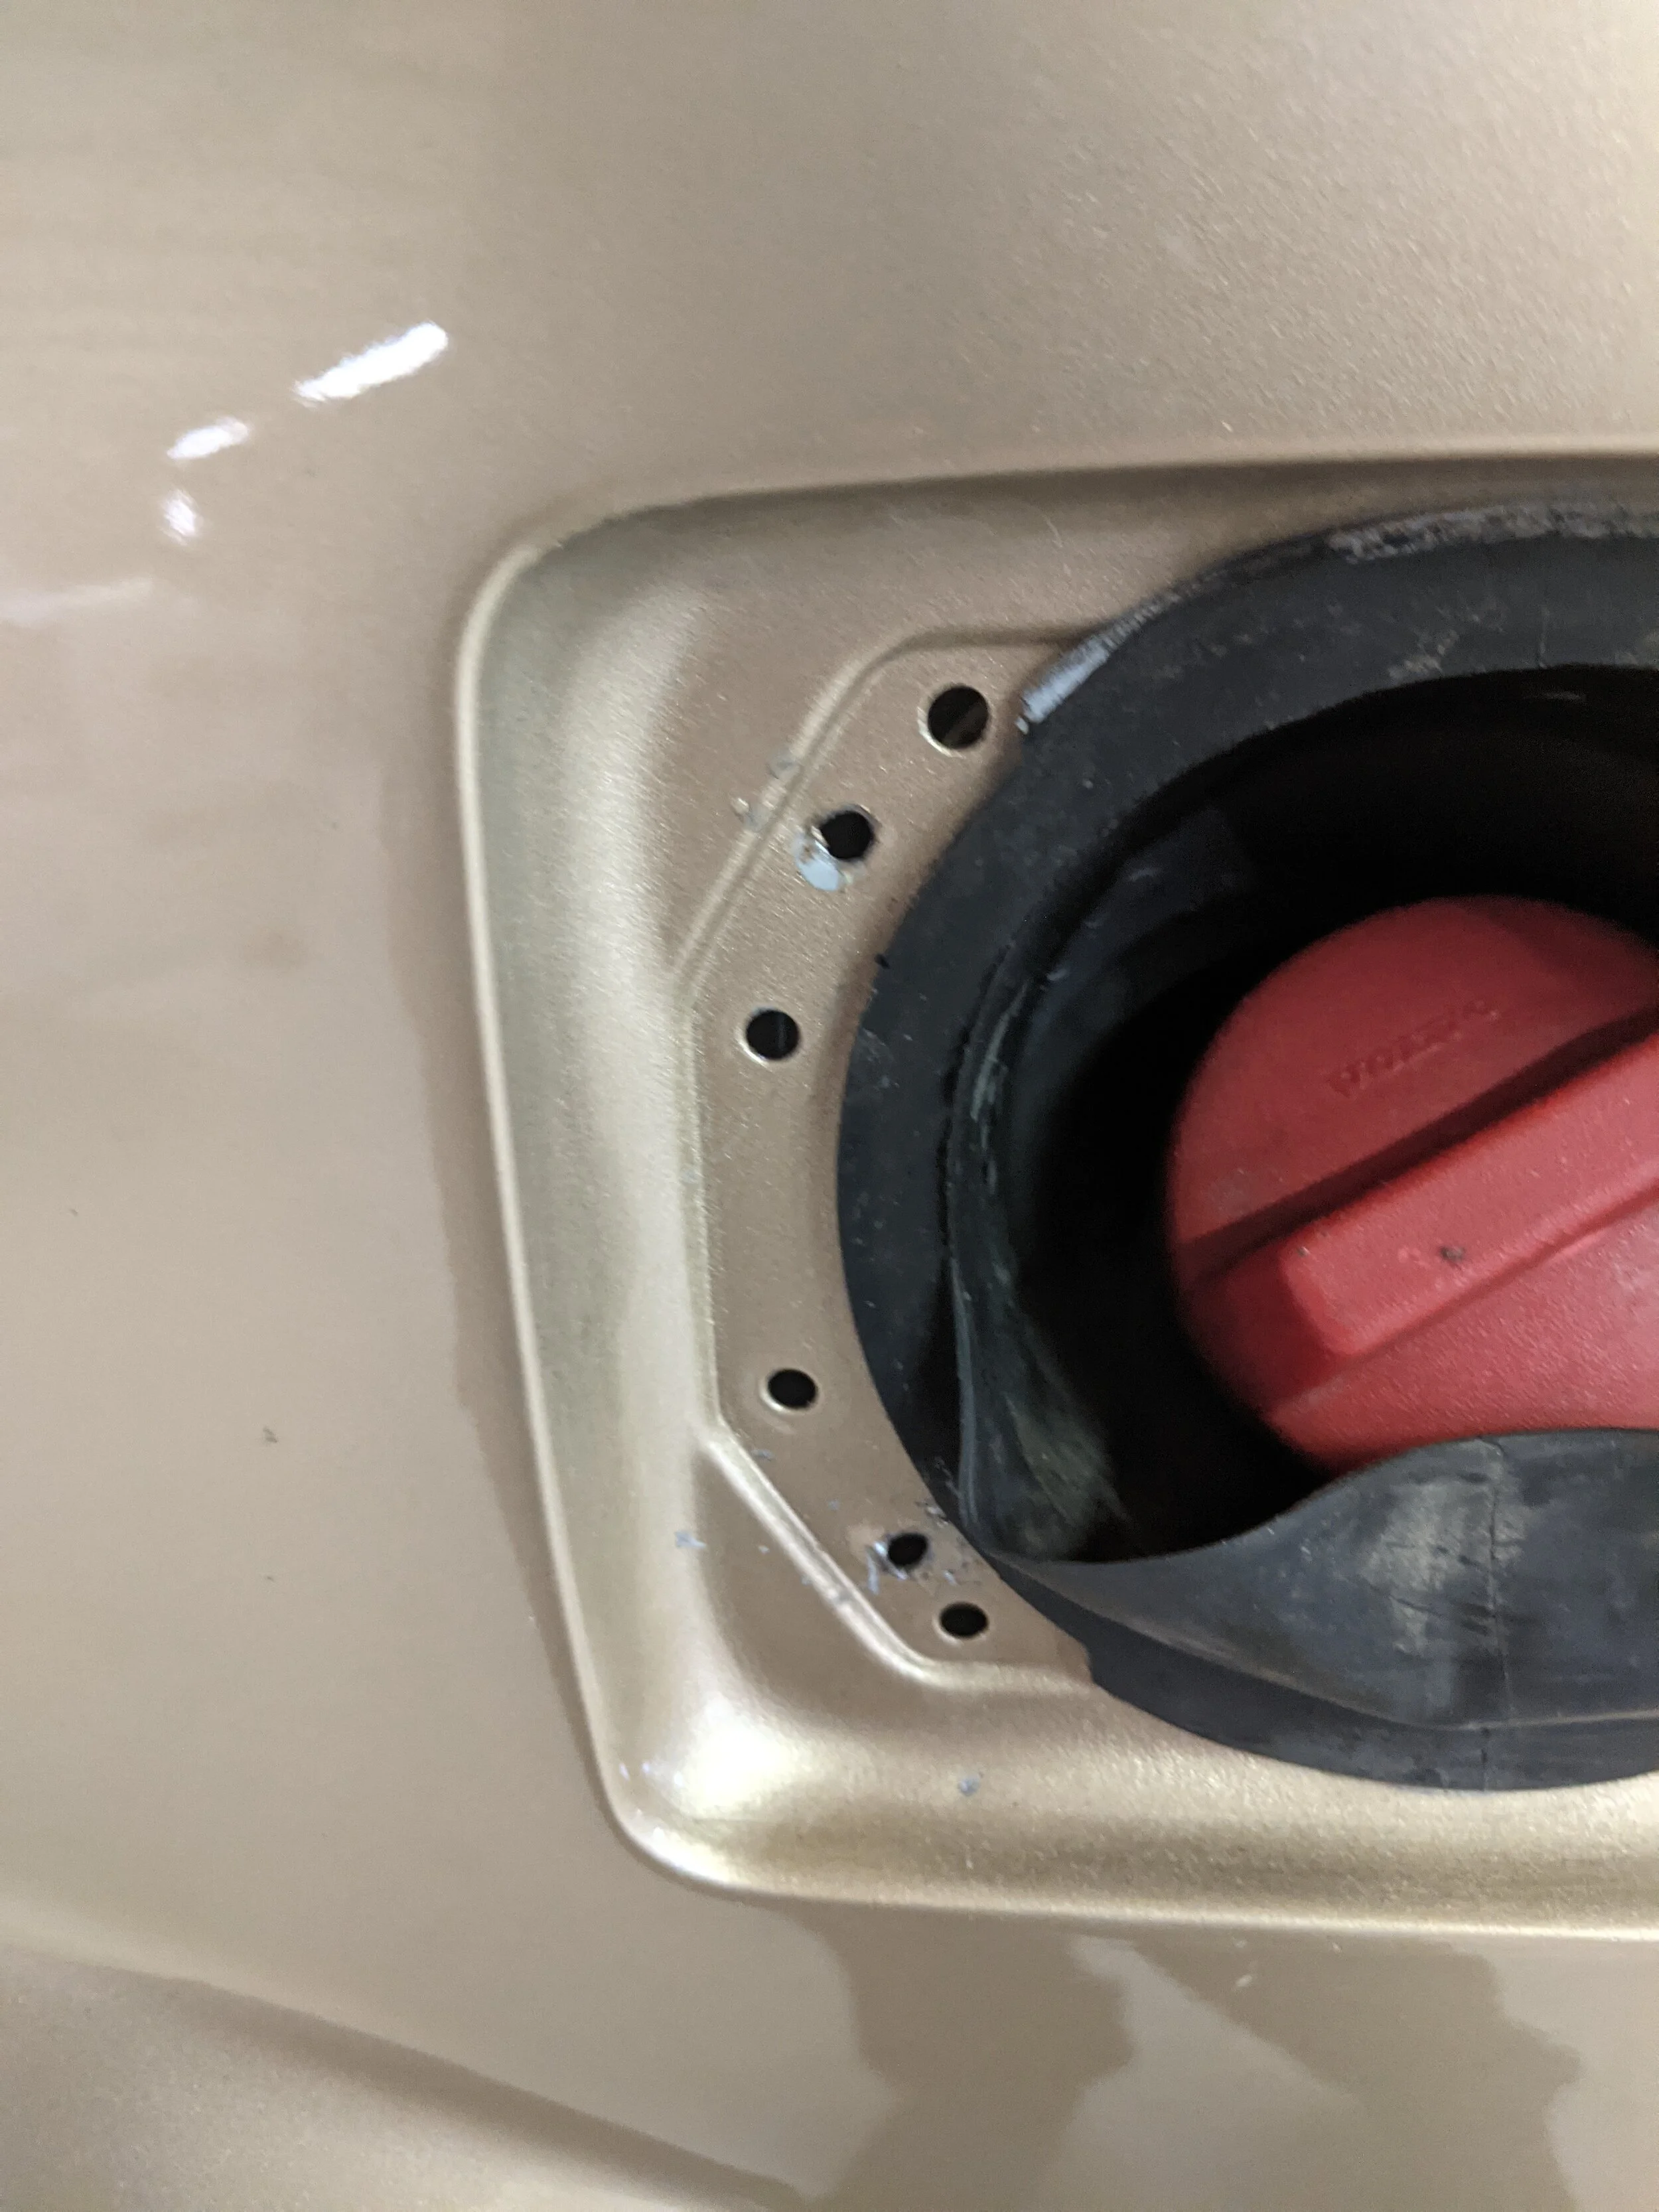
The rivets and tape were carefully removed to not exacerbate the damage they had done any more. The area was then wiped down and I was able to snap the new hinge into place. Its the small details that can really add value and show that the car was properly cared for, not just thrown together. Its these small details that I always strive to fix and improve, especially on a car as rare and collectible as this.
Part 3 should be following this write up soon. I wanted to split this into a few sections as I have a whole writeup on the power seats planned. Lets just say, its not a pretty sight…
Volvo 780 Bertone Project Pt. 1 - In Over My Head
So I had planned to make a write up on the 780 Bertone much before this month, but with work slowing down it was time to get in the holiday spirit of spending money and actually work on the 780. To make this simple for myself to follow (since it has been a slow couple of months tinkering with the car), I wanted to get a list made of everything I had marked down that the car needed when I got it. As follows:
Passenger side hood latch not catching
Radio mast bent / broken
Radio not working
Light fault warning
Poor idle
Broken drivers seat controls
Oil Change
Brakes going to floor
Check coolant
Electrical gremlins in dash / lighting system
Suspension damage
Exhaust rust
Interior needs lots of TLC
Quite the extensive list I know. One of the first the first things I wanted to tackle was the mechanical bits and bobs so that I could actually drive the thing without it stalling or hitting a tree. First up was the brakes. I was told when I got the car that they were bad, and I was hoping for the best but expecting the worst. Got the car up on the rack and removed the wheels hoping that maybe it was just air in the lines.

After a full flush, it was becoming apparent that it was NOT a problem with air in the lines, but an issue with the master cylinder bleeding off pressure. Luckily brake master cylinders for these cars are shared with the 700 series as a whole, and as such I was able to get a good reman. one for the cheap.

The reservoir was cleaned thoroughly to ensure all the old crusty fluid was not going to contaminate the new master.
Thankfully installing one of these is just 2 bolts and 2 hardlines, and within an hour the new system was installed and bled. Now, the car could easily drive itself around the shop yard without being a complete risk of rolling away.
Next in the process was the hood / grille situation. I would like to mention that this car is repainted, and due to this many of the little trim pieces and parts have been removed and reinstalled. The grille was fixed in such a way that it was skewed at an angle, and this was quickly fixed by setting it correctly into its spot and using a new push tab to secure it.

The moisture in the headlight was easily remedied with a fan pointed into a funnel which was inserted into the bulb hole.
One of the larger issues was the hood not latching on one side, and I will preface this by saying that my “fix” still isnt 100% however it does work. These cars use a cable that pulls two releases (one on each side of the hood). One of these latches, due to the nature of the cable stretching over time, does not like to reset back into place once pulled, causing the hood to not properly relatch. Two adjustments were made for this, one in the car where the cable handle can be tightened to pull out slack, and greasing of the mechanism to help it return to its place. Unfortunately it still wants to stay in the open position, however it can be easily returned to place with a small flathead.

The silver bar slides over the hood bar to latch into place.
Moving into the engine bay, I wanted to start tackling the idle and rough running issues I was experiencing with the car. Thankfully, the previous owner had left a lot of new parts in the trunk for me to install like spark plugs, spark plug wires, distributor, distributor cap, and few other odds and ends. I figured I would throw all these parts into the car and see where it got me.

After the install of all these parts, unfortunately I was still getting a seeking idle as well as a slight misfire above 2500RPM. Time to hit the books, and really get my hands dirty with this motor.
Volvo 960 Project Pt. 5 - Taking my time.
960 Update
As luck would have it, the 960 started acting up just as I sold the S60. I was driving on Saturday around town when it suddenly started losing power. Immediately the engine began jumping in a feeling that I knew all too well from when I first got the car. Cylinder 2 was misfiring, and the loss of power was nothing short of significant as I was able to limp the car back to the shop under its own power. About a month prior during my road trip back from Florida I got a code for a lean running condition. I cleared those codes and they stayed gone for a wile, but now I can see that it was most likely the bad injector/spark plug I had starting to die on me. My first course of action was to replace the injectors as I had a spare set left over from the 850 days. The 960 actually uses the same Bosch injector as an 850. Installation is straight forward on the 960 as there are only 3 bolts holding the fuel rail in place. The bolts can be tough to access, and dropping one can mean losing it forever down below the intake manifold. For this I recommend using “dum-dum tape” which is 3M’s butyl rubber tape. A dab of the stuff inside a socket keeps the bolt securely in place during removal and the installation later on.
The plugs were also replaced at this time, I have no previous records on the car so most things I do are a mystery as to when they were last changed. The previous owner had installed NGKs which was a nice relief, and I used a Denso as a replacement as we already had them stocked in the shop. With the misfire resolved, it was time to test drive…
After only a few minutes the CEL was back on. This time for a rich condition. Damn. Back to the drawing board.
Well I knew that the condition had to have come from the “new” injectors. These were old used injectors from a junkyard car, so they were a mystery if they worked properly or not. I ordered a set of re manufactured injectors and began to inspect the ones I had.
My 960 most likely had its still original injectors. I could tell because all 6 bore the “A” mark, meaning they were part of the first batch of injectors that Bosch made for this part #. The 850, had 5 “B”s, and we also had a few spare “E”s in the shop.

I made sure to mark the old and new injectors so that I could tell which ones I replaced and which ones were “new”.
After I received the new injectors, I took a look at the rest installed in the car and found what was most likely causing my issues, broken O-rings.

Most of the injectors had broken or no pedestal, and this one had a very damaged O-ring.
One thing I did note about the reman. injectors I received was that they were all from different batches. While I later learned that it doesn’t make a difference, it would have been a nice peace of mind. These fresh injectors were tested and had new hardware like rings and caps. They were installed without a hitch and it has been running without a hitch (fingers crossed).
Everything was going great for about 3 hours. Thats when I decided to take the car out to go grab some dinner. Arrive at the location, go to grab the inner door handle and POP, the handle went limp on me. It still actuated the door, however it was not returning into place. In my haste, I got home, grabbed my tools, and began to remove the door panel. Well I did this without a guide so I just brute forced the doorcard off, thinking it would be the same as my S60. Well I was wrong, it destroyed the clips at the bottom that have a pop out retainer on them which is easily removed from the door…
You live and you learn.
Well I did find the culprit to my issue. The spring in the handle had sheared clean in half!

This is supposed to be one piece…
Removing the handle on the 960 is an easy process and only requires a punch / screwdriver and a hammer. It is help in with a pin with the spring behind it providing a force to return the handle to its resting location. A quick trip to LKQ and I had a new spring ready to go. I also had to order new pins for the door, but for now it is solid with just the screws behind the grab handle.
Archive
-
2025
- Dec 15, 2025 11-16 Ford Super Duty Remote Start Ultimate DIY Guide Dec 15, 2025
- May 5, 2025 Volvo 700 Series In-Tank Fuel Sender Assemblies - Whats the deal? May 5, 2025
- Apr 28, 2025 Store Update: Shipping Rates and Carriers Apr 28, 2025
- Jan 1, 2025 Cash for Clunkers and Todays Car Marketplace - A Mathematical Analysis on Why Cash For Clunkers Doesn't Matter Anymore. Jan 1, 2025
-
2024
- Nov 25, 2024 11-16 Ford F250 / F350 Super Duty - Definitive Flow-Through Center Console Install Guide Nov 25, 2024
- Jul 30, 2024 13-16 F250 Steering Wheel and Audio Control Upgrade / Retrofit Guide for Dummies Jul 30, 2024
- Mar 13, 2024 Misc. Project - Volvo P3 Desk Chair Mar 13, 2024
- Jan 16, 2024 The Definitive P2 XC90 External Transmission Cooler Writeup Jan 16, 2024
-
2023
- Aug 8, 2023 TFT Display with P3Tool Guide Aug 8, 2023
- Aug 4, 2023 Facility Upgrades and Updates Pt. 2 - Tow Dolly Aug 4, 2023
- Mar 27, 2023 Facility Upgrades and Updates Pt. 1 - John Deere 165 Hydro Restoration Mar 27, 2023
-
2022
- Sep 27, 2022 P3Tool - Volvo Hacking Takes Its Next Big Step Sep 27, 2022
- Aug 25, 2022 Project Nashville Pt. 3 - MOST Excelent! Aug 25, 2022
- Jun 28, 2022 NordCarolina Shop Update! Jun 28, 2022
- Jun 20, 2022 Project Nashville Pt. 2 - Tech Talk Jun 20, 2022
- May 12, 2022 And I Would Drive 500 Miles - Project Nashville Pt. 1 May 12, 2022
- Mar 14, 2022 On life, cars, and business. Mar 14, 2022
-
2021
- Jul 19, 2021 Volvo 960 Project Pt. 6 - Still Alive Jul 19, 2021
- Mar 12, 2021 Volvo 780 Bertone Project Pt. 2 - Why buying another persons project is the WORST. Mar 12, 2021
-
2020
- Dec 7, 2020 Volvo 780 Bertone Project Pt. 1 - In Over My Head Dec 7, 2020
- Dec 7, 2020 Volvo 960 Project Pt. 5 - Taking my time. Dec 7, 2020
- Sep 11, 2020 A Very Volvo September Sep 11, 2020
- May 15, 2020 960 Project Pt. 4 - End of Spring Almost Summer Updates May 15, 2020
- Feb 3, 2020 960 Project Pt. 3 - Always Remember Your Oil Feb 3, 2020
-
2019
- Dec 17, 2019 Nord Carolina - Starting my own E-Commerce Platform for Volvo Enthusiasts Dec 17, 2019
- Nov 20, 2019 960 Project Pt. 2 - I built it one piece at a time... Nov 20, 2019
- Oct 2, 2019 960 Project Pt. 1 - Diving In Oct 2, 2019
- Sep 20, 2019 1997 Volvo 960 Project Pt. 0 - $800 Worth of Headaches Sep 20, 2019
- Aug 3, 2019 VDASH Pt. 2 - Cloud Based Car Tuning Aug 3, 2019
- Jul 2, 2019 VDASH Pt 2. is coming.... Jul 2, 2019
- Apr 1, 2019 VDASH Pt. 1 - A new tool for a modern Volvo hacker Apr 1, 2019
- Mar 18, 2019 2013+ Shifter Retrofit Project Pt. 2 - Reconstruction and Installation Mar 18, 2019
- Feb 17, 2019 2013+ Shifter Retrofit Project Pt. 1 - Preparation and Disassembly Feb 17, 2019
- Feb 2, 2019 The P3 Common & Uncommon Repairs Documentation Project Feb 2, 2019
-
2018
- Dec 28, 2018 Mini-Post: New side skirt. Dec 28, 2018
- Dec 8, 2018 Driveability and Performance Report: December 2018 Dec 8, 2018
- Oct 8, 2018 Audio Modules & The Return to Boostmoose Oct 8, 2018
- Jul 28, 2018 The Final Report: 850R Beauty Shots Jul 28, 2018
- Jul 17, 2018 Mid-July Summer Update Jul 17, 2018
- May 15, 2018 Summer Progress Update May 15, 2018
- Apr 1, 2018 850R - Stage 0 Dreams Pt. 2 Apr 1, 2018
- Mar 18, 2018 850R - 960 Throttle Body Upgrade pt. 1 Mar 18, 2018
- Mar 14, 2018 850R - Seat Restoration Mar 14, 2018
- Jan 18, 2018 S60R - Wrap Repair + Driving the Eastern Shore Jan 18, 2018
- Jan 1, 2018 S60R - Vinyl Wrap Jan 1, 2018
-
2017
- Dec 4, 2017 850R - Better and Brighter Tail Light Installation Dec 4, 2017
- Dec 4, 2017 S60R - Holiday Charity Laps at Virginia International Raceway Dec 4, 2017
- Nov 16, 2017 850R - Junkyard Pulls for Performance & New Rear Lights Nov 16, 2017
- Nov 15, 2017 S60R - Scheduled maintenance.....yawn. Nov 15, 2017
- Nov 3, 2017 850R - Stage 0 Dreams Pt. 1 Nov 3, 2017
- Nov 1, 2017 850R - Firestone Fixes CV Axle while Suspension Nears Completion Nov 1, 2017
- Oct 28, 2017 850R - Axle Removal and CV Boots Halt Progress Oct 28, 2017
- Oct 27, 2017 850R - Air Tool Woes and Broken Brakes Oct 27, 2017