
NordCarolina Blog
Formerly BoostMoose.com

S60R - Vinyl Wrap
As my winter break is finally wrapping up I managed to get some time to take a few shots of my new wrap! This wrap was done by iDetail here in northen New Jersey. It is a full panel off wrap using 3M Intense Gloss Blue. On top of the blue wrap, I also had the shop wrap the trim around the windows to give it more of a Polestar look.
These shots are from the Skylands Manor in Ringwood, New Jersey which is one of my favorite sport to shoot during the summer and fall. (This was my first time visiting the park during the winter.)


For anyone wondering, the cost of this wrap was around $2700, which is a lot, but definitely worth it for a better than paint way to change the color of your car.
850R - Better and Brighter Tail Light Installation
The greatest enemy when working on an older car is time itself. Over time things like rubber and plastic degrade due to exposure to the elements, its just something you cant control. I ran into this issue originally when removing the new taillights that we had purchased from LKQ Greensboro. The 850 Estate that I removed them from had dry, cracking, rear trim. I had hoped that this was a isolated case, but when I went to install the new lights on the 850R I found that the rear plastic on our car was also in a sad state of brittleness. This discovery did not hamper the installation, however I had to take extra care to remove the panel clips and make sure the plastic wasn't being stressed. Unfortunately in this installation I ended up cracking one of the rear speaker grilles.
Removal and installation of the tail lights is a simple process, needing only an 8mm socket, and extension, a small ratchet, and some thin hands. The upper light pieces are very easy to remove, as both of the 8mm bolts are unobstructed by any trim panels or wires, and this piece can be removed only be removing the rear tweeter cover.
The D pillar cleaned up after removing the upper light assembally.
On the 850 wagon the lower tail light assembly is where the real fun stuff is. To get the the bolts holding the lower section, almost all of the trim pieces around the rear hatch need to be moved. On the drivers side I had a much easier time with this process as many of the clips were already broken or moved already. (I am assuming this is from one of the many rear repairs done by the dealer at some point). To get to these bolts you will certainly need a ratchet extension and some thin hands. Almost all of these bolts you will need to put on and off using your hand so that they do not fall down into the abyss below the light assembly. To make matter worse, the light harness that comes out has a much shorter loom length than the upper light, making it much harder to move it out of the way when trying to grab a bolt.
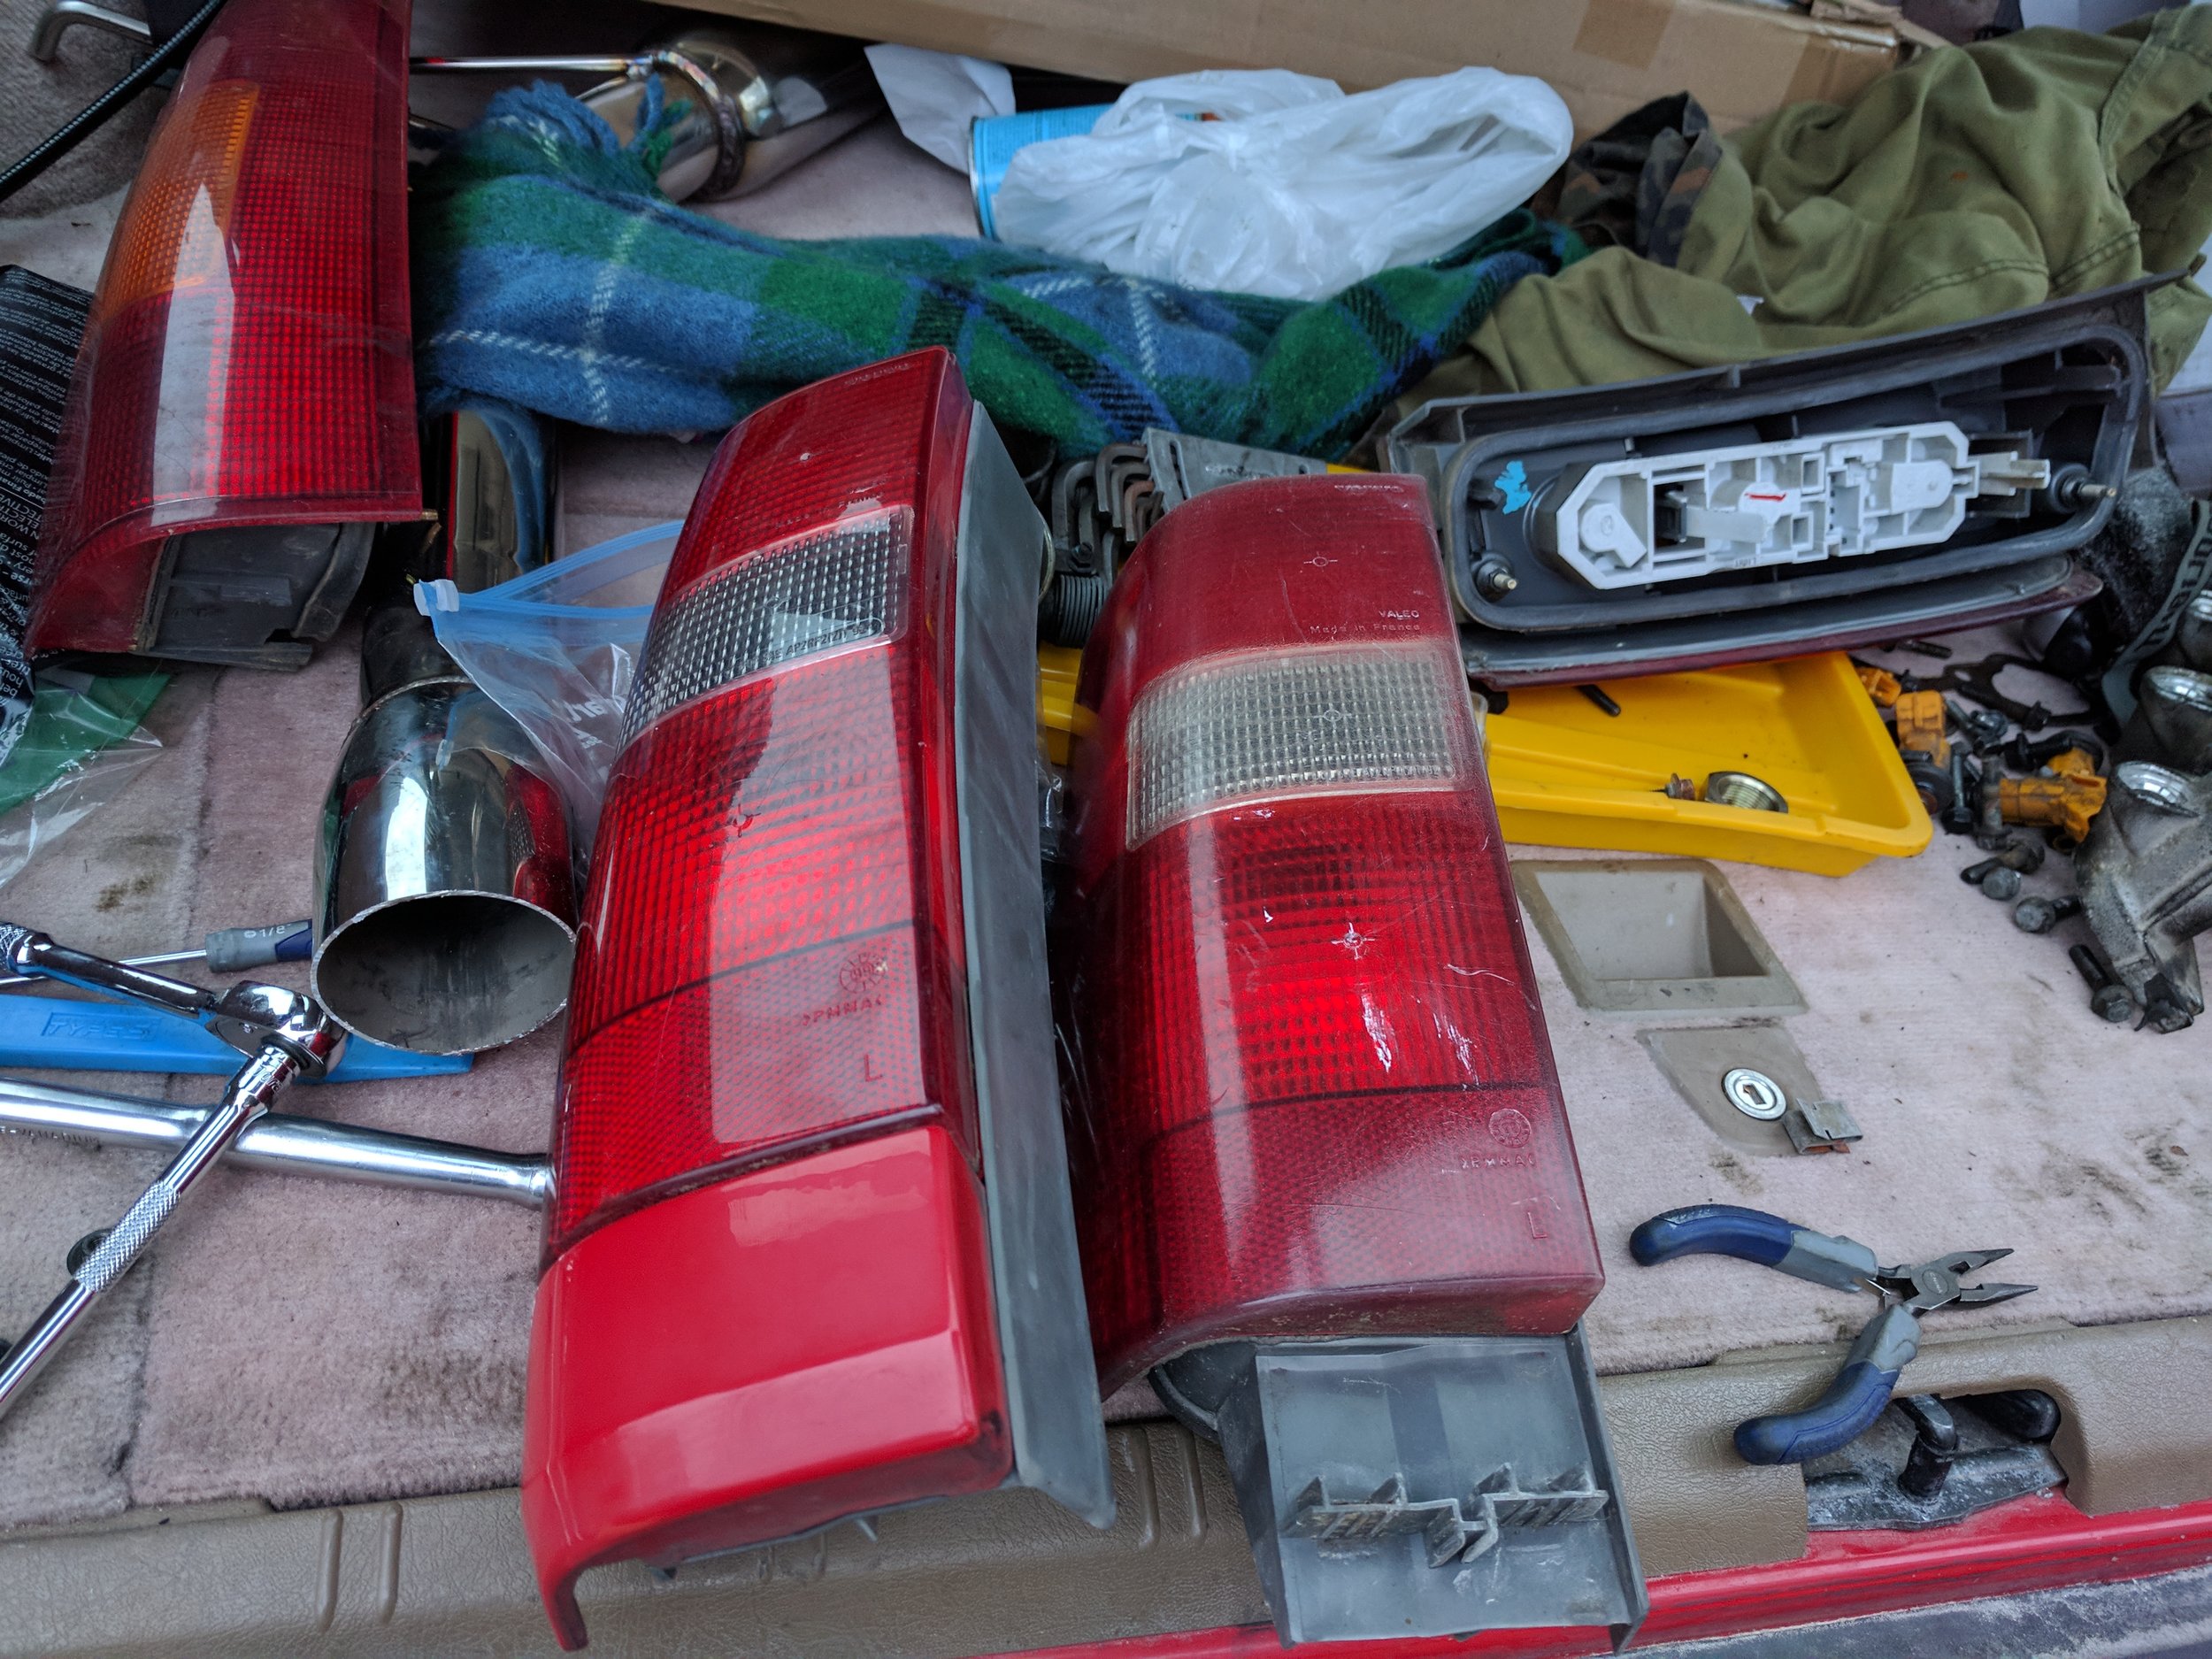
The new light with the red corner piece installed vs the old piece.

The lower light removed from the drivers side. A lot of junk has built up behind these over the years!
One thing I have to say is that being able to work on a junkyard car before your own is a great learning experience. This process is pretty straight forward, but knowing what tools I needed, and how the lights were attached before hand took out any guess work I had to do when swapping the housings out. The passenger side took me a bit more time as one of the panels that I easily removed on the drivers side was being very stubborn and required me to blindly undo a bolt using my hand instead of the socket. For this job I really recommend that you purchase a magnet-snake tool that can grab any bolts that may fall down into the car during this project.

A comparison shot: new on the left, old on the right.
Overall the project took less than an hour. Even someone with little mechanical skill can get this done. Unfortunately by the time I finished it was already getting dark so the final shots do not accurately show the progression from old to new.
As a note, I would like to mention this will probably be the last update on the 850R until January when Steve and I return from our college winter break. Hopefully then we will be able to work on installing the exhaust as well as the new intake manifold. Do worry though, updates on my personal vehicle (my 2012 S60 R Design) will still be coming over the break. Have a happy holidays!
S60R - Holiday Charity Laps at Virginia International Raceway
While the United States may not have a track that is easily open to the public like the infamous tourist days at Germany's Nurburgring, it is still nice to be able to take you car to a track every so often and really scratch that itch for performance driving that road cruises never will. Every year Virginia International Raceway does charity laps where in they allow you to pay a one time entrance fee (donation) to run on the track in a group of around 30-40 cars. All of the proceeds from this event go to benefit charities such as Toys for Tots this holiday season. While they do not let you fully track your car, the speeds dictated by the pace car are more than enough to put some serious stress on your cars without risking a crash or spinoff. The way I explain it to people is that these events are more of a glorified Cars and Coffee, with a nice track driving portion to look forward to. While cruising to the event with Andrew in his G37S we happened upon a brand new Aston Martin DB11 that was also heading to the event and ended up adding him and his co-worker to our run group that day.

My car set up in the paddock.
While the run went fine, I found myself holding back due to the limitations of my Pilot Sports having lots of wear. Afterwards I also feel like the stock Volvo brakes just aren't up to snuff for hardcore driving. Its hard to say how the car would have done just because of the wear I have put on it in the past year. I wouldn't be surprised if I need new pads and rotors some time soon.
Archive
-
2025
- Dec 15, 2025 11-16 Ford Super Duty Remote Start Ultimate DIY Guide Dec 15, 2025
- May 5, 2025 Volvo 700 Series In-Tank Fuel Sender Assemblies - Whats the deal? May 5, 2025
- Apr 28, 2025 Store Update: Shipping Rates and Carriers Apr 28, 2025
- Jan 1, 2025 Cash for Clunkers and Todays Car Marketplace - A Mathematical Analysis on Why Cash For Clunkers Doesn't Matter Anymore. Jan 1, 2025
-
2024
- Nov 25, 2024 11-16 Ford F250 / F350 Super Duty - Definitive Flow-Through Center Console Install Guide Nov 25, 2024
- Jul 30, 2024 13-16 F250 Steering Wheel and Audio Control Upgrade / Retrofit Guide for Dummies Jul 30, 2024
- Mar 13, 2024 Misc. Project - Volvo P3 Desk Chair Mar 13, 2024
- Jan 16, 2024 The Definitive P2 XC90 External Transmission Cooler Writeup Jan 16, 2024
-
2023
- Aug 8, 2023 TFT Display with P3Tool Guide Aug 8, 2023
- Aug 4, 2023 Facility Upgrades and Updates Pt. 2 - Tow Dolly Aug 4, 2023
- Mar 27, 2023 Facility Upgrades and Updates Pt. 1 - John Deere 165 Hydro Restoration Mar 27, 2023
-
2022
- Sep 27, 2022 P3Tool - Volvo Hacking Takes Its Next Big Step Sep 27, 2022
- Aug 25, 2022 Project Nashville Pt. 3 - MOST Excelent! Aug 25, 2022
- Jun 28, 2022 NordCarolina Shop Update! Jun 28, 2022
- Jun 20, 2022 Project Nashville Pt. 2 - Tech Talk Jun 20, 2022
- May 12, 2022 And I Would Drive 500 Miles - Project Nashville Pt. 1 May 12, 2022
- Mar 14, 2022 On life, cars, and business. Mar 14, 2022
-
2021
- Jul 19, 2021 Volvo 960 Project Pt. 6 - Still Alive Jul 19, 2021
- Mar 12, 2021 Volvo 780 Bertone Project Pt. 2 - Why buying another persons project is the WORST. Mar 12, 2021
-
2020
- Dec 7, 2020 Volvo 780 Bertone Project Pt. 1 - In Over My Head Dec 7, 2020
- Dec 7, 2020 Volvo 960 Project Pt. 5 - Taking my time. Dec 7, 2020
- Sep 11, 2020 A Very Volvo September Sep 11, 2020
- May 15, 2020 960 Project Pt. 4 - End of Spring Almost Summer Updates May 15, 2020
- Feb 3, 2020 960 Project Pt. 3 - Always Remember Your Oil Feb 3, 2020
-
2019
- Dec 17, 2019 Nord Carolina - Starting my own E-Commerce Platform for Volvo Enthusiasts Dec 17, 2019
- Nov 20, 2019 960 Project Pt. 2 - I built it one piece at a time... Nov 20, 2019
- Oct 2, 2019 960 Project Pt. 1 - Diving In Oct 2, 2019
- Sep 20, 2019 1997 Volvo 960 Project Pt. 0 - $800 Worth of Headaches Sep 20, 2019
- Aug 3, 2019 VDASH Pt. 2 - Cloud Based Car Tuning Aug 3, 2019
- Jul 2, 2019 VDASH Pt 2. is coming.... Jul 2, 2019
- Apr 1, 2019 VDASH Pt. 1 - A new tool for a modern Volvo hacker Apr 1, 2019
- Mar 18, 2019 2013+ Shifter Retrofit Project Pt. 2 - Reconstruction and Installation Mar 18, 2019
- Feb 17, 2019 2013+ Shifter Retrofit Project Pt. 1 - Preparation and Disassembly Feb 17, 2019
- Feb 2, 2019 The P3 Common & Uncommon Repairs Documentation Project Feb 2, 2019
-
2018
- Dec 28, 2018 Mini-Post: New side skirt. Dec 28, 2018
- Dec 8, 2018 Driveability and Performance Report: December 2018 Dec 8, 2018
- Oct 8, 2018 Audio Modules & The Return to Boostmoose Oct 8, 2018
- Jul 28, 2018 The Final Report: 850R Beauty Shots Jul 28, 2018
- Jul 17, 2018 Mid-July Summer Update Jul 17, 2018
- May 15, 2018 Summer Progress Update May 15, 2018
- Apr 1, 2018 850R - Stage 0 Dreams Pt. 2 Apr 1, 2018
- Mar 18, 2018 850R - 960 Throttle Body Upgrade pt. 1 Mar 18, 2018
- Mar 14, 2018 850R - Seat Restoration Mar 14, 2018
- Jan 18, 2018 S60R - Wrap Repair + Driving the Eastern Shore Jan 18, 2018
- Jan 1, 2018 S60R - Vinyl Wrap Jan 1, 2018
-
2017
- Dec 4, 2017 850R - Better and Brighter Tail Light Installation Dec 4, 2017
- Dec 4, 2017 S60R - Holiday Charity Laps at Virginia International Raceway Dec 4, 2017
- Nov 16, 2017 850R - Junkyard Pulls for Performance & New Rear Lights Nov 16, 2017
- Nov 15, 2017 S60R - Scheduled maintenance.....yawn. Nov 15, 2017
- Nov 3, 2017 850R - Stage 0 Dreams Pt. 1 Nov 3, 2017
- Nov 1, 2017 850R - Firestone Fixes CV Axle while Suspension Nears Completion Nov 1, 2017
- Oct 28, 2017 850R - Axle Removal and CV Boots Halt Progress Oct 28, 2017
- Oct 27, 2017 850R - Air Tool Woes and Broken Brakes Oct 27, 2017