
NordCarolina Blog
Formerly BoostMoose.com
Project Nashville Pt. 3 - MOST Excelent!
How to upgrade your P3 V70/XC70/S80 to the Premium (DynAudio) Sound System
Introduction:
As the P3 cars continue to age, it is no suprise that they have become more common in junkyards across the country. This is excellent news for us who have been fans of the chassis for a while as it means that well optioned cars can now be picked over to upgrade those still on the road. From personal experience it seems that people really love taking the grille and headlights, an odd choice considering how common they are and how they went unchanged for close to 8 years, but I digress. This weekend I had the benefit of going to 3 P3 cars in South Carolina. Both yards were mere minutes from my parents house in Charleston so a weekend trip was well worth it. The marked vehicles were two S80s and 2009 V70, the V70 being a rarity to show up in LKQ yards due to their low sales in the US. While all 3 cars were tan interior vehicles, they all had great items to pick.

This V8 was fully loaded. DynAudio, heated and cooled seats, ABL headlights, and more.
Parts:
From each vehicle I was able to get some plug and play items useful for anyone with a P3 that share parts between the 70/80 chassis. My first stop was Blue and Gold Auto Salvage in Goose Creek, SC.
From the white V8 S80 I got:
DynAudio Tweeters
Sirius XM Module
The tweeters are easily removed from the A pillar by prying them back gently. They have a small connector that is easily removed the XM module is bolted in with a few hard to access bolts, but comes out easily once unbolted.
From the blue 3.2 S80 I got:
DynAudio Tweeters (with BLIS)
Full BLIS power mirrors
DynAudio Amplifier
The tweeters in this vehicle are identical to the V8, however the housing has an extra connector that goes to the mirrors for the BLIS notifier light. They are also easy to remove, and the mirrors come off the chassis with 2 easily accesible T25 bolts. The amp is located under the drivers seat, and was not too hard to access even with no power to the seats. I removed the front seat bolts and bent the seat rails back to access the 3 10mm bolts holding the amp in place.
My second stop was at LKQ Charleston to see the V70. This car was much more rough than the pictures showed, but there were a few small items I took as backups.
From the tan 3.2 V70 I got:
Standard BLIS Tweeters
Sirius XM module
While I should have probably taken the load cover and maybe the tail lights, I was quickly running out of time before the yard closed. These parts I grabbed as backups and spare parts for my BLIS swap. This car also had BLIS mirrors however the passenger side was destroyed.
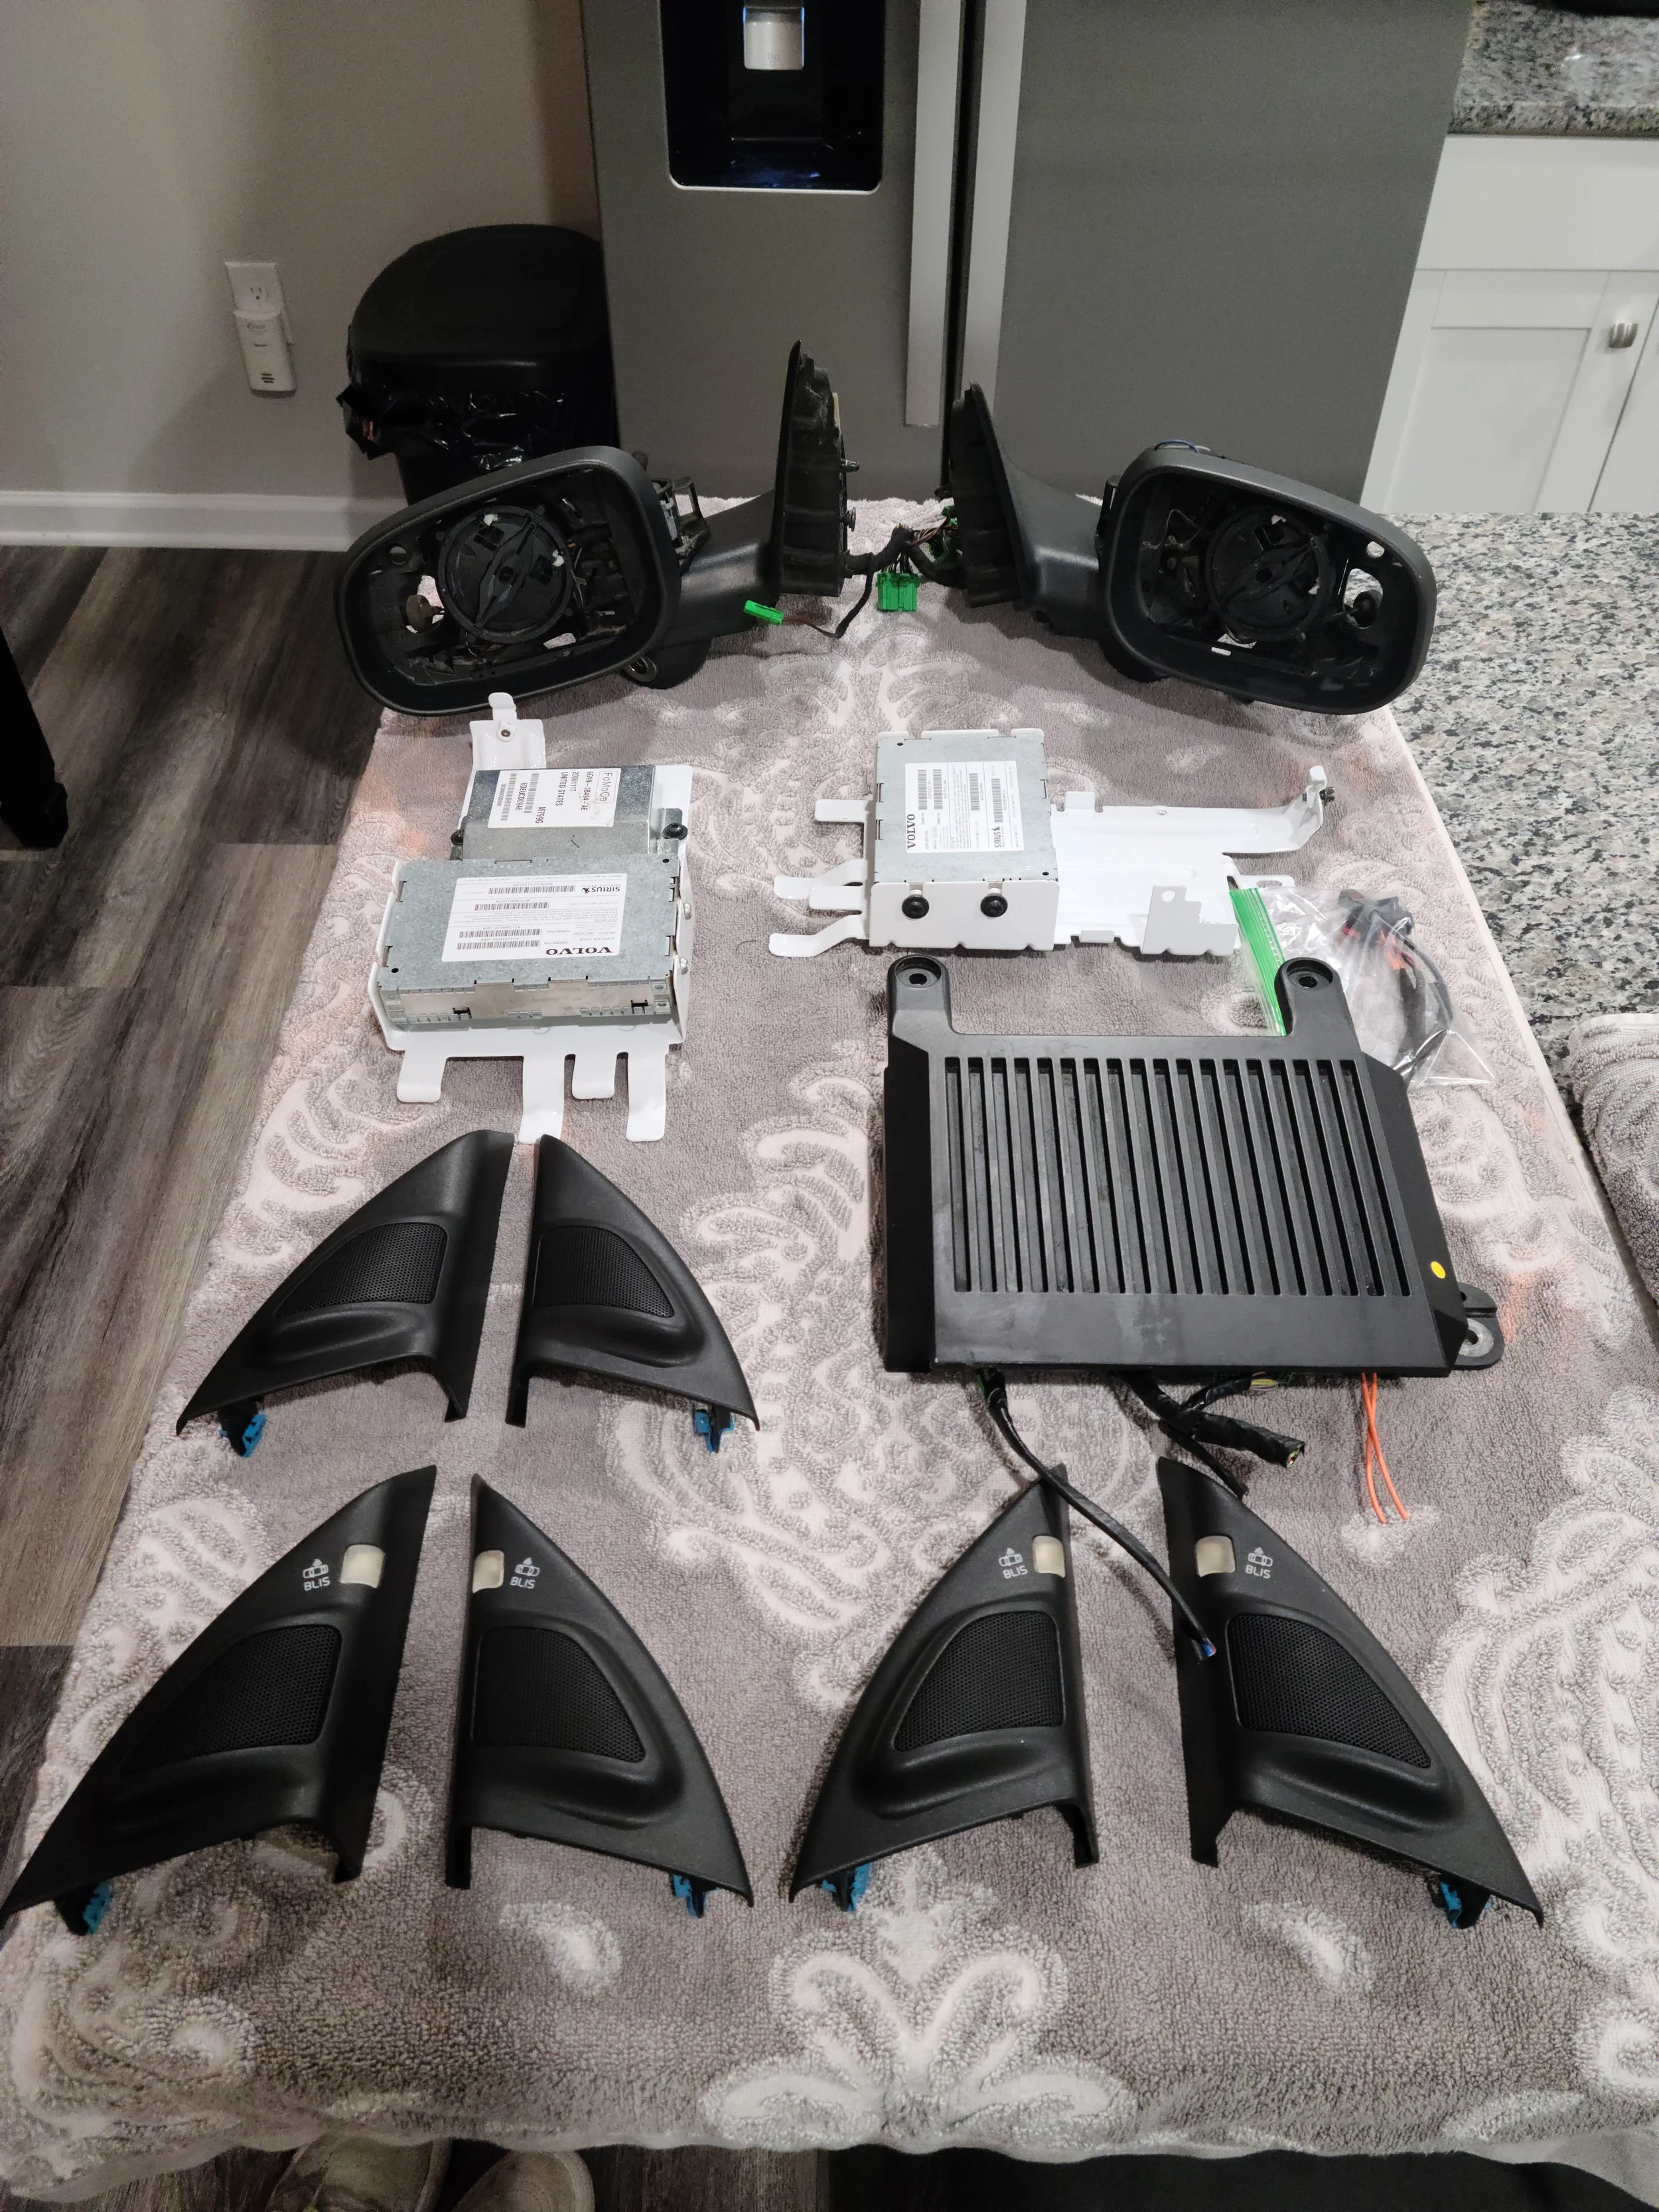
The full haul once back home and cleaned up. Every part was gone over with a small brush, and cleaning agent.

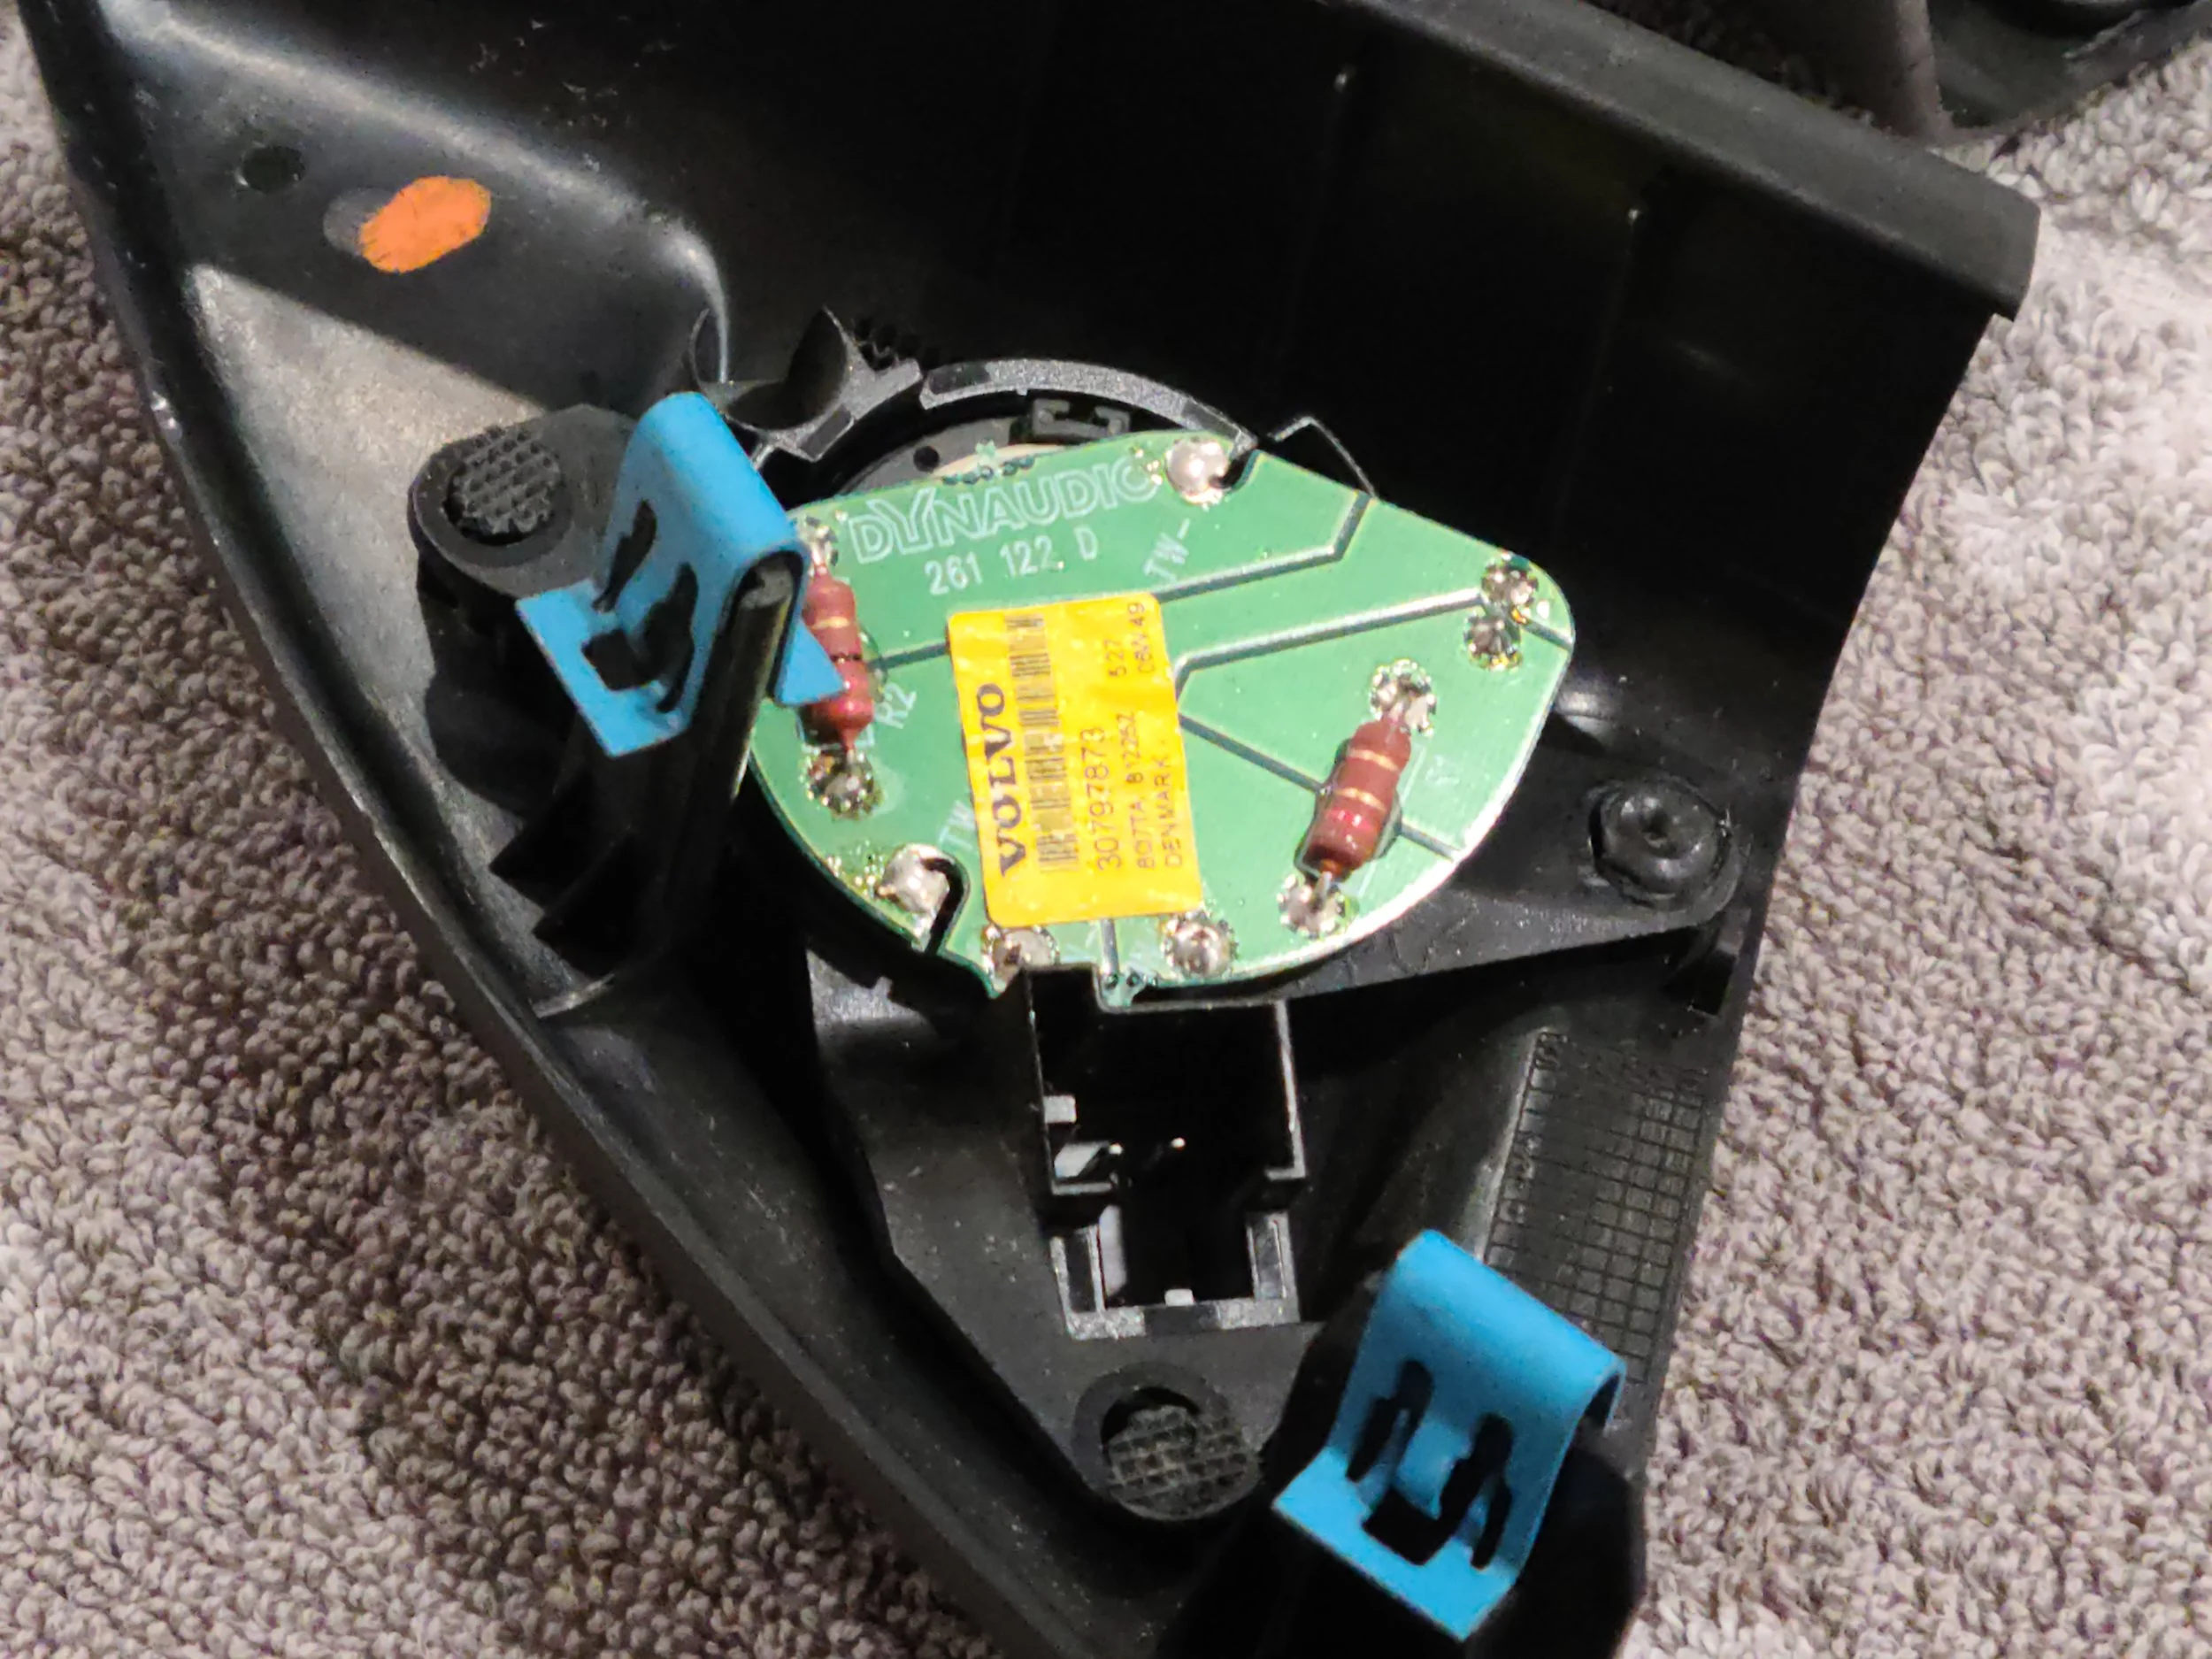
Green DynAudio tweeters, standard in blue. Note the white plastic housing in the BLIS equipped sets.
Installation:
Sound System
This is where I begin to enter some unknown territory. I have a pretty good idea of what needs to happen for the mirrors, however the audio system uses MOST security which will need to be disabled to add the amplifier. Additionally I plan on possibly adding the premium sound speakers and drivers to the doors to add even more audio fidelity.
The first step was replacing the amplifier, which sounds easy and should have been if it was not for one little bolt holding it in. The amp has 3 10mm bolts that secure it to the floor, and while the first two are super easy to access, the third is located directly under the seat, very close to the seat rail. Getting a socket on the bolt was no easy task, and I ended up breaking the small magnet that is attached to the seat rail to gain access.
What that magnet does, I have no idea.
The rest of the install is very straight forward, just unclip the stock amp, and plug the upgraded one in. Once in we need to take 3 steps in P3tool. (This can also be done in VDASH with a Pro account).
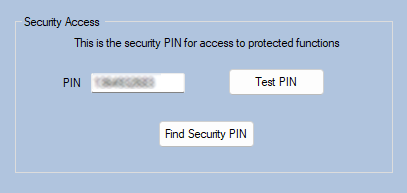
Step 1 is to find the cars security PIN. (P3 Security tab) This is different than the CEM PIN which is needed first to access anything. Running the Find PIN takes about 10 minutes, with the car is the same “deep sleep” state as when you try to find the CEM PIN. Once it is found, it will populate the field (where I have blurred).
Step 2 is to set the ITP Security to Off. This will allow a “foreign” device to be on the MOST network. Without getting too deep into the details, the original amp is coded to the car so when the system sees a new component with a different ID, it throws a flag and will not allow the audio system to turn on. By disabling the ITP security we are telling the system to allow any device. (That being said, if the car is brought to a dealer or updated with VIDA there is a risk of the ITP locking again, in which case you may need to re-install the original amp or disable the ITP security through P3Tool again. This is unchartered territory so do these mods at your own risk!)
Step 1.

Step 2.
Step 3 is to change the audio settings of the car. This means going back to the P3 CarConfig tab and going to parameter #119. Here I will be changing the car from hex 0x03 High Performance Sound to hex 0x04 Premium Sound. Making this change gives you many more options in the audio settings of the car, and allows the premium sound amp to play nicely with the rest of the system.
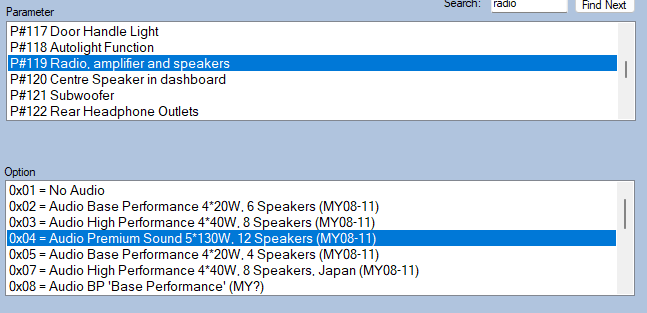
Step 3.
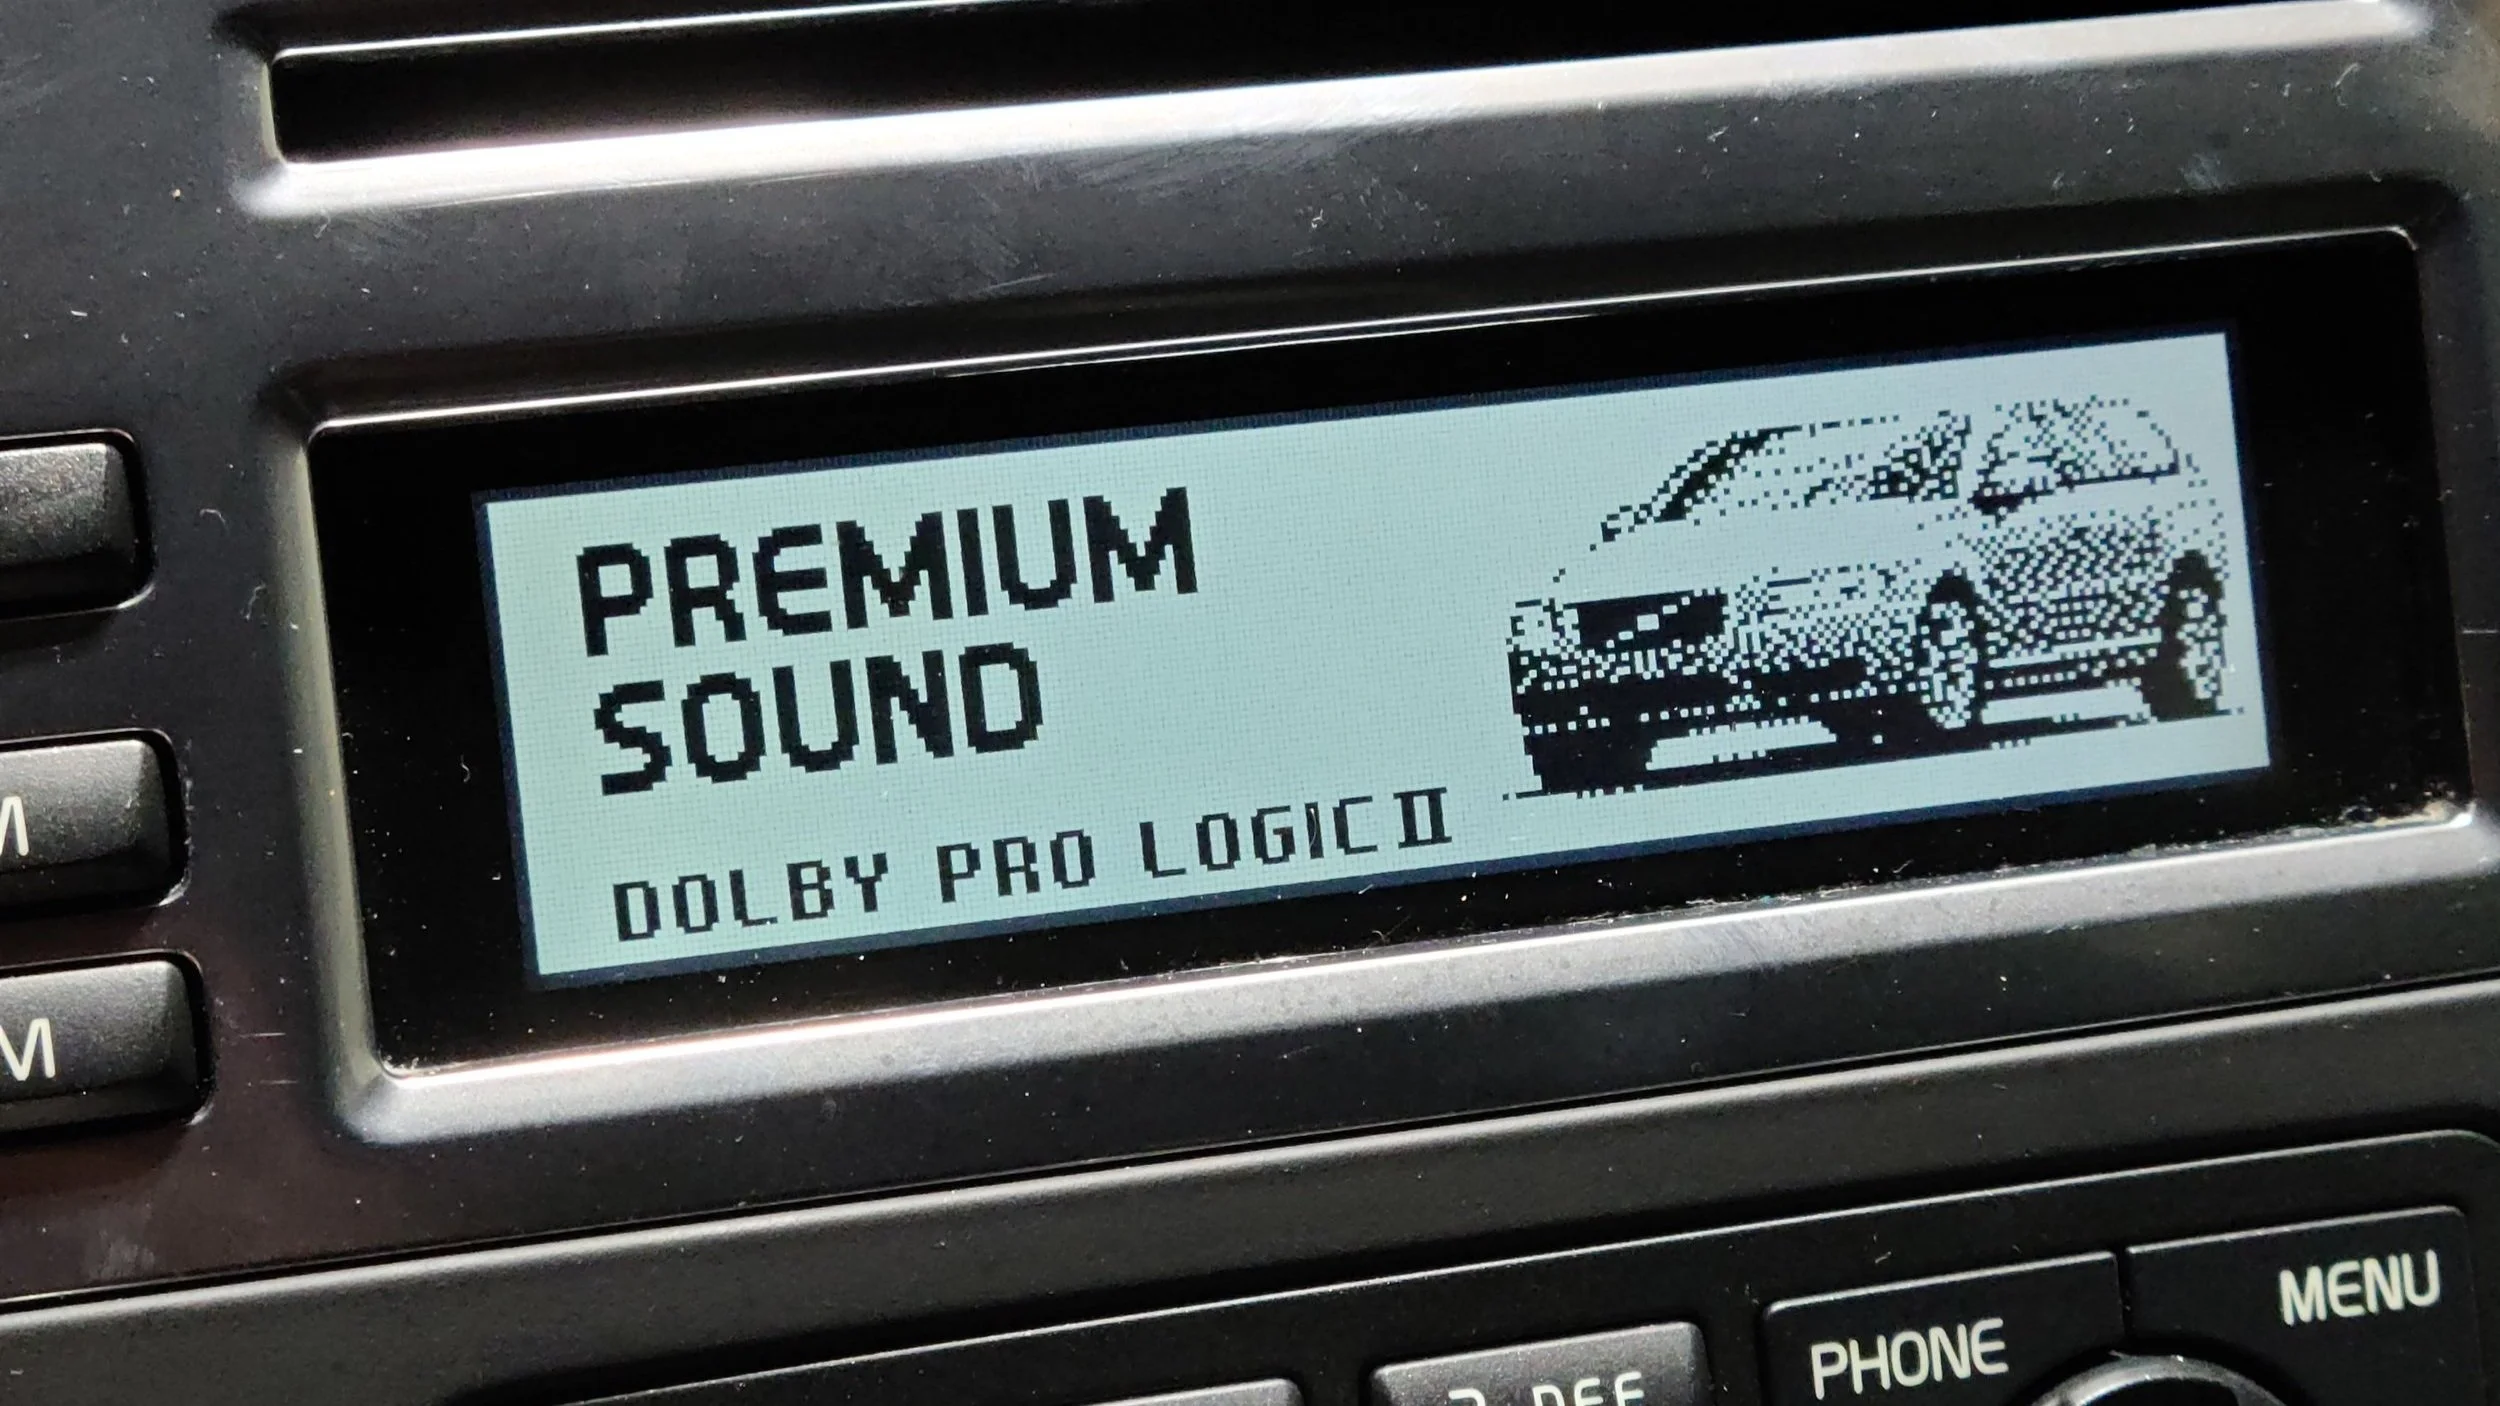
Save the changes and the car will reboot. You will now see the car show the Premium Sound image instead of the High Performance sound image. The sound difference is night and day. What used to be 80-85 percent up the volume bar is now closer to 40%. I will not be driving the system past about 60-75 percent as the volume factor has increased significantly.
Please Note: With the much powerful amplifier you do run the risk of driving the stock sound components too hard. Playing the sound system at higher than usual volumes can result in damage!
Overall through, this was a pretty easy and very noticable mod to make to the car. With the later addition of premium sound door speakers, the soundscape in the car will have changed drastically.
Sirius XM Radio
This is the biggest question mark for me as information online for adding this is sparse. Obviously there are not a whole lot of people adding satelite radio to a 12 year old car. Off to Swedespeed I went, and in my searching found that all P3 cars from 2010 onwards were pre-wired for Sirius XM satellite radios. This meant that the power (MOST) cables, antenna, and fiber optic cables should be all run to the back under the load tray.
I dug into my car, the MOST cables were easy to find, a bright orange two wire connector with a loop on the end. I didnt see any other cables initally, so I went back to Swedespeed and posed a question to anyone that could help. Afterall, who is really taking the time out of their day to install satellite radio in a 12 year old car these days. One user responded, linking the VIDA instruction manual on how to install the module and this made me question my inital search in the car.
Lo-and-behold after lifitng up some more sound deadening in the trunk there they were. The antenna and fiber optic cables. Next step, installing the board into the car.

Do not throw away / lose the loop installed on the MOST cable as it is required if the module is taken back out!
From here the install was just connecting the 3 cables into their ports and pushing the bracket the RDAR module sits in into the car. It is a press fit with a single bolt to hold it in. The final step will be done in the car with the aid of P3Tool.

In the tool, option #125 was selected which is the config of the radio options. The car was originally set to hex 0x03 for HD radio, however with the new XM module installed it was changed to hex 0x04. I saved the change and the program changed the value in the CEM.
After its reboot I immediately had access to the satellite radio!

What then happened sort of suprised me. I found that all the user data was stored inside the satellite module! This included their subscription data, as well as all of the presets. I figured this data would be stored in the IAM, but lo-and-behold I had a totally free, working XM subscription!
Now this did not last long, as the subscription had clearly expired during the donor cars time in the junkyard, however this does mean that it is possible to find a module with a working, active subscription. From here I went into the audio settings tab to find the radios ID code, and activated the subscription with my own Sirius XM account.
There will be a follow up to this post, covering both the basic uses of P3tool and the installation of BLIS into the car. I am very excited at the new levels that P3 modding are getting to. The P3tool is very easy to use and I genuinely believe will one day overtake VDASH as the modding tool of choice. If there is anything I missed or any questions on some process I did not cover, please feel free to drop a comment below.
NordCarolina Shop Update!
With summer in full swing I have found some spare time to add some new product lines to the shop as well as streamline operation. Before I was using a single store page for all the items, however I have realized that there are many smaller items that people are interested in that I often get requests for. Itsm like bulb holders and fender badges are among the biggest of these requests. As such I have decided to remake the stores, and split them out into 3 categories, as follows:
NordCarolina Shop
This is the standard shop and will not be changing much. Here you will find all the regular items such as 740 headlamps, 940 headlamps, chrome trim, etc. This will be the area for complete sets of items, new items, and high value items.
Spare & Replacement Parts
As the name suggests, this is where I will post spare parts and pieces mostly for the lamps I sell as well as the metal and plastic fender badges. I am open to requests on this page as I am sure there are many small bits and bobs that people are often looking for that were US market only.
Garage Sale & Clearance
This section will be for damaged, incomplete, or misc. items that do not fit into the previous two sections. Here you will find non Volvo related items as well that will still be automotive related. I also plan on selling smaller items here that are not high dollar enough for the main page like mirror glass, turn signal lights, and random online misorders.
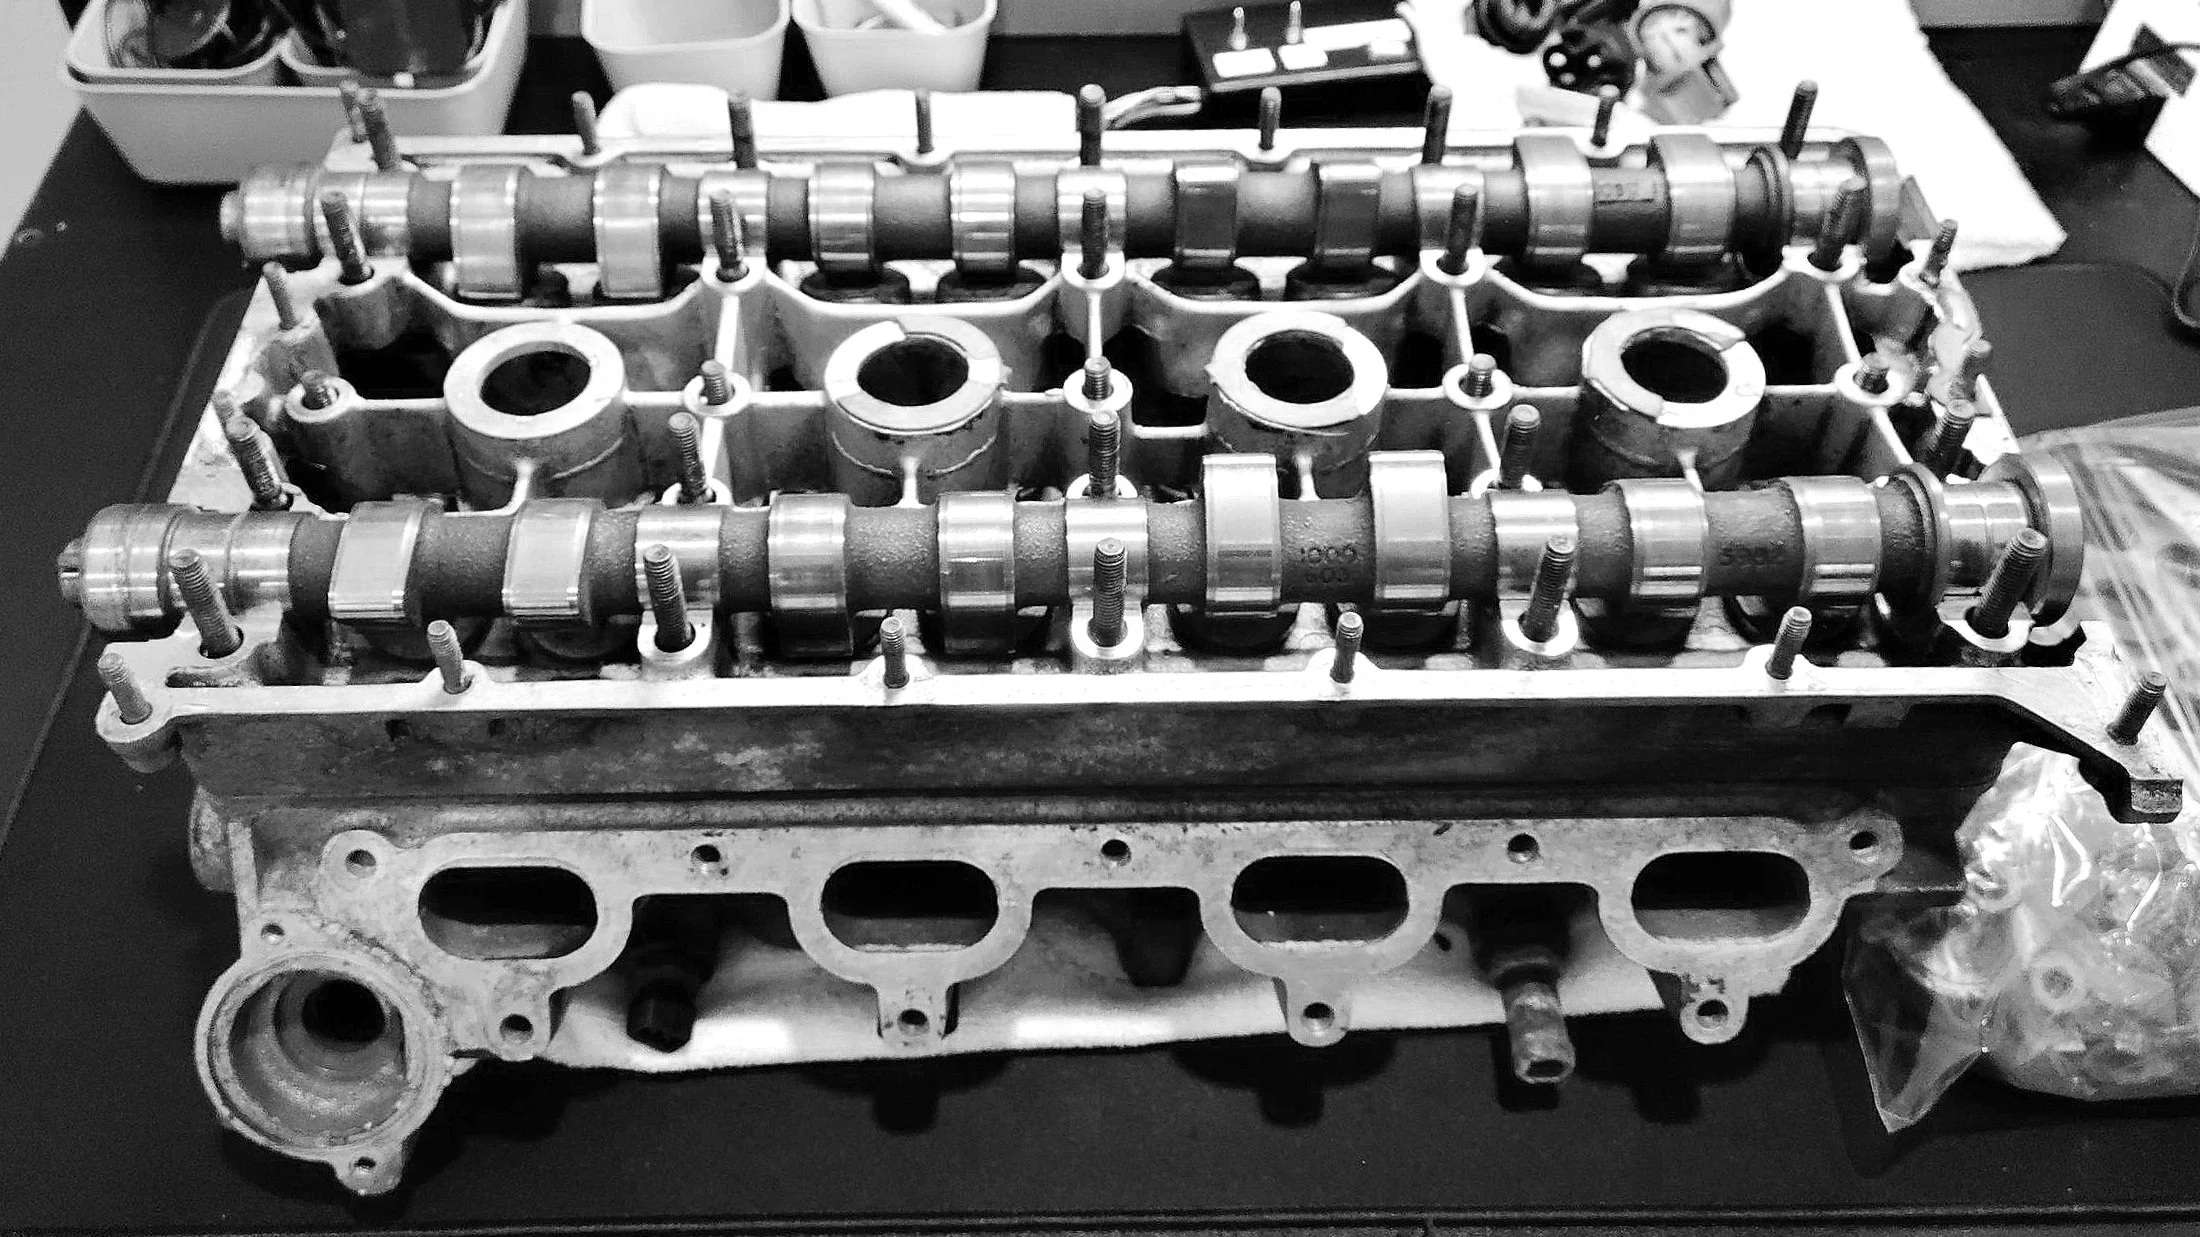
This 16 Valve, B234 head is an example of a Garage Sale item.
These changes are now live, however inventory levels and items are subject to change as I go through my woefully un-updated backlog of spare parts. Thank you!
Project Nashville Pt. 2 - Tech Talk
Alright I admit it, I am shamelessly stealing further blog posts names from M539 Restorations on Youtube. With the sheer amount of cars I go through, I think it at least adds a little personality as I am not one to name cars.This part two is only going to be for a few items as I am not extensively modifying this car outside of a few cosmetics, and I have gotten pretty bad at recording things I am doing.
Section 1 - Emissions
The first thing I wanted to cover was the nagging CEL that seems to be playing hide and seek with me. The code being thrown is a P430 code which signifies that the bank 2 catalytic converter is below efficiency. In simple terms, the filter is letting too much fuel by and the O2 sensor is picking that up. This has no effect on driveability, however will set a Check Engine Light thanks to the EPA…
On the 3.2 motor the converters are a known failure point, however with such low milage the idea of dropping $2,000 on a new converter is not ideal. So before going all out, I decided to do some digging and check all the systems that could cause the code. I also checked the diagnostic readouts in VIDA (which we will get into later). The first items I replaced were the PCV box as well as the sensor for bank 2 sensor 2.

The oil trap on this car was original from when it left the factory and was still stamped with its 2009 build date. Usually at this age they begin to deteriorate and really recommended to be replaced at the 100,000 mile mark which this car is very much passed. A faully failed unit will make a distinct whistling noise due to the rubber diaphragm inside going. A decently old one such as this can be clogged and will effect fuel trims leading to the code I was seeing. Thankfully replacing these are decently easy, while not being a walk in the park either, located on the top of the motor they are much easier to access compared to the old whiteblocks. A few extensions and swivel sockets were needed to reach the back bolts, and much care was taken to not drop any down into the abyss.
Following this was the installation of a new O2 sensor. While I wish i had photos of this process I unfortunately had to pay a shop to replace it as my sockets and wrenches just could not break free the 10 year old+ threads. I went with an OEM Bosch sensor, one as a precaution and secondly due to some off readings I was getting from the original. Before replacing the sensor was flatlining at 0v randomly, I believed that this reading was causing the code to be thrown as it was not a reoccurring code, oly showing up every ~800 miles. Below are the readings are post sensor install. Not great as you can see the readings are still fluctuating indicating that the cat may still be bad.

The black is Bank 2 Sensor 2 Voltage (the bad cat), purple is Bank 1 Sensor 2, and the two others are the front O2 sensors.
Since these two items were installed (and the ECM parameters reset), I have driven about ~700 miles without issues. We shall see if the code returns. if it does, the next steps will an O2 sensor with built in mini-cat. If this does occur, i will make sure to have a seperate write up on fighting these stupid 3.2 emissions systems.
Section 2 - Cosmetics
If you have followed this blog, you’ll know I am a big proponent of LEDs, especially on these eastly P3s as they make the car look much more modern. Most of the kits I receive I buy off Amazon or AliExpress, links will be provided for each item.
License Plate Lights
Ease of install: 10
Two bolts and about 5 minutes is all you’ll need for these. Slots directly into where the originals were, gives a much cleaner look!

Before and after, LED vs standard filament bulbs.

Looks very clean with the upper LED tail lamp modification done by the PO.
Interior Lighting
Ease of install: 9
This kit came with lighting for all the interior bits and bobs. Some I have not installed yet like the visor mirror lamps or the glovebox, but they all fit without issue all around the car and make it much easier to see at night when digging through the car.


Puddle Lamps
Ease of install: 6
Not a fan of installing these, only due to the fact that getting the stock lamps out is a huge pain. The plastic become brittle and stiff over time so of course it broke trying to get it out. Luckily its no big issues as the replacement goes in easily, however I like to save the original equipment in case something happens to the aftermarket units.
Once installed they cast a nice white LED light, and illuminate much better than stock. Gives the car a clean look all around when on.

Well thats all for this installation. I was hoping to have also gotten some convex mirror glass, but the ones I ordered from China were not the right size. Sad. Hope everyone enjoys, I have a cool box of stuff from VPARTS coming soon as well, so stay tuned for that!
Archive
-
2025
- Dec 15, 2025 11-16 Ford Super Duty Remote Start Ultimate DIY Guide Dec 15, 2025
- May 5, 2025 Volvo 700 Series In-Tank Fuel Sender Assemblies - Whats the deal? May 5, 2025
- Apr 28, 2025 Store Update: Shipping Rates and Carriers Apr 28, 2025
- Jan 1, 2025 Cash for Clunkers and Todays Car Marketplace - A Mathematical Analysis on Why Cash For Clunkers Doesn't Matter Anymore. Jan 1, 2025
-
2024
- Nov 25, 2024 11-16 Ford F250 / F350 Super Duty - Definitive Flow-Through Center Console Install Guide Nov 25, 2024
- Jul 30, 2024 13-16 F250 Steering Wheel and Audio Control Upgrade / Retrofit Guide for Dummies Jul 30, 2024
- Mar 13, 2024 Misc. Project - Volvo P3 Desk Chair Mar 13, 2024
- Jan 16, 2024 The Definitive P2 XC90 External Transmission Cooler Writeup Jan 16, 2024
-
2023
- Aug 8, 2023 TFT Display with P3Tool Guide Aug 8, 2023
- Aug 4, 2023 Facility Upgrades and Updates Pt. 2 - Tow Dolly Aug 4, 2023
- Mar 27, 2023 Facility Upgrades and Updates Pt. 1 - John Deere 165 Hydro Restoration Mar 27, 2023
-
2022
- Sep 27, 2022 P3Tool - Volvo Hacking Takes Its Next Big Step Sep 27, 2022
- Aug 25, 2022 Project Nashville Pt. 3 - MOST Excelent! Aug 25, 2022
- Jun 28, 2022 NordCarolina Shop Update! Jun 28, 2022
- Jun 20, 2022 Project Nashville Pt. 2 - Tech Talk Jun 20, 2022
- May 12, 2022 And I Would Drive 500 Miles - Project Nashville Pt. 1 May 12, 2022
- Mar 14, 2022 On life, cars, and business. Mar 14, 2022
-
2021
- Jul 19, 2021 Volvo 960 Project Pt. 6 - Still Alive Jul 19, 2021
- Mar 12, 2021 Volvo 780 Bertone Project Pt. 2 - Why buying another persons project is the WORST. Mar 12, 2021
-
2020
- Dec 7, 2020 Volvo 780 Bertone Project Pt. 1 - In Over My Head Dec 7, 2020
- Dec 7, 2020 Volvo 960 Project Pt. 5 - Taking my time. Dec 7, 2020
- Sep 11, 2020 A Very Volvo September Sep 11, 2020
- May 15, 2020 960 Project Pt. 4 - End of Spring Almost Summer Updates May 15, 2020
- Feb 3, 2020 960 Project Pt. 3 - Always Remember Your Oil Feb 3, 2020
-
2019
- Dec 17, 2019 Nord Carolina - Starting my own E-Commerce Platform for Volvo Enthusiasts Dec 17, 2019
- Nov 20, 2019 960 Project Pt. 2 - I built it one piece at a time... Nov 20, 2019
- Oct 2, 2019 960 Project Pt. 1 - Diving In Oct 2, 2019
- Sep 20, 2019 1997 Volvo 960 Project Pt. 0 - $800 Worth of Headaches Sep 20, 2019
- Aug 3, 2019 VDASH Pt. 2 - Cloud Based Car Tuning Aug 3, 2019
- Jul 2, 2019 VDASH Pt 2. is coming.... Jul 2, 2019
- Apr 1, 2019 VDASH Pt. 1 - A new tool for a modern Volvo hacker Apr 1, 2019
- Mar 18, 2019 2013+ Shifter Retrofit Project Pt. 2 - Reconstruction and Installation Mar 18, 2019
- Feb 17, 2019 2013+ Shifter Retrofit Project Pt. 1 - Preparation and Disassembly Feb 17, 2019
- Feb 2, 2019 The P3 Common & Uncommon Repairs Documentation Project Feb 2, 2019
-
2018
- Dec 28, 2018 Mini-Post: New side skirt. Dec 28, 2018
- Dec 8, 2018 Driveability and Performance Report: December 2018 Dec 8, 2018
- Oct 8, 2018 Audio Modules & The Return to Boostmoose Oct 8, 2018
- Jul 28, 2018 The Final Report: 850R Beauty Shots Jul 28, 2018
- Jul 17, 2018 Mid-July Summer Update Jul 17, 2018
- May 15, 2018 Summer Progress Update May 15, 2018
- Apr 1, 2018 850R - Stage 0 Dreams Pt. 2 Apr 1, 2018
- Mar 18, 2018 850R - 960 Throttle Body Upgrade pt. 1 Mar 18, 2018
- Mar 14, 2018 850R - Seat Restoration Mar 14, 2018
- Jan 18, 2018 S60R - Wrap Repair + Driving the Eastern Shore Jan 18, 2018
- Jan 1, 2018 S60R - Vinyl Wrap Jan 1, 2018
-
2017
- Dec 4, 2017 850R - Better and Brighter Tail Light Installation Dec 4, 2017
- Dec 4, 2017 S60R - Holiday Charity Laps at Virginia International Raceway Dec 4, 2017
- Nov 16, 2017 850R - Junkyard Pulls for Performance & New Rear Lights Nov 16, 2017
- Nov 15, 2017 S60R - Scheduled maintenance.....yawn. Nov 15, 2017
- Nov 3, 2017 850R - Stage 0 Dreams Pt. 1 Nov 3, 2017
- Nov 1, 2017 850R - Firestone Fixes CV Axle while Suspension Nears Completion Nov 1, 2017
- Oct 28, 2017 850R - Axle Removal and CV Boots Halt Progress Oct 28, 2017
- Oct 27, 2017 850R - Air Tool Woes and Broken Brakes Oct 27, 2017